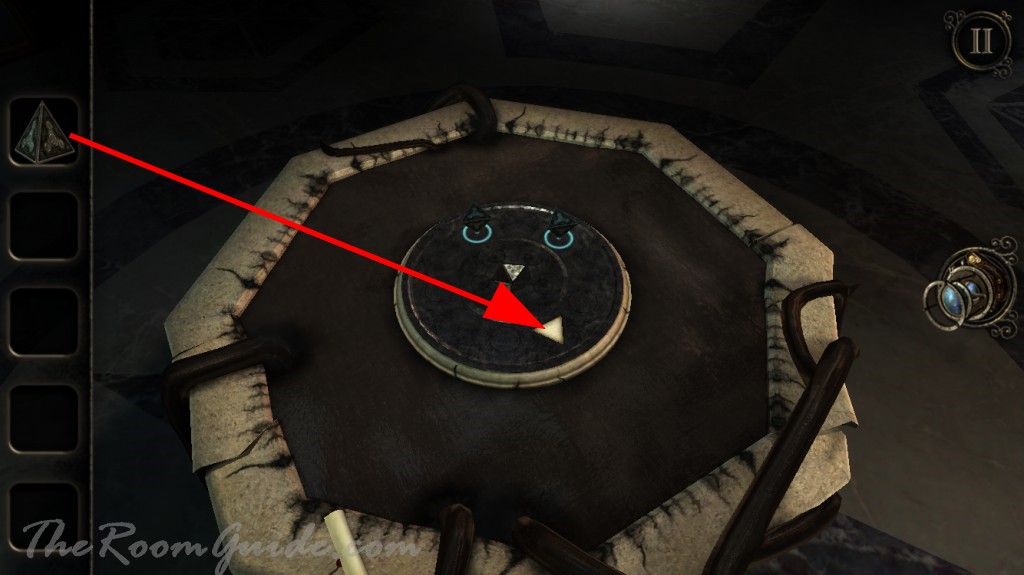
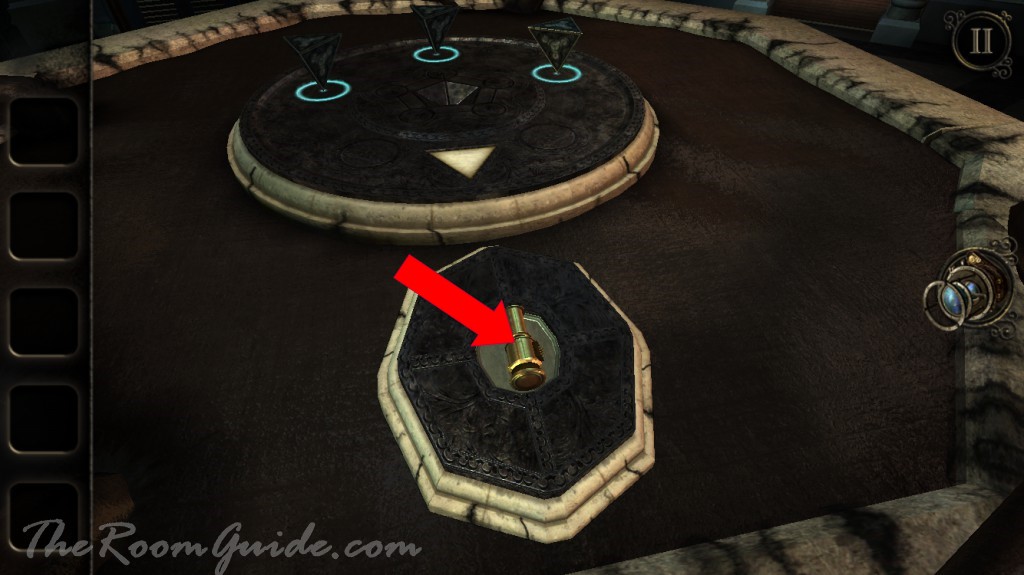
You found yourself inside the library. Exit the library and return to the atrium. Place the pyramid on the table. Get an optical device.
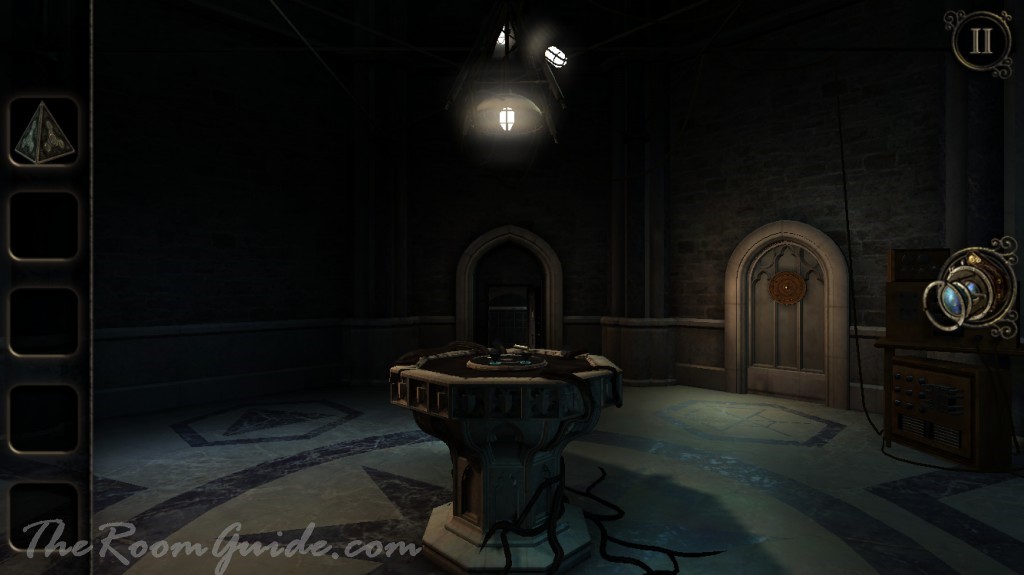
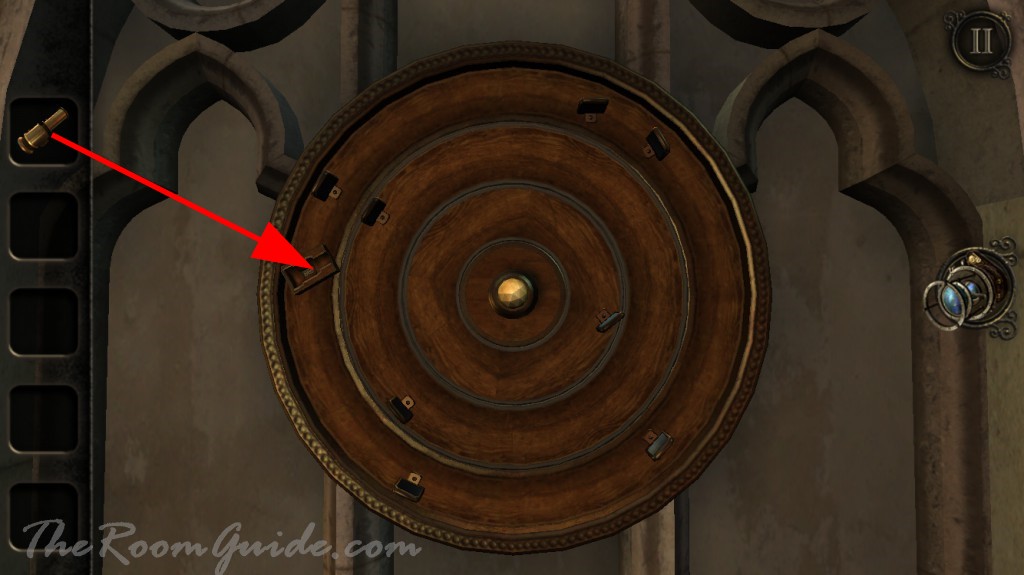
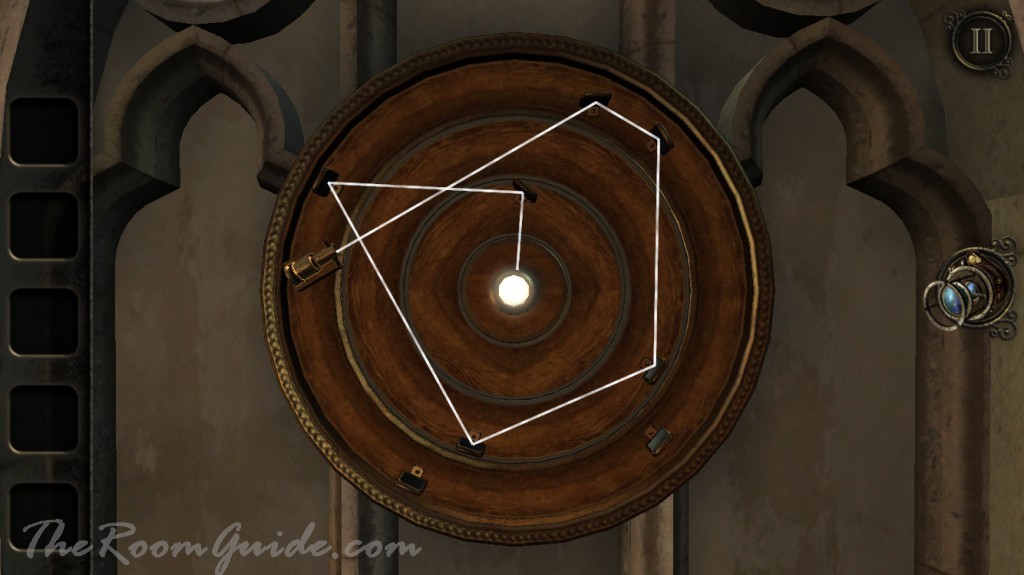
Locate a round board on the wall. Insert the optical device. Two outer rings of the round board can be rotated. Adjust the rings so that the mirrors will reflect the light on the optical device and illuminate the center of the board. A doorway will reveal. Enter the archway.


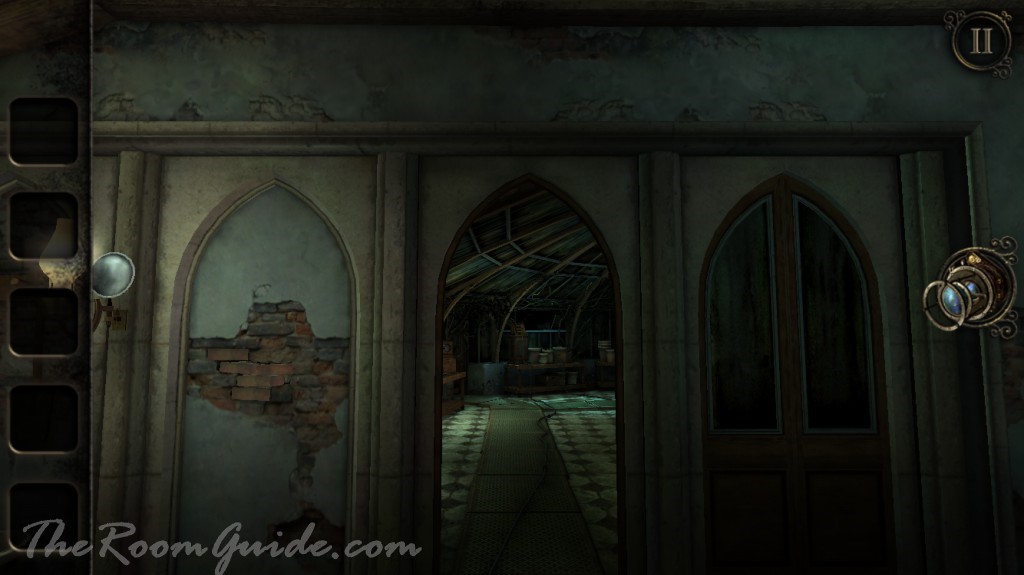
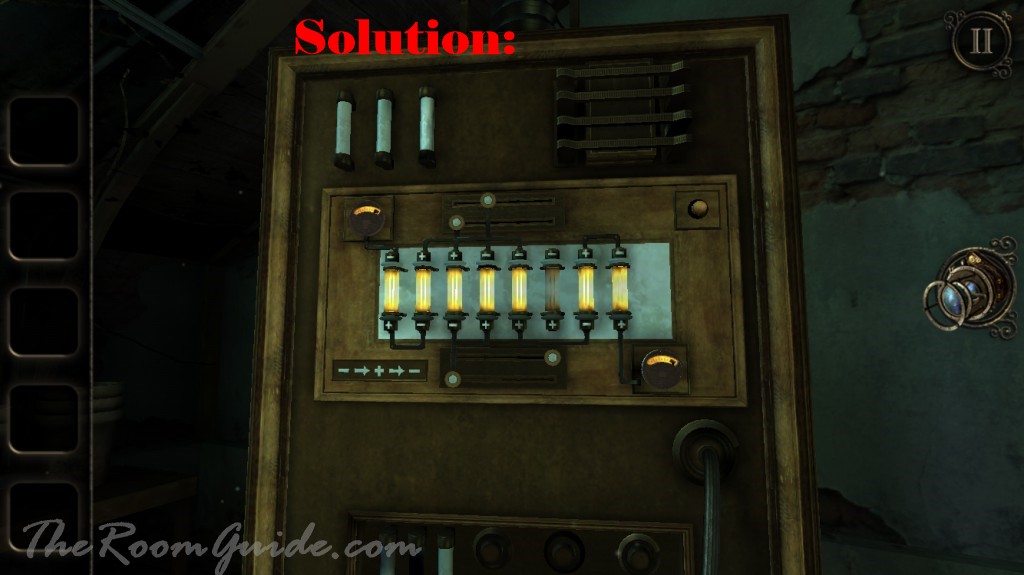
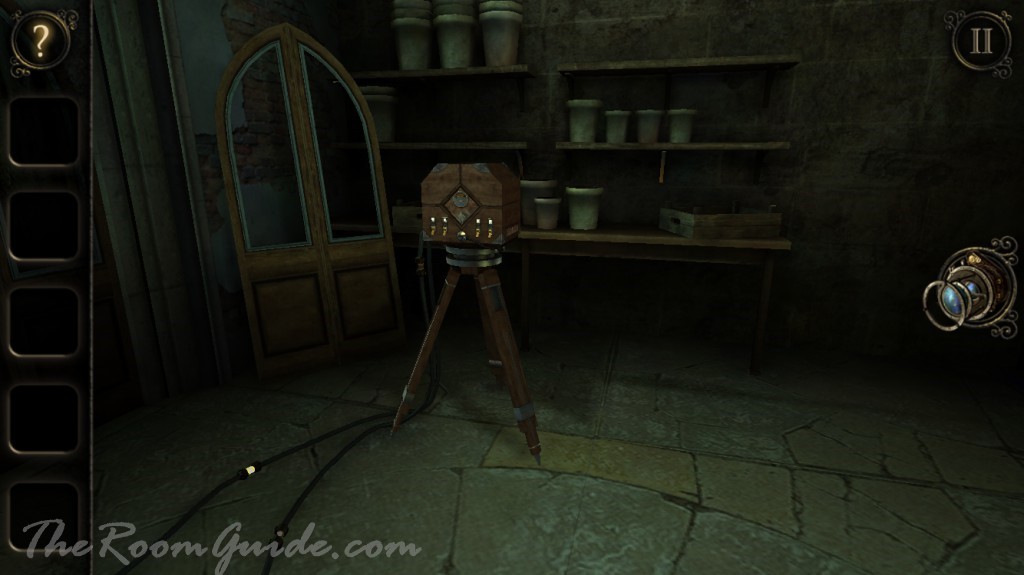
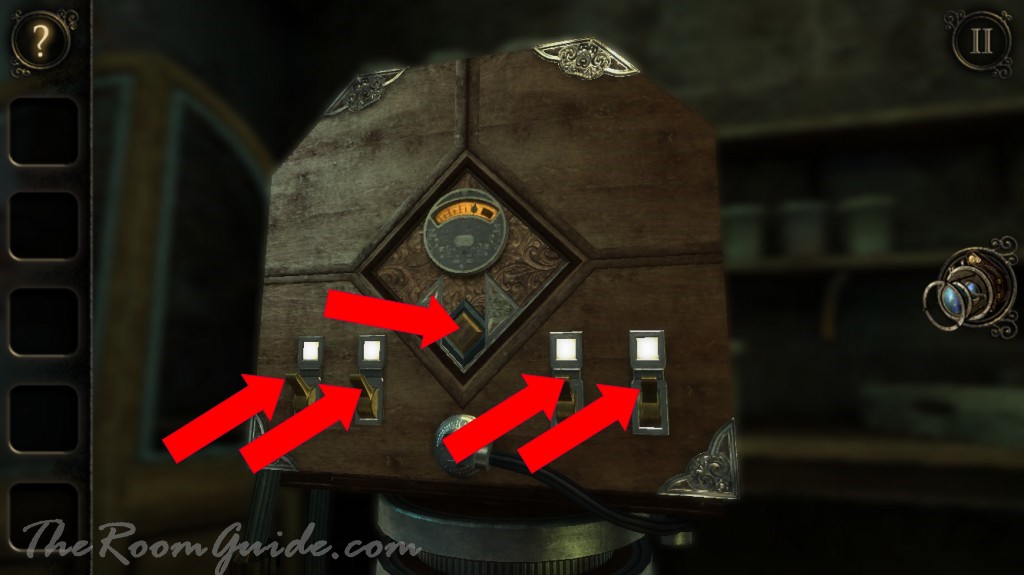
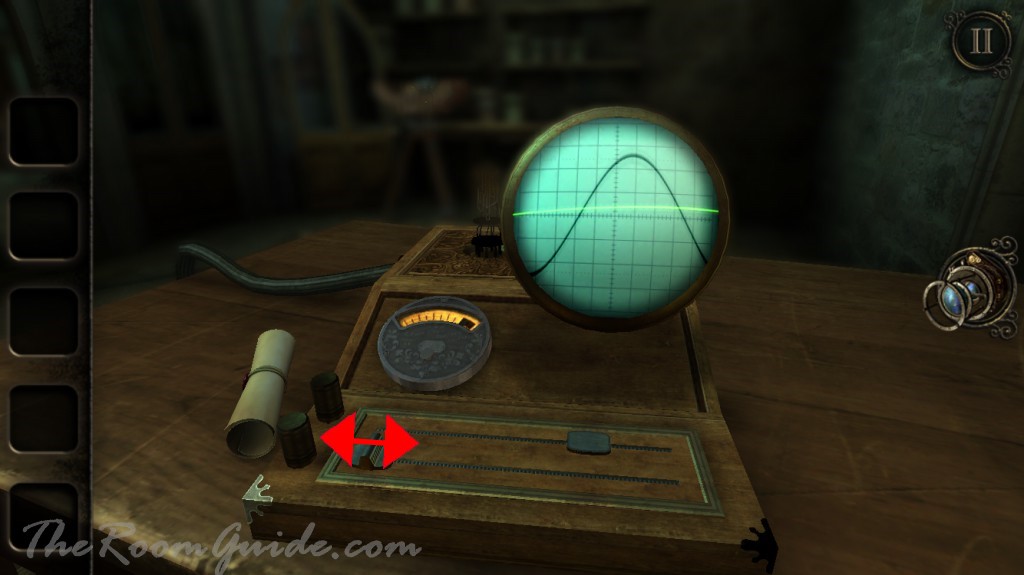
The setup in the room is similar to the previous two chapters. Find the power generator in the glass room in the back. Move the metal sliders so the power runs through the connectors continuously. Turn on the power switch. Go to the device on the tripod. Turn the four switches on the side and press the button in the middle. Locate the oscilloscope. Slide the bottom slider to match the movement of the top slider. The green line will slowly merge with the black line. Device on the tripod will activate and bring you to the workshop.


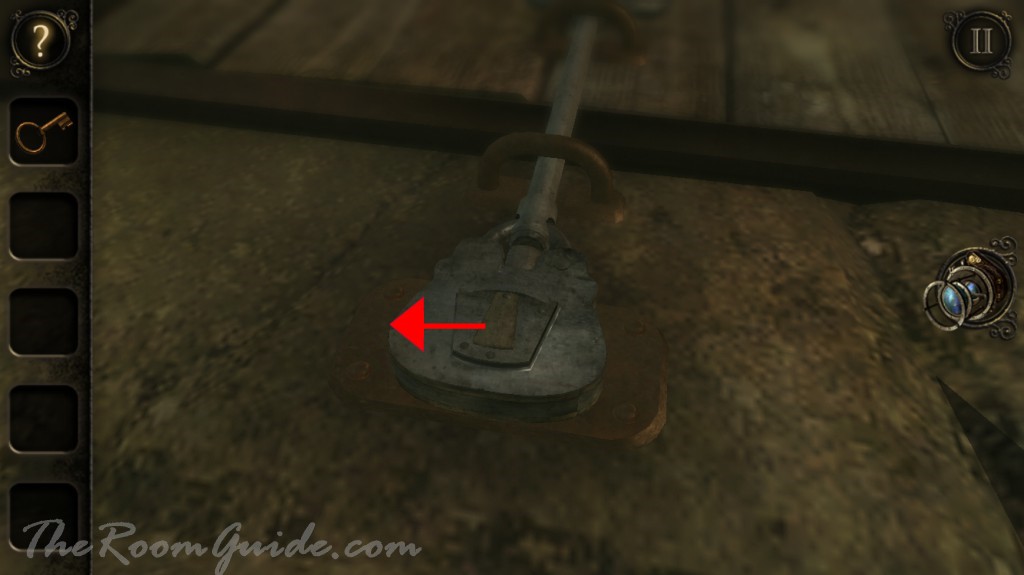
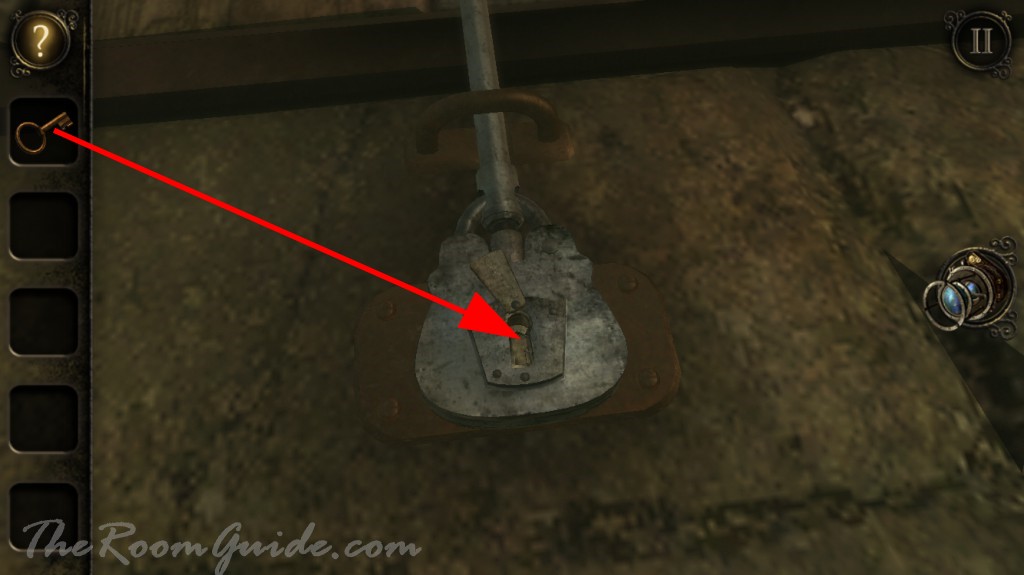
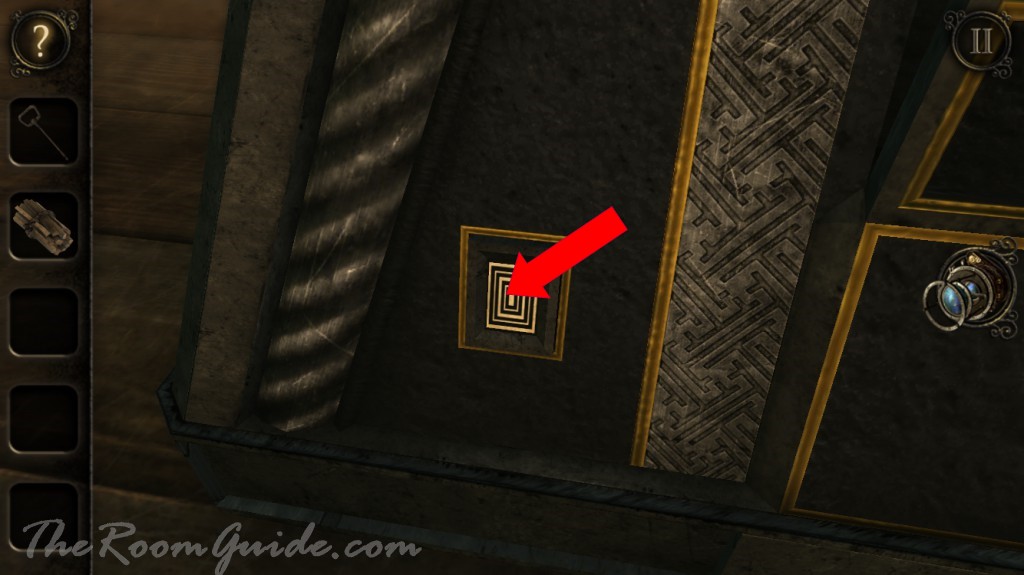
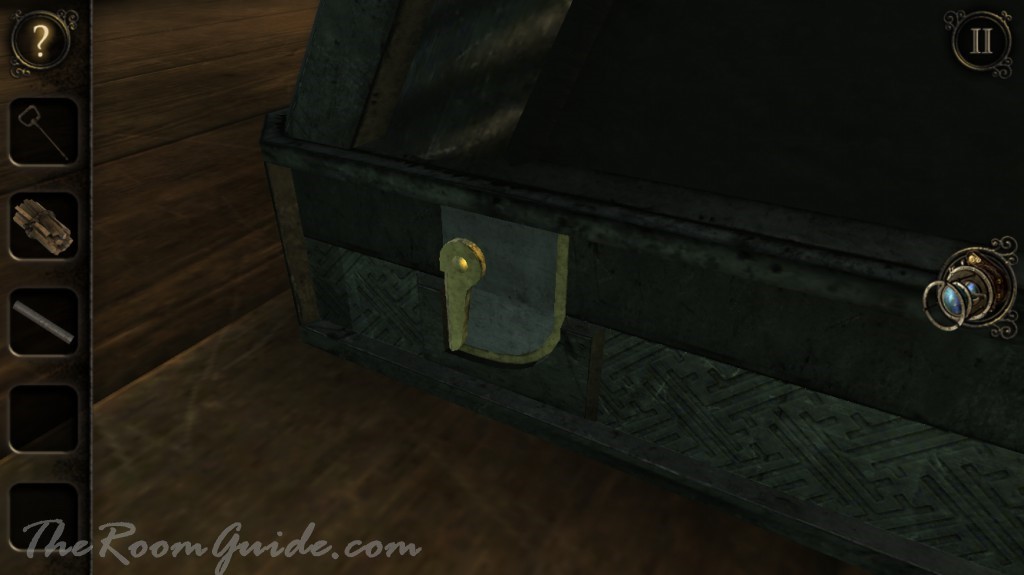
Go over to the plinth next to the large column. Grab the key.


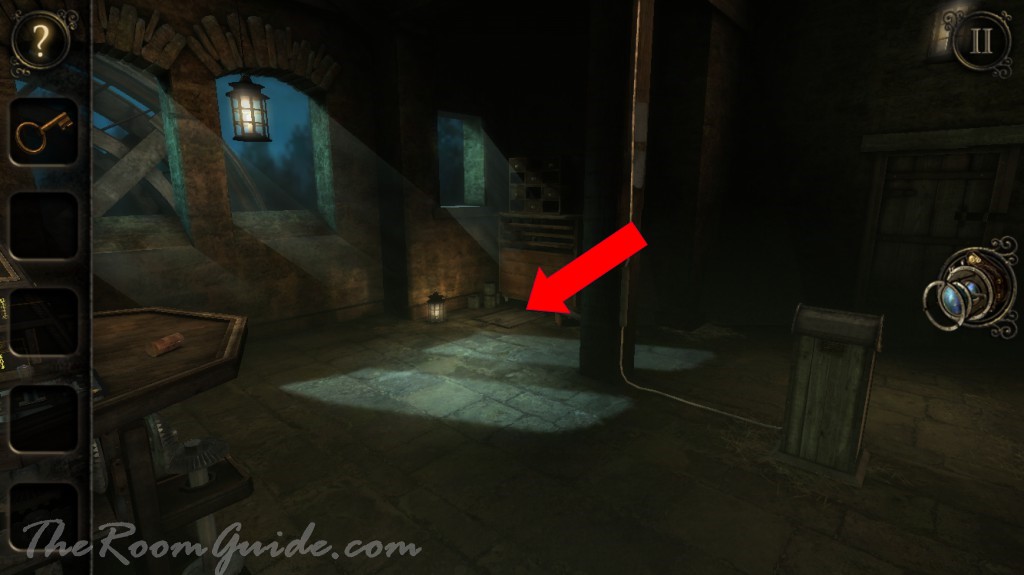
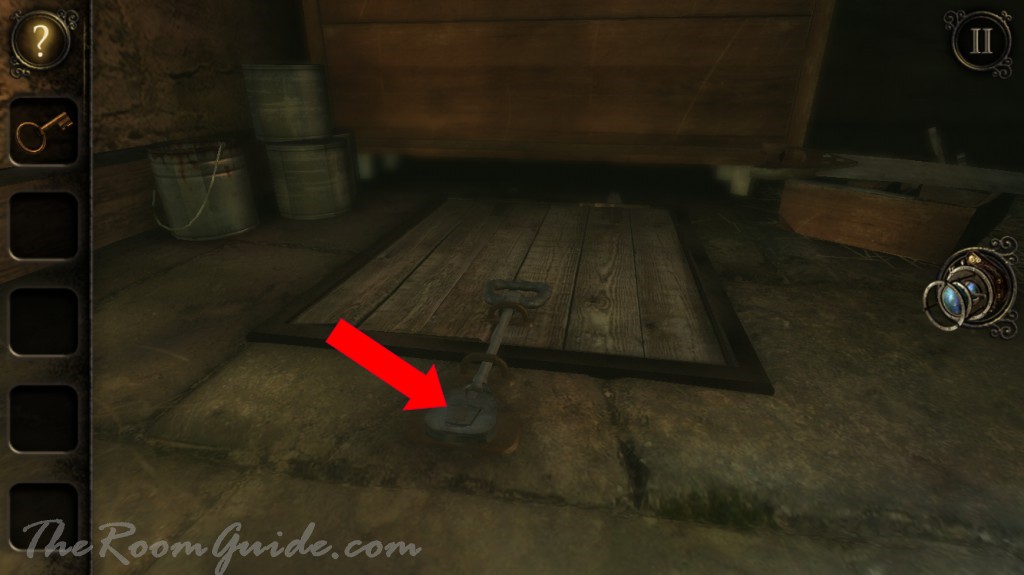
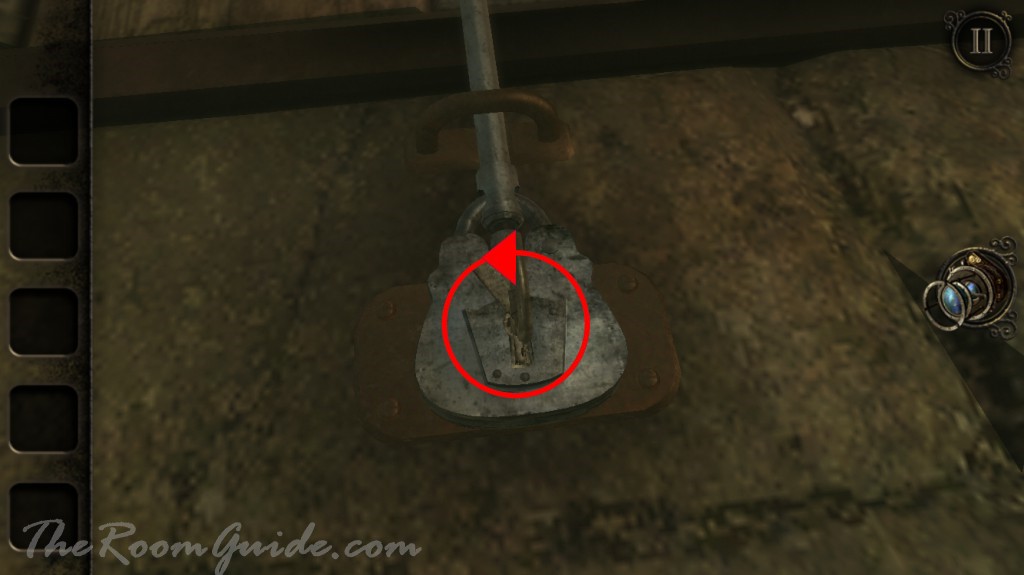
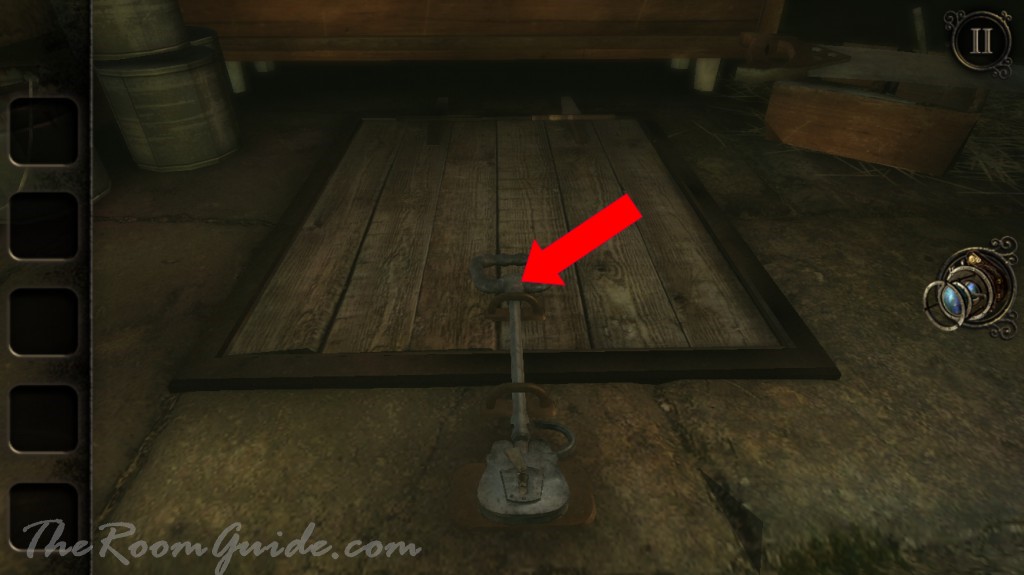
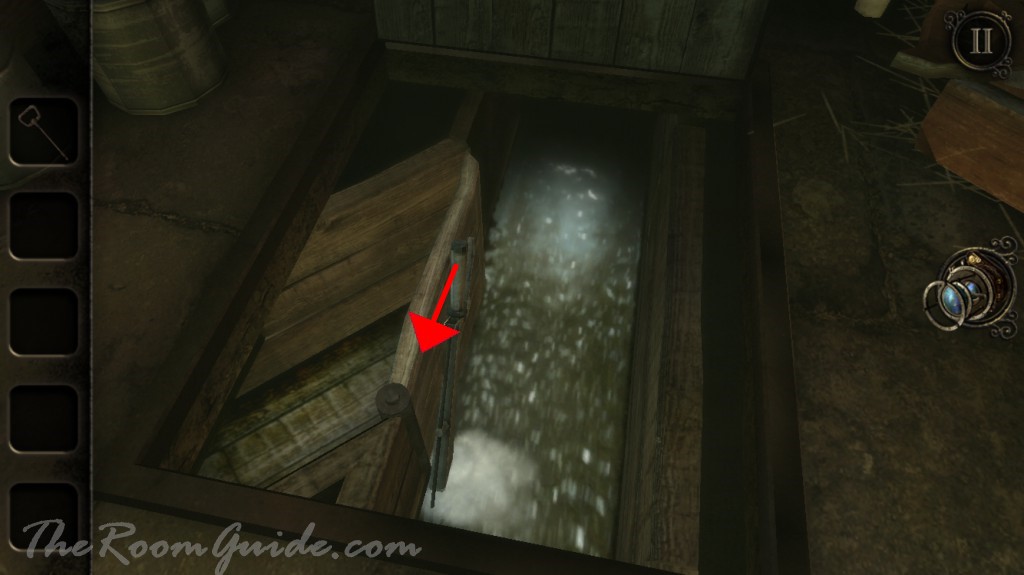
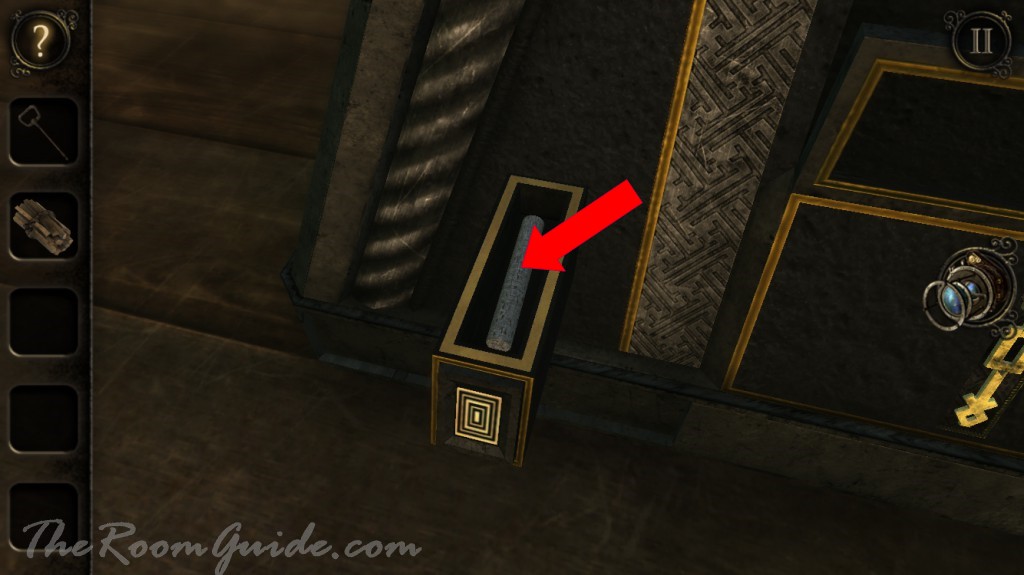
Use the key to unlock the padlock on the trapdoor in the corner of the room. Pull the metal rod. Notice the water running below. Pull the handle. The wooden gate will open and flow to the water wheel.
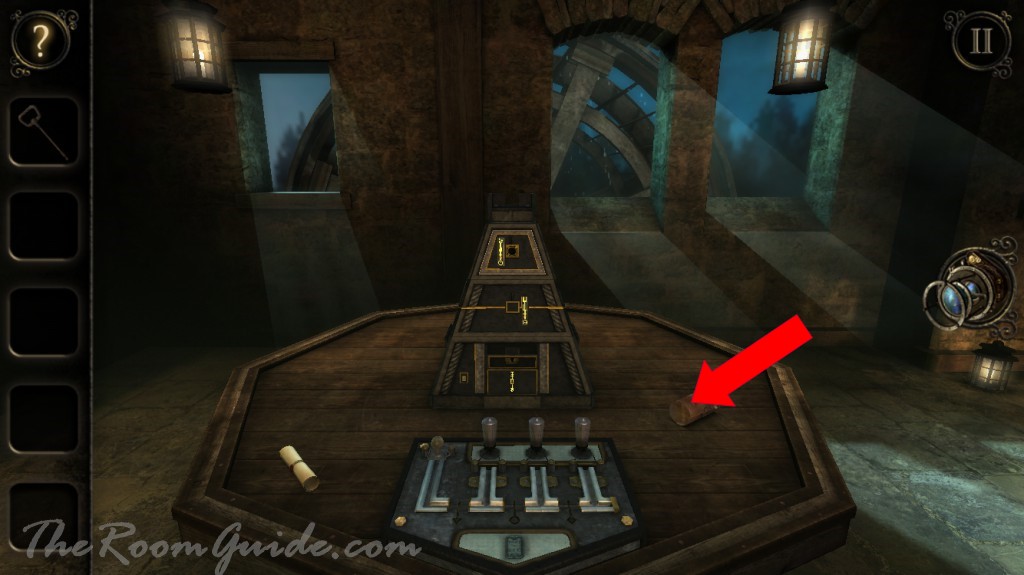
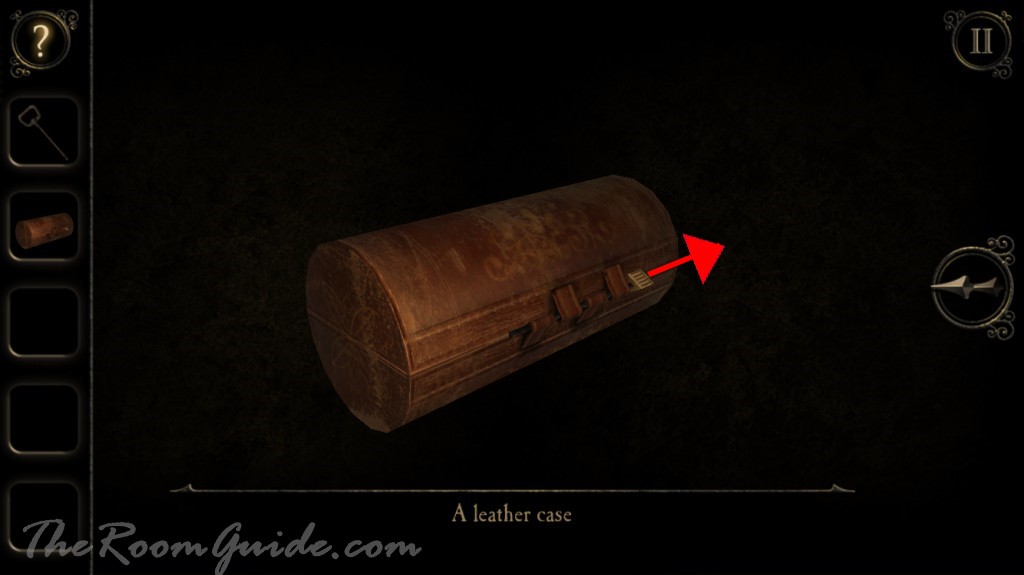
Go to the wooden table in the center of the room. Grab the leather case on the table. Undo the latch and open the case. Get a kindling. Exam the iron box on the table. Press the button on the bottom left. Grab a flint.

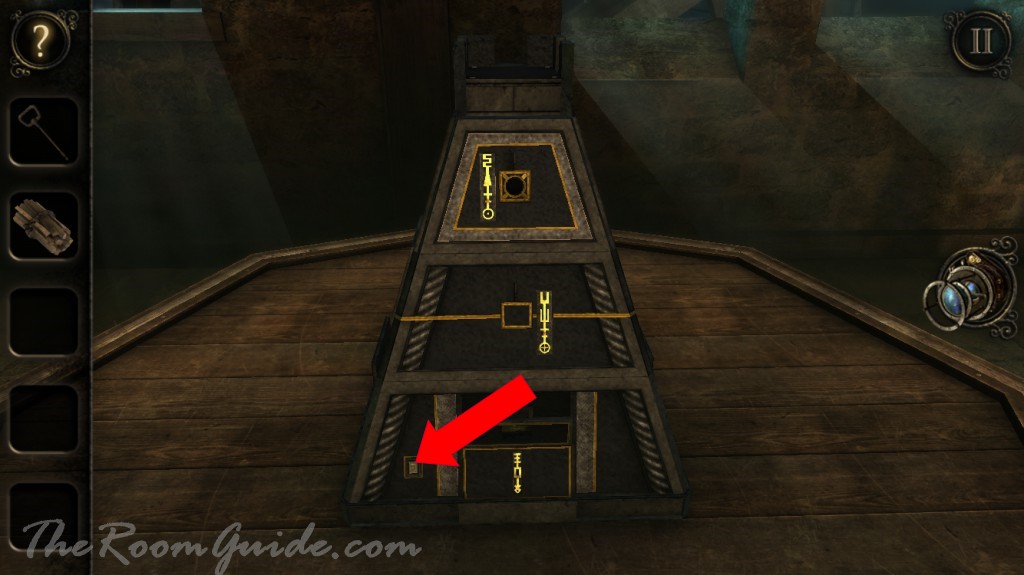
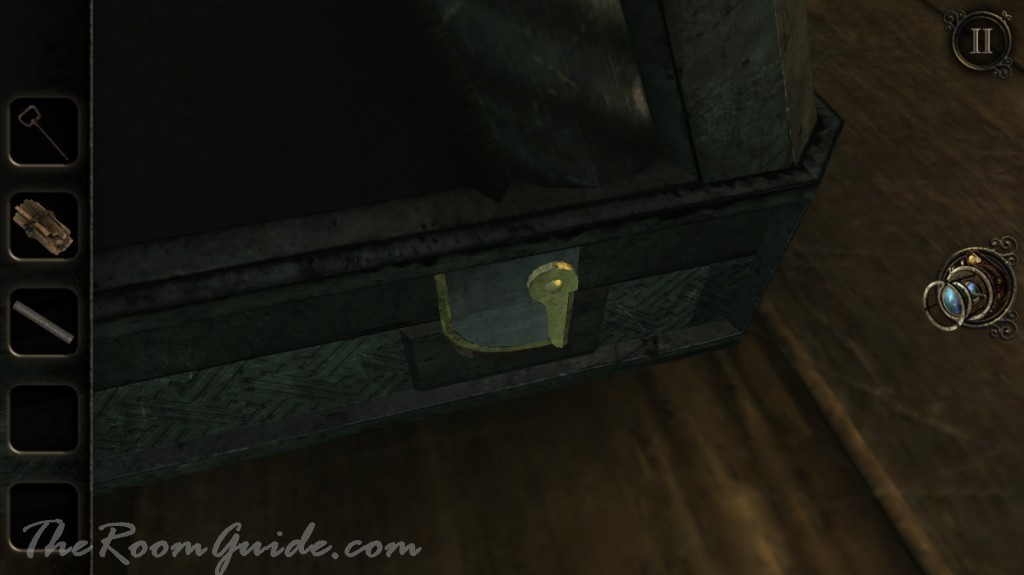
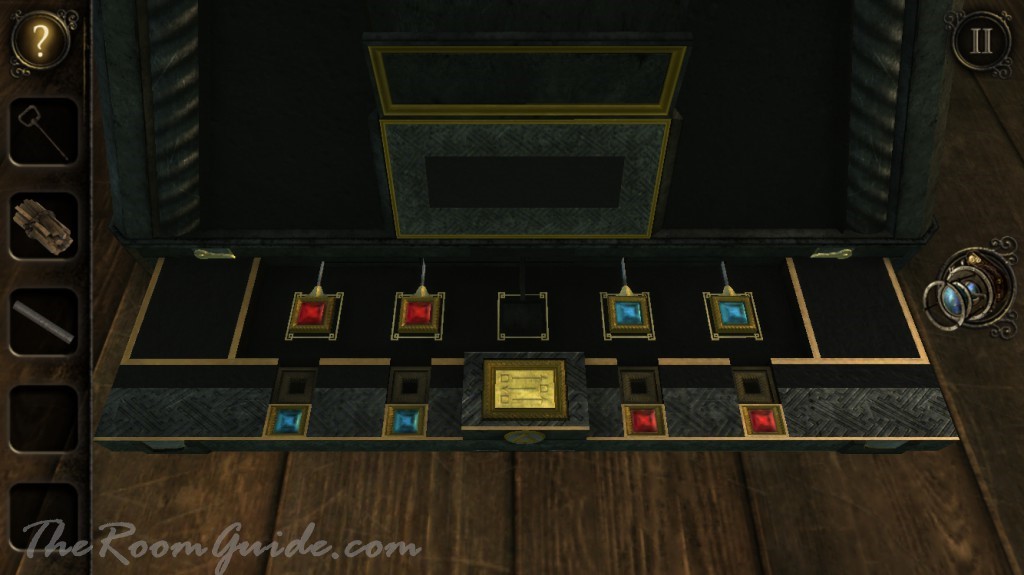
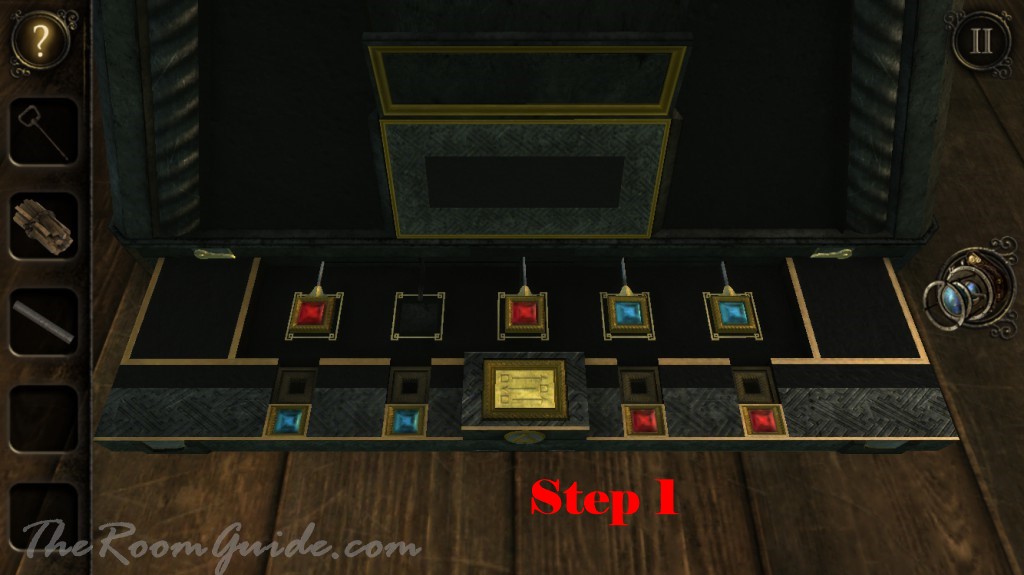
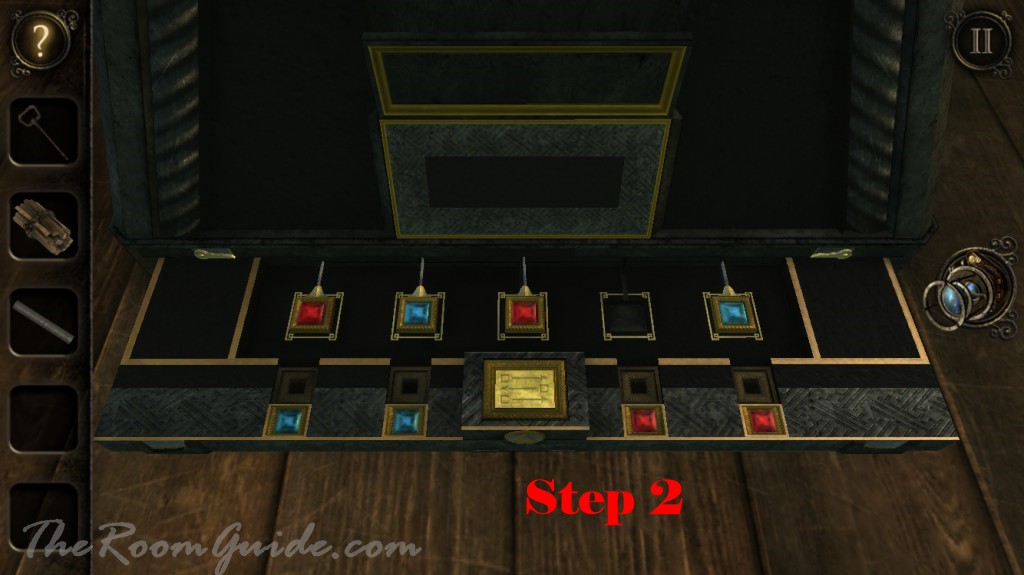
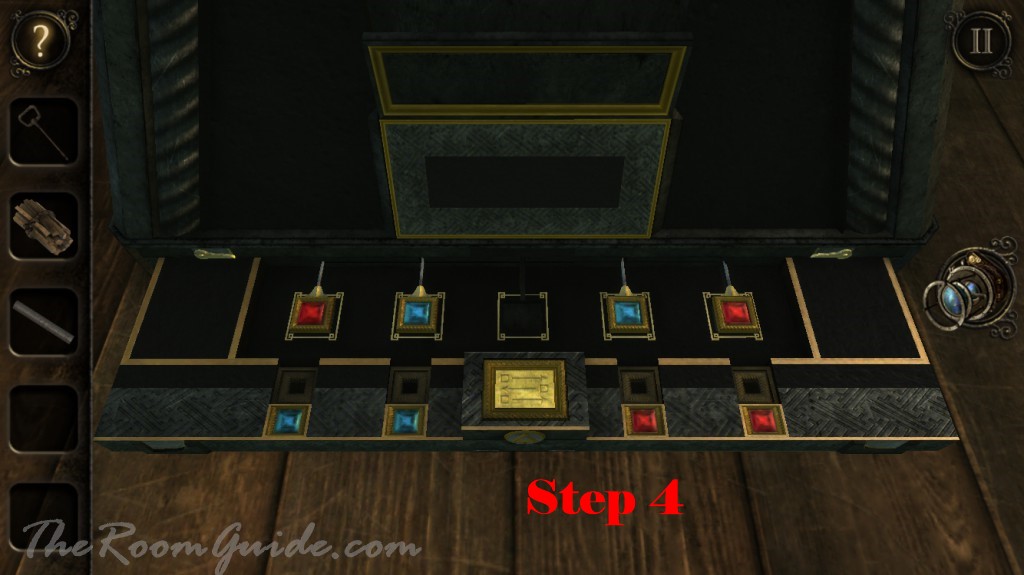
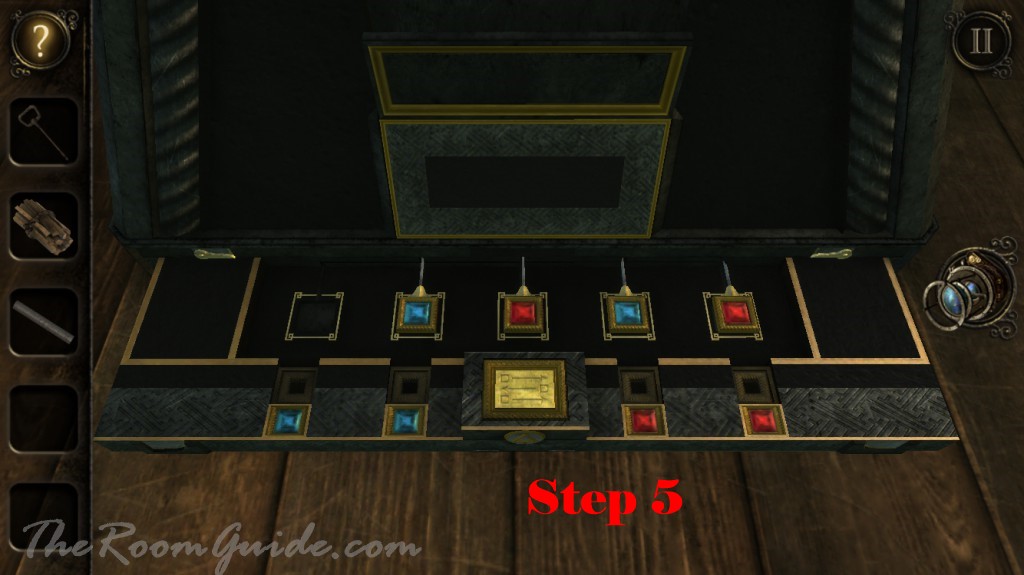
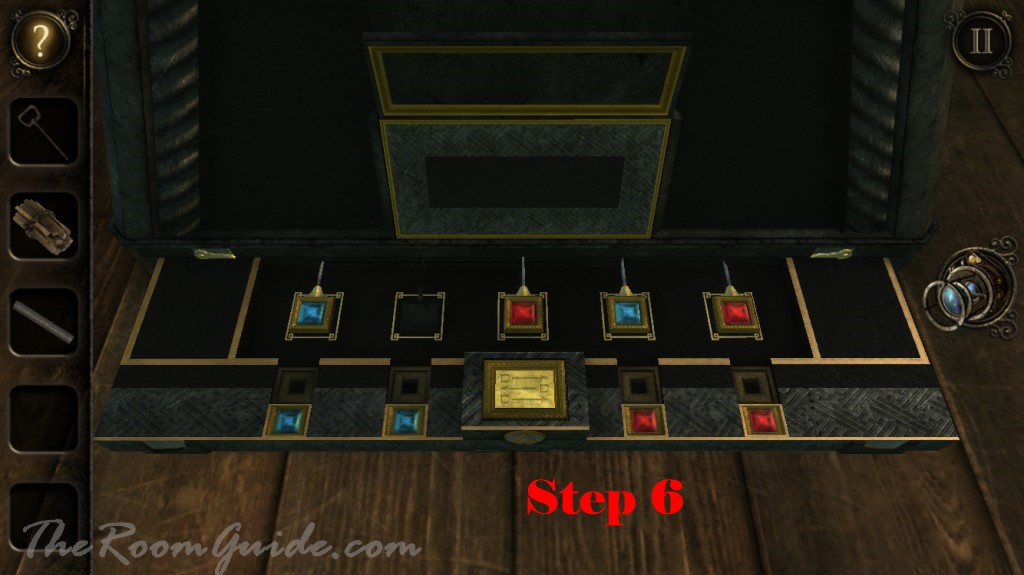
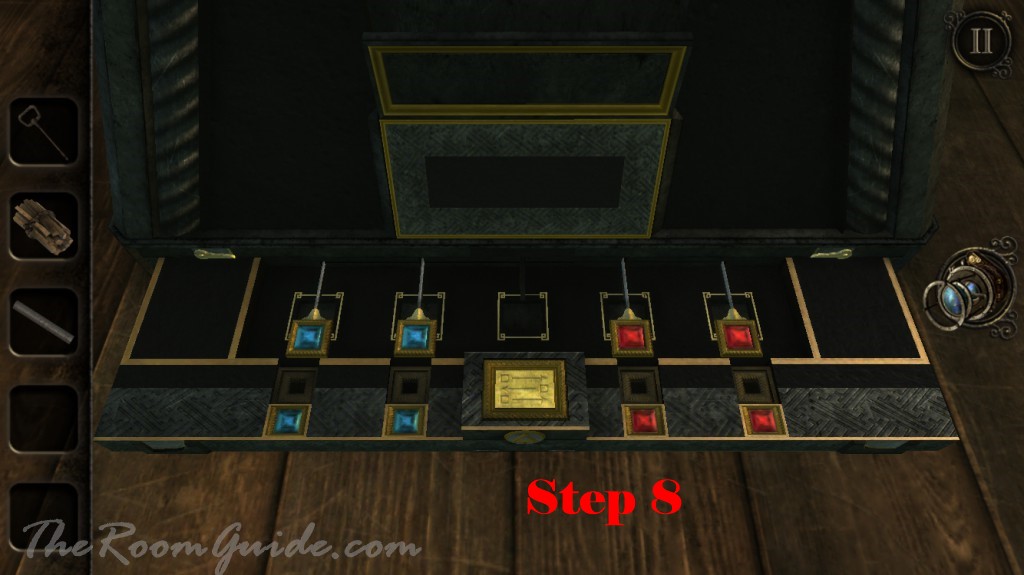
Go to the left side of the box. Undo two latches at the bottom. A puzzle will appear. You need to move the red tiles to the right and blue tiles to the left. Follow the step below to solve the puzzle. Obtain a metal casting.
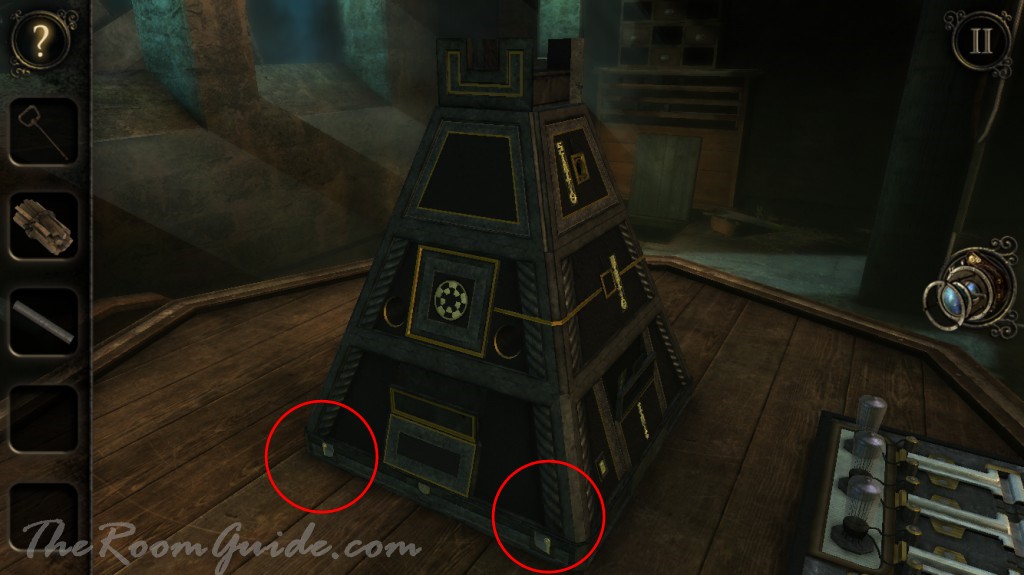


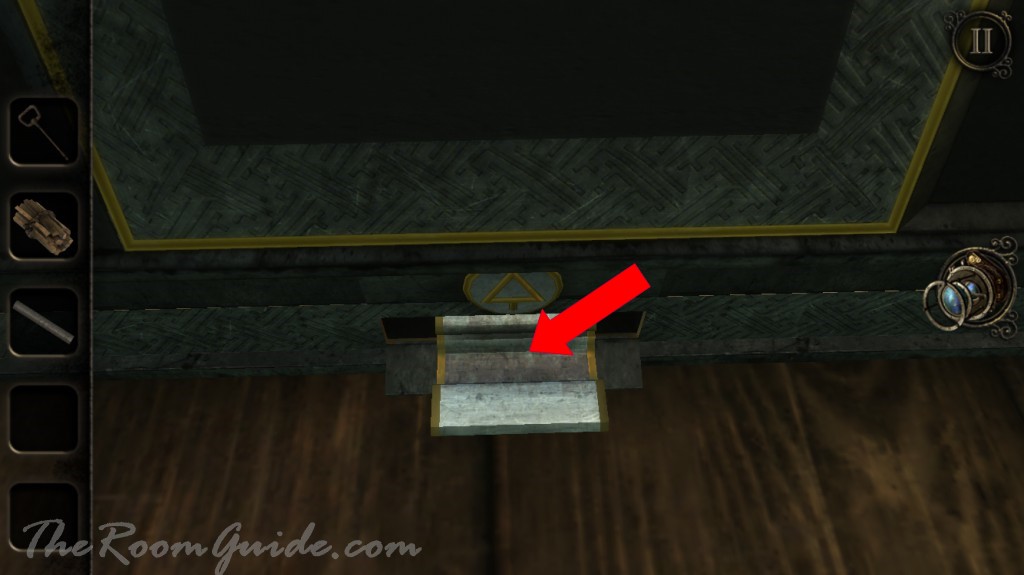
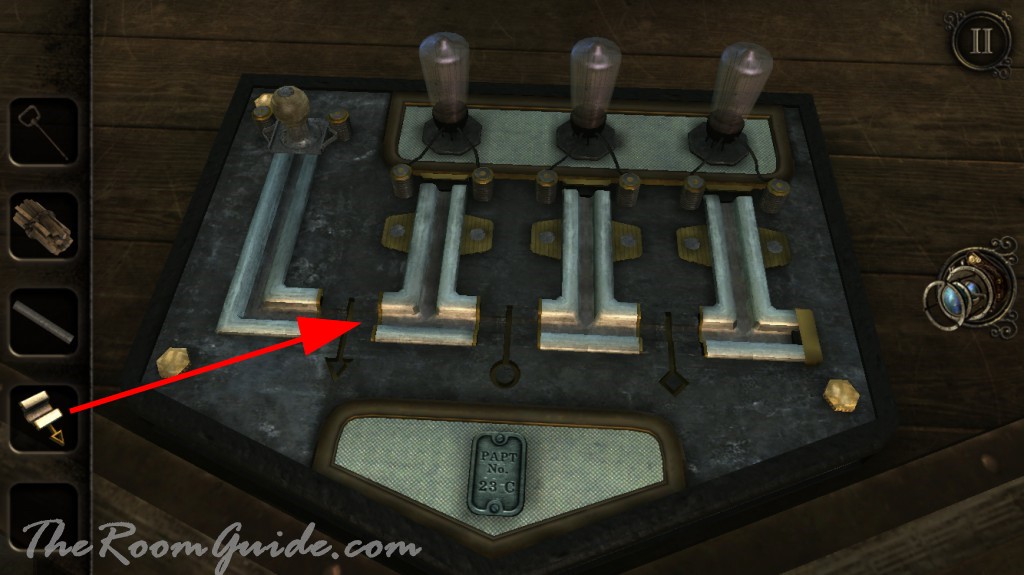
Locate the panel toward the front edge of the table. Insert metal casting and slide the handle to the first light bulb which will illuminate.

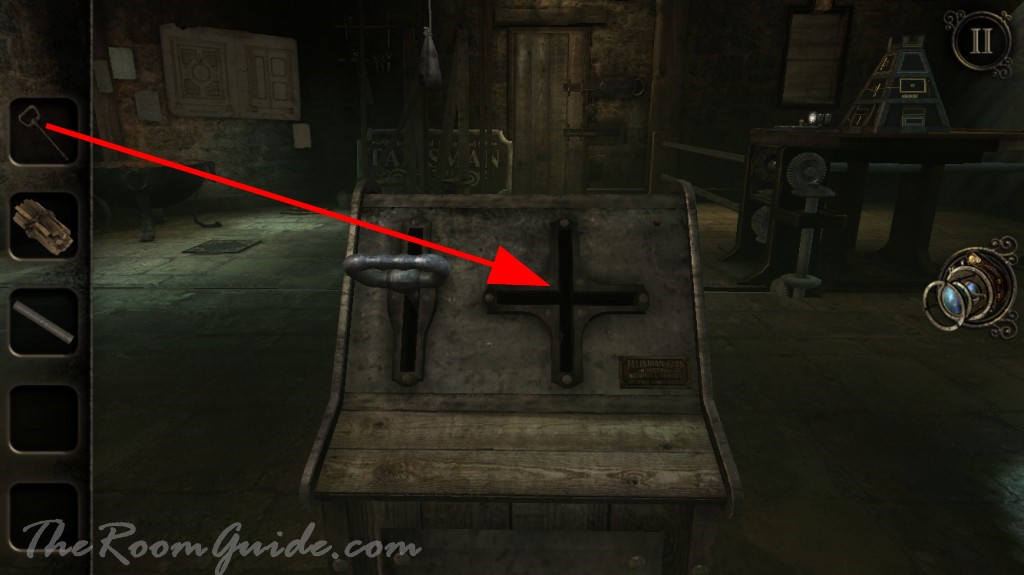
In order to open the door to Woodworking Room, you need to undo two latches on the door using the two controllers on plinth to the move the sandbag over the pressure sensitive tiles on the floor.
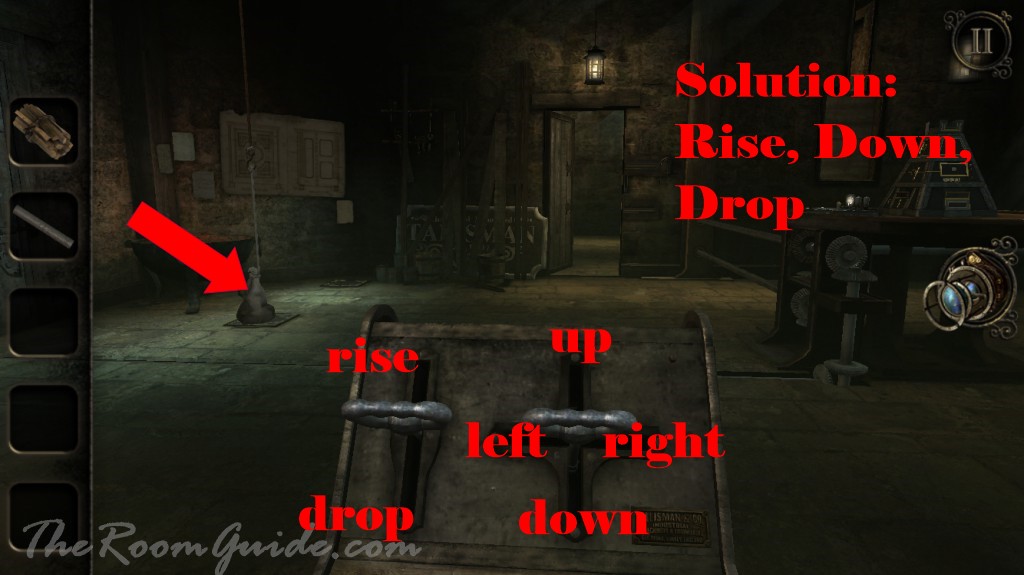
Sandbag Puzzle Solution:
1. Return to the plinth. Insert metal rod in the empty slot.
2. Use the control panel to lower the sandbag on the first tile (Left and Drop). This will undo the top latch.
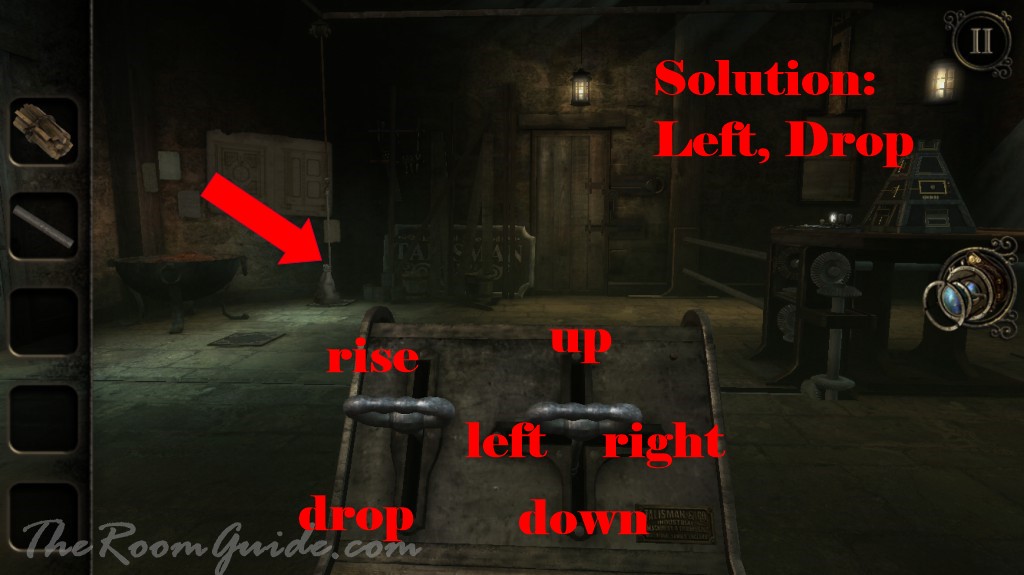
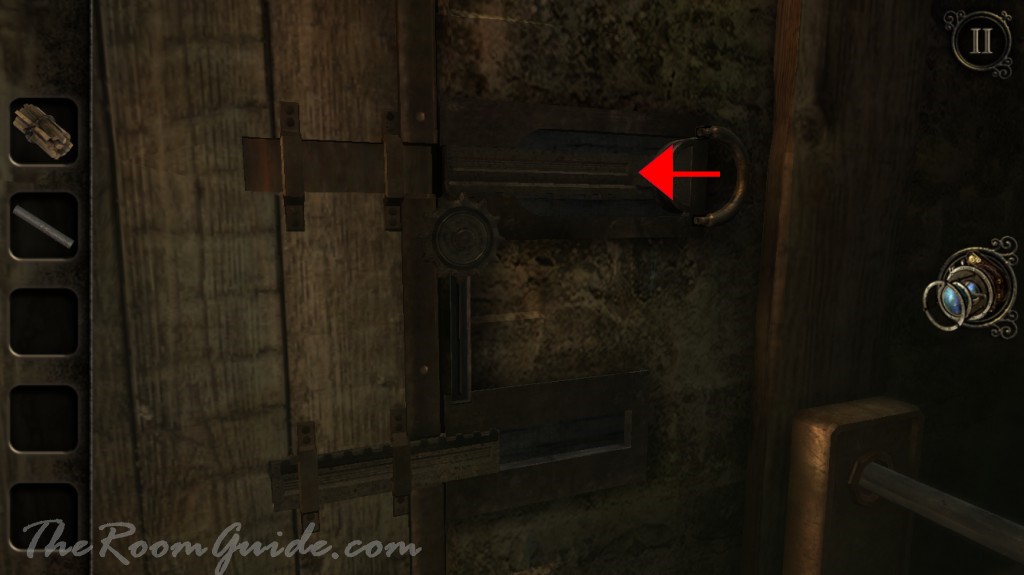
3. Go over to the door and secure the top latch by flipping over the metal ring to the left.
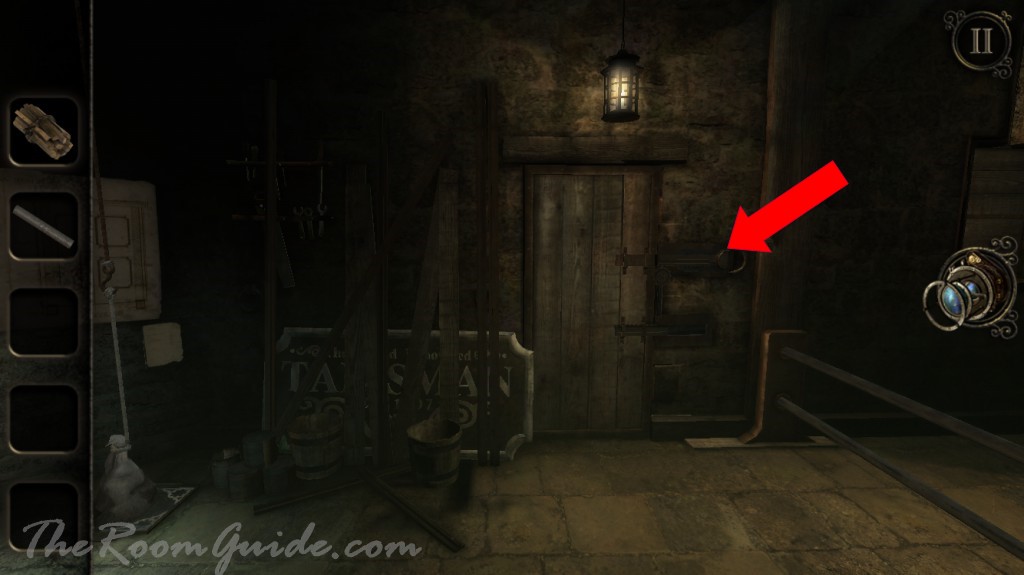
4. Go back to the control panel. Move the sandbag to the second plate (Rise, Down, Drop). This will undo the bottom latch. Door is now unlocked.
Entering woodworking room.
where is the rest
Show me what to do
And.