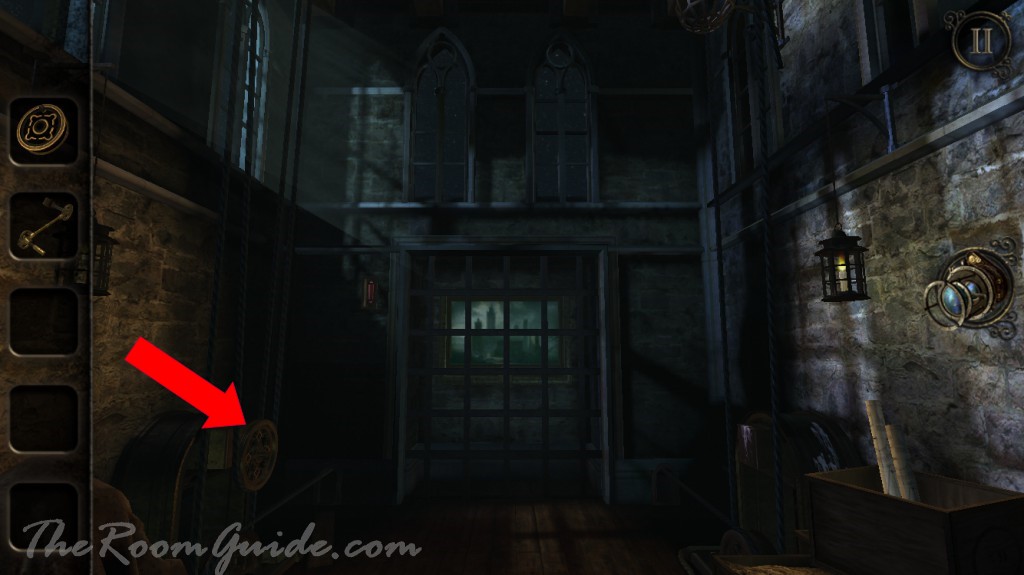
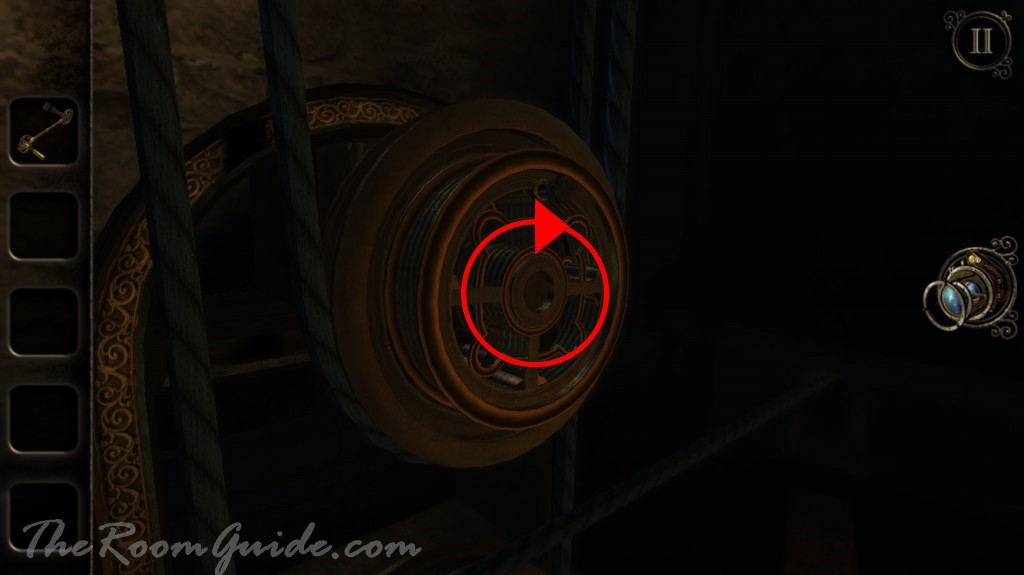
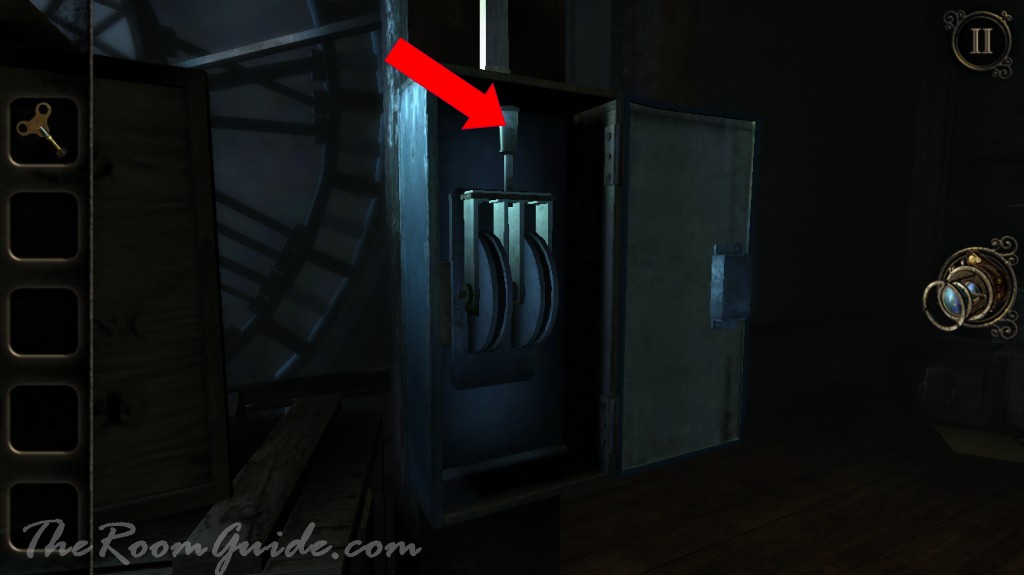
Go up the staircase. Locate a pulley and insert the wheel with handle.

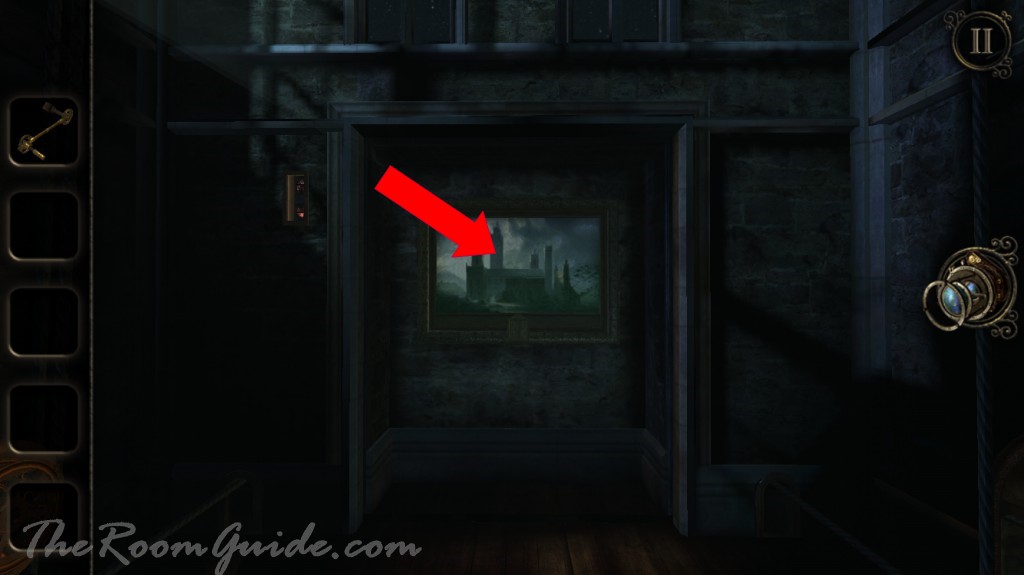
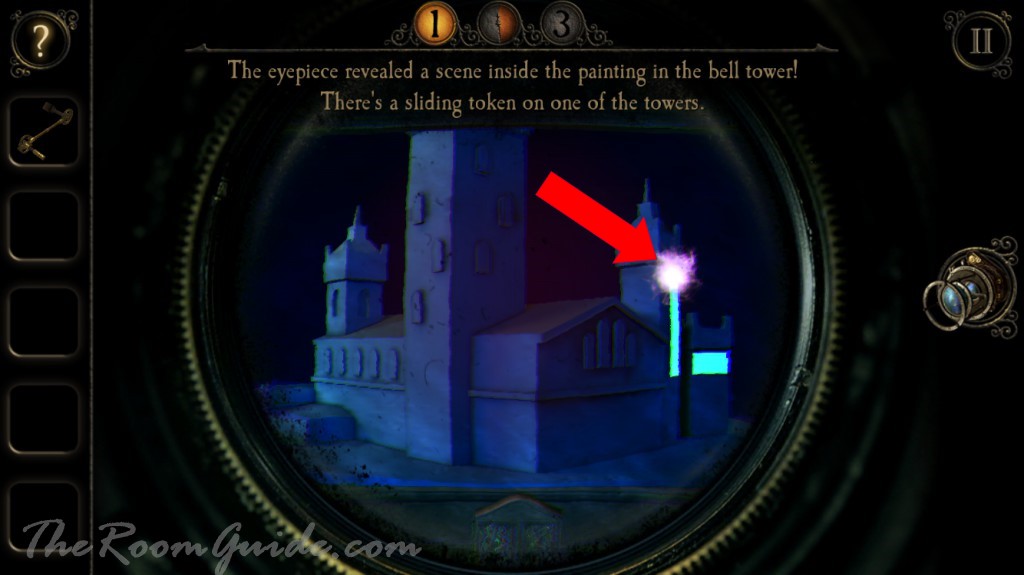
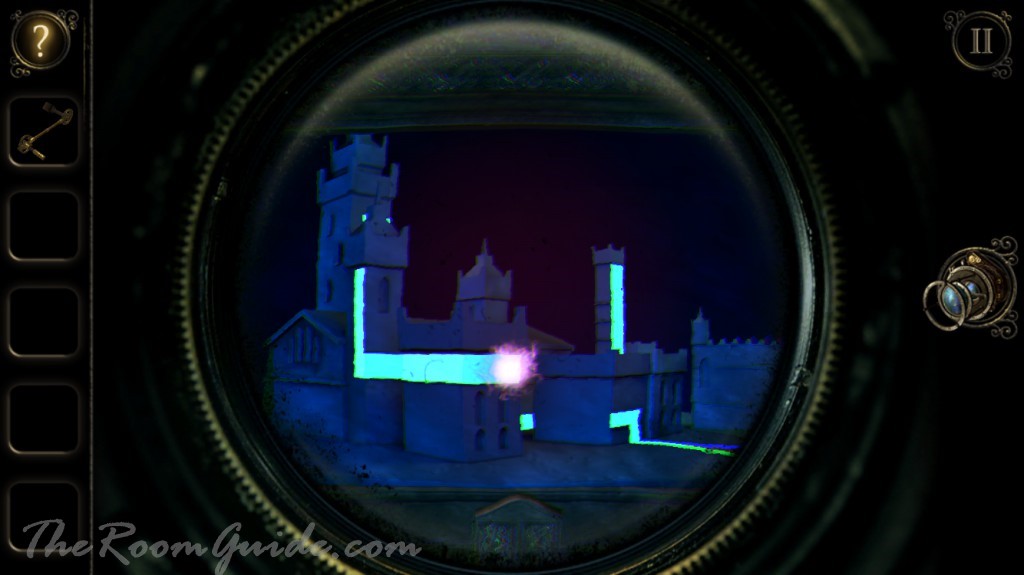
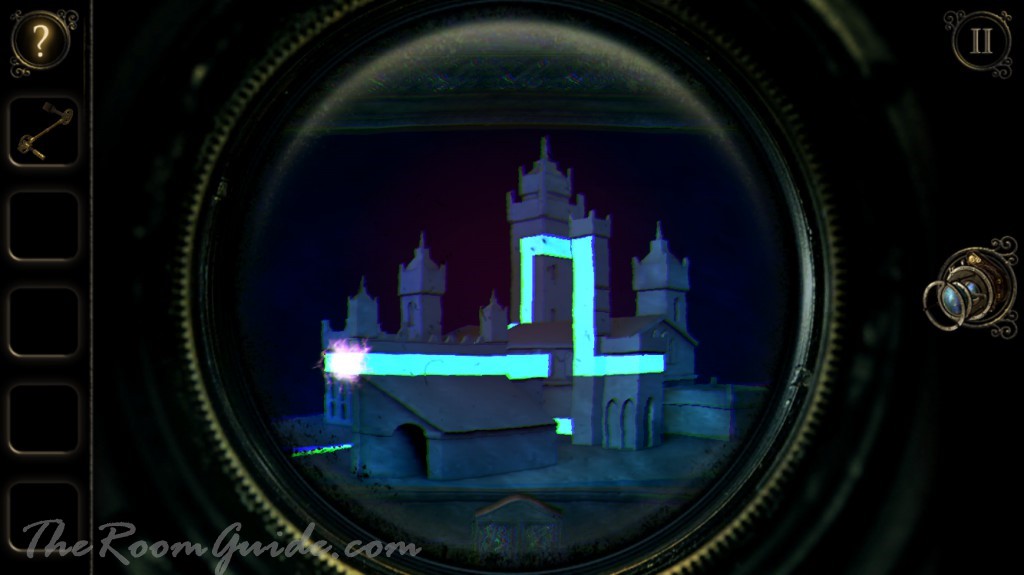
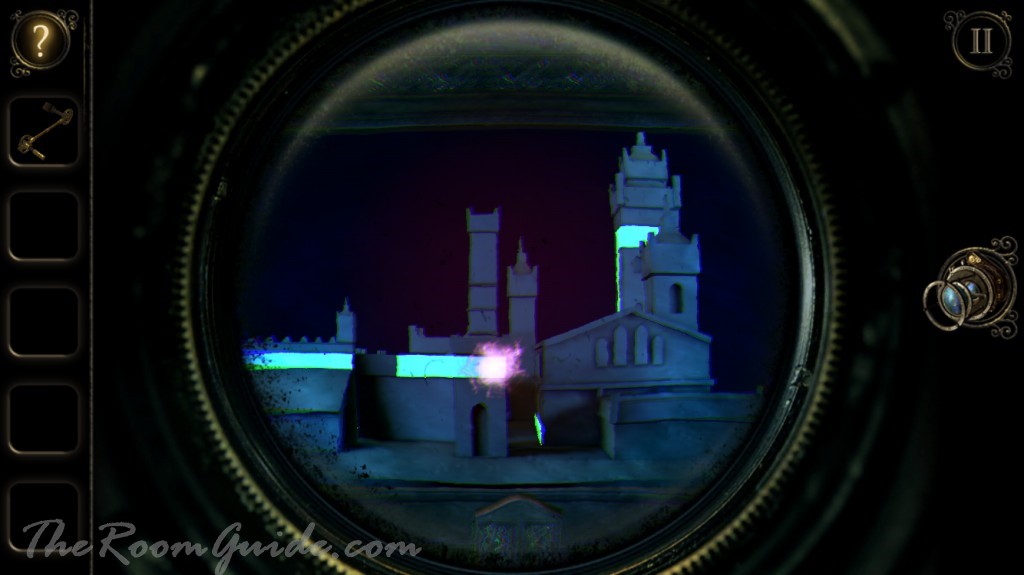
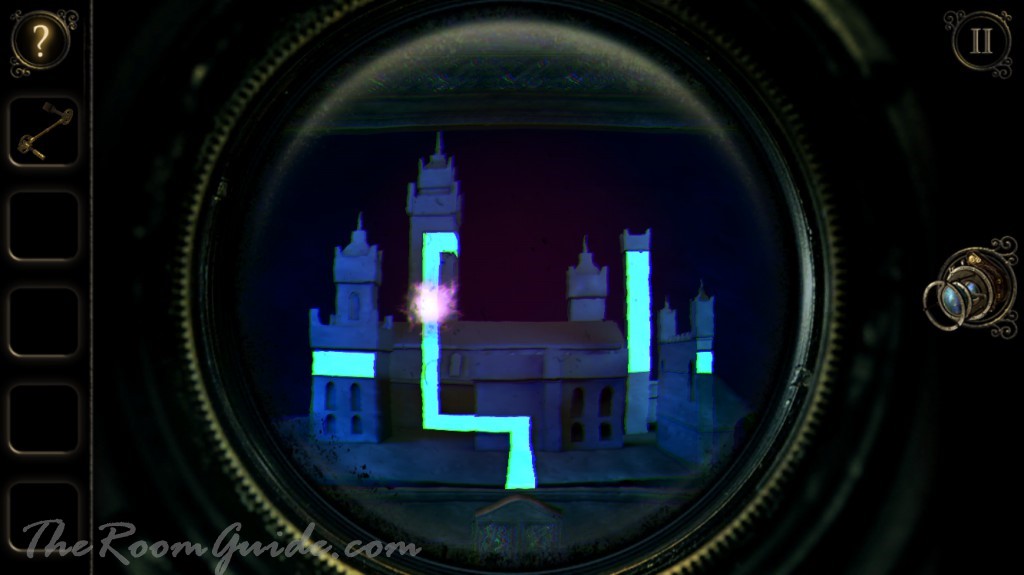
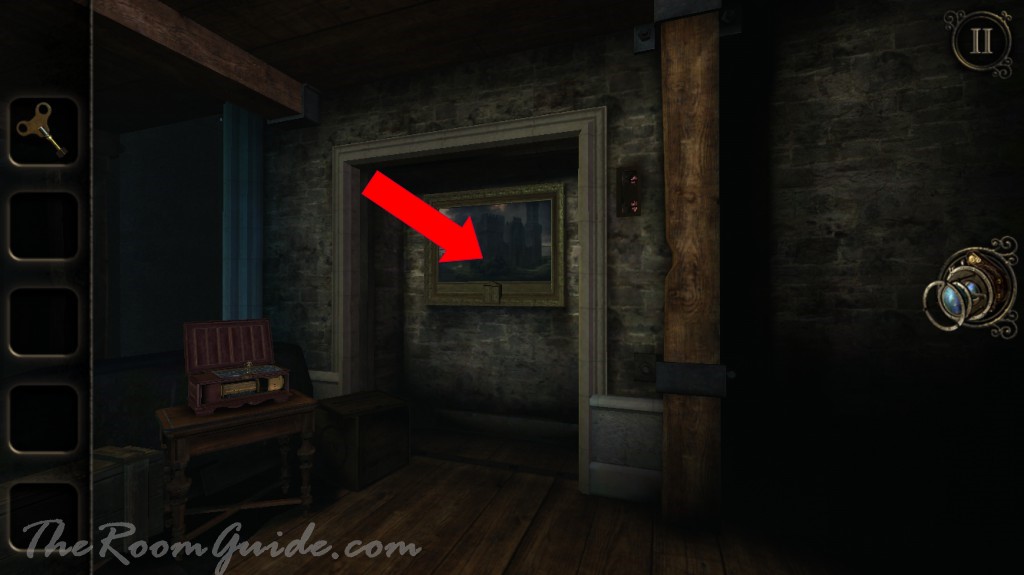
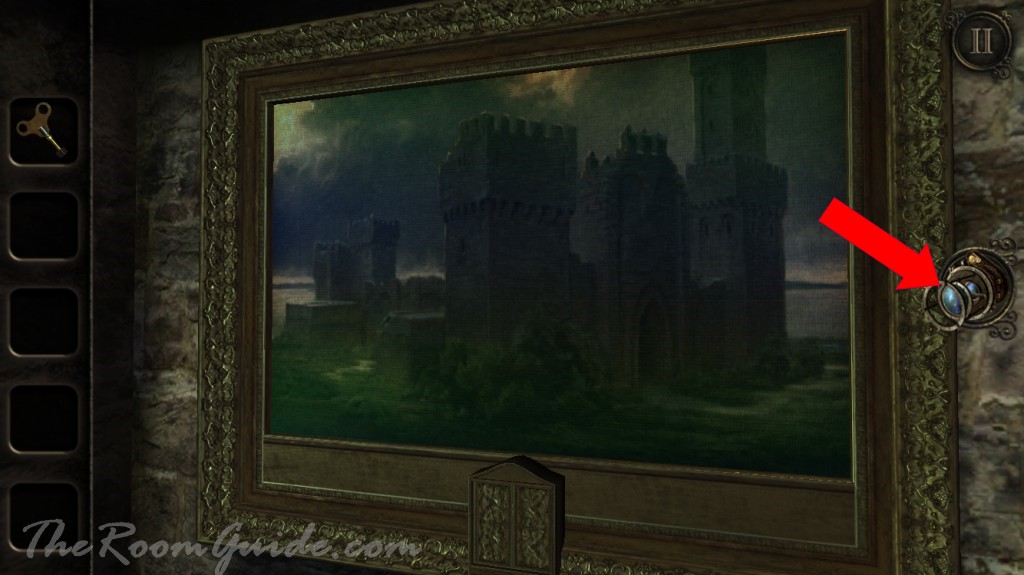
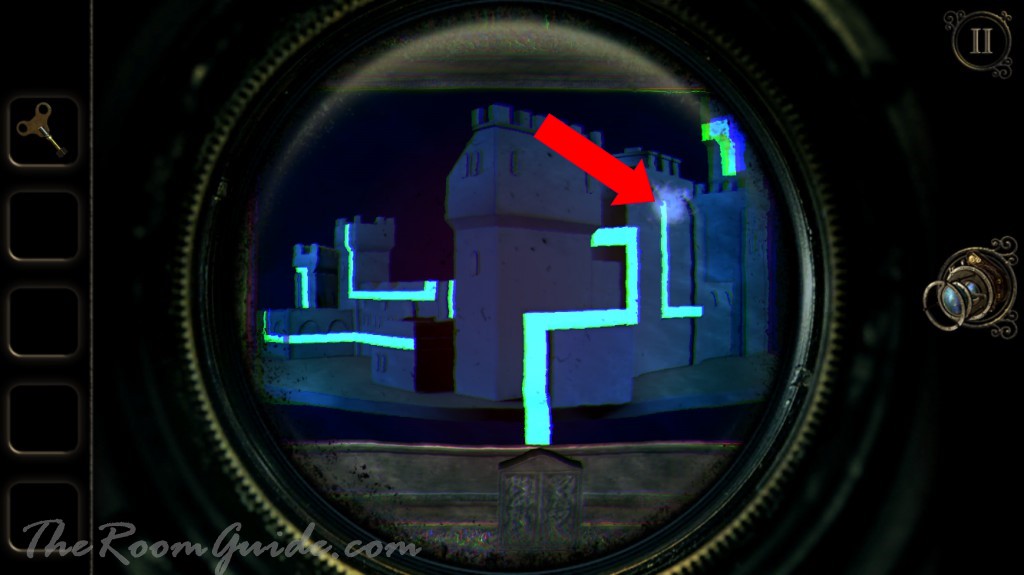
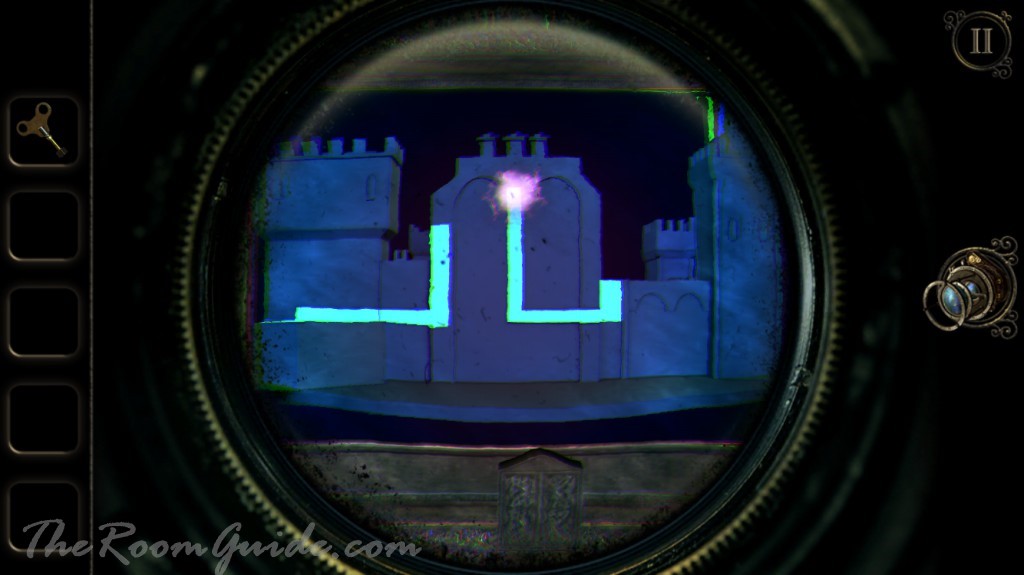
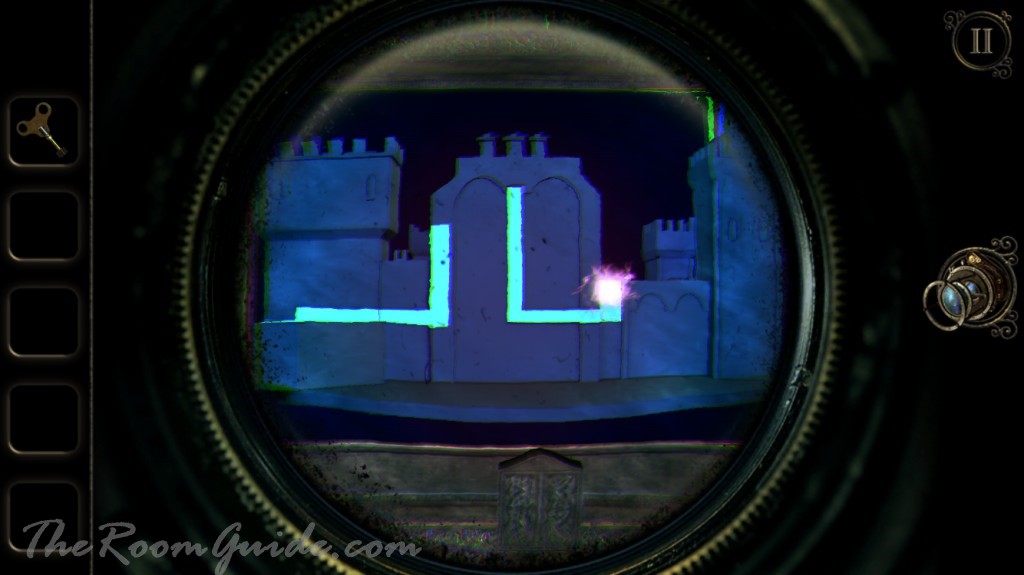
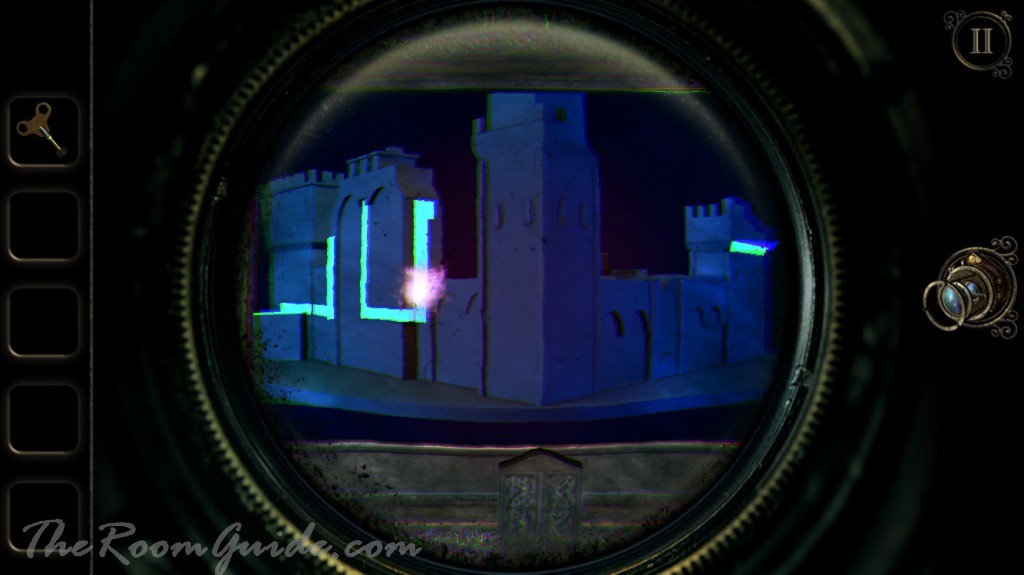
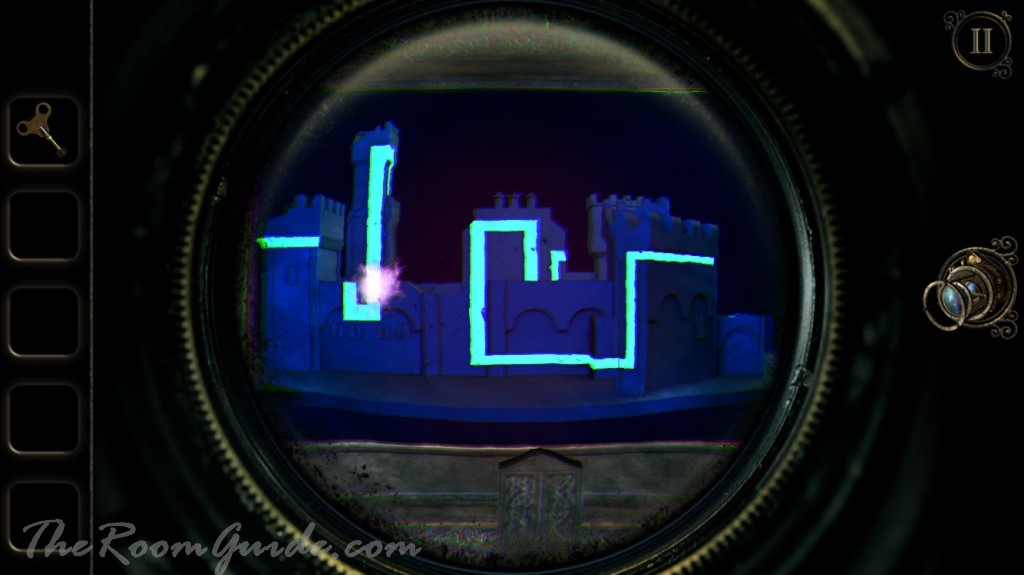
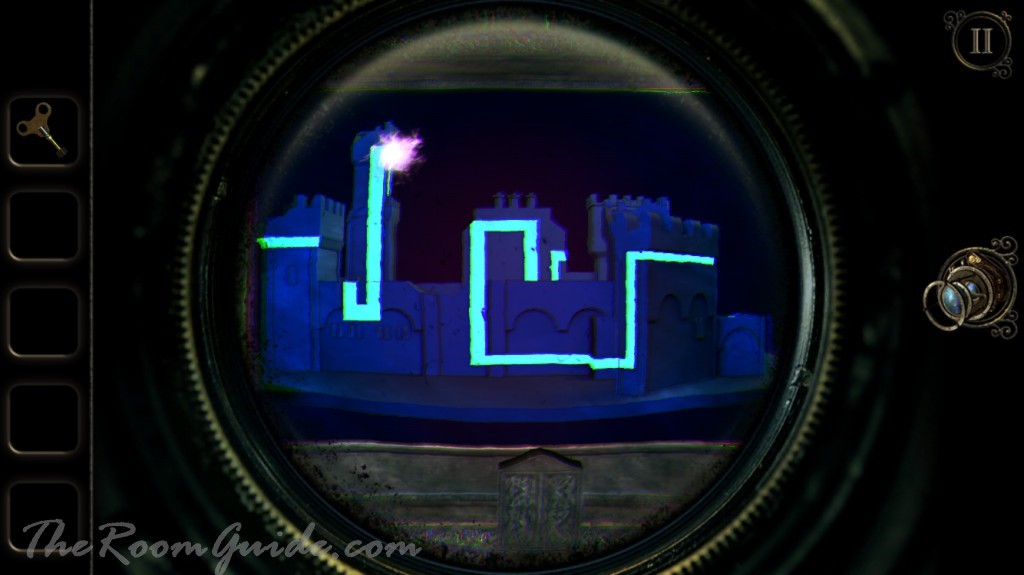
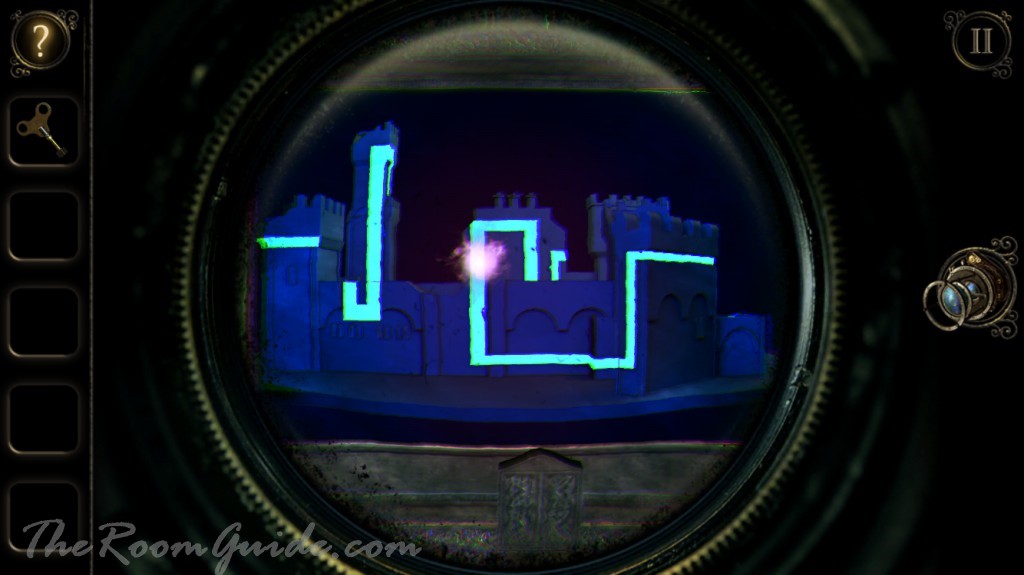
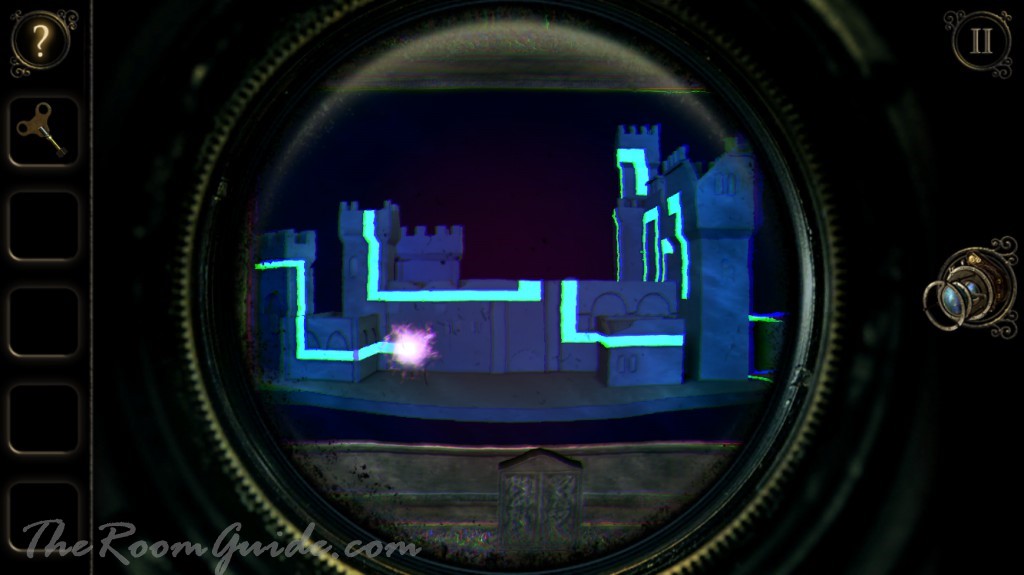
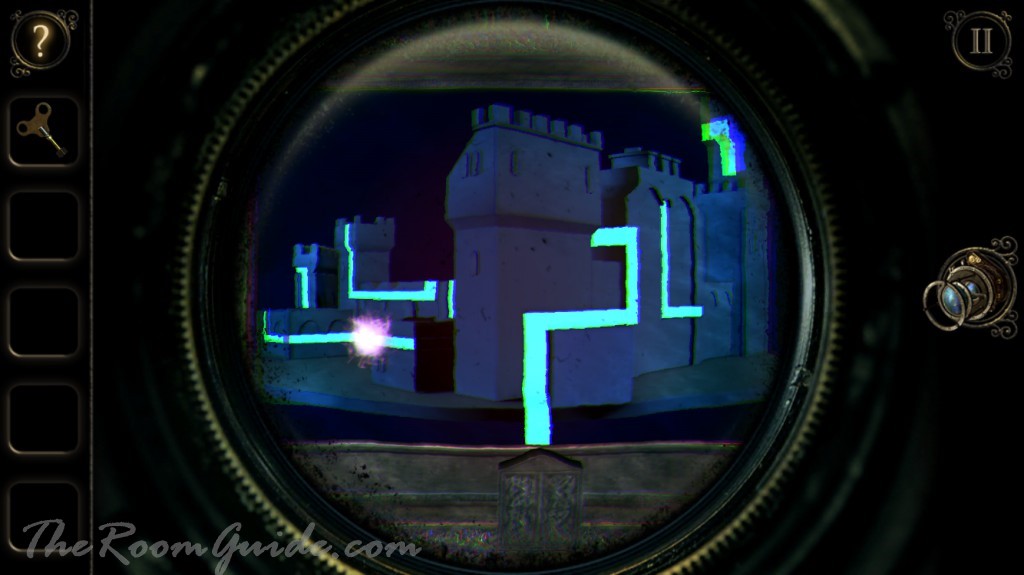
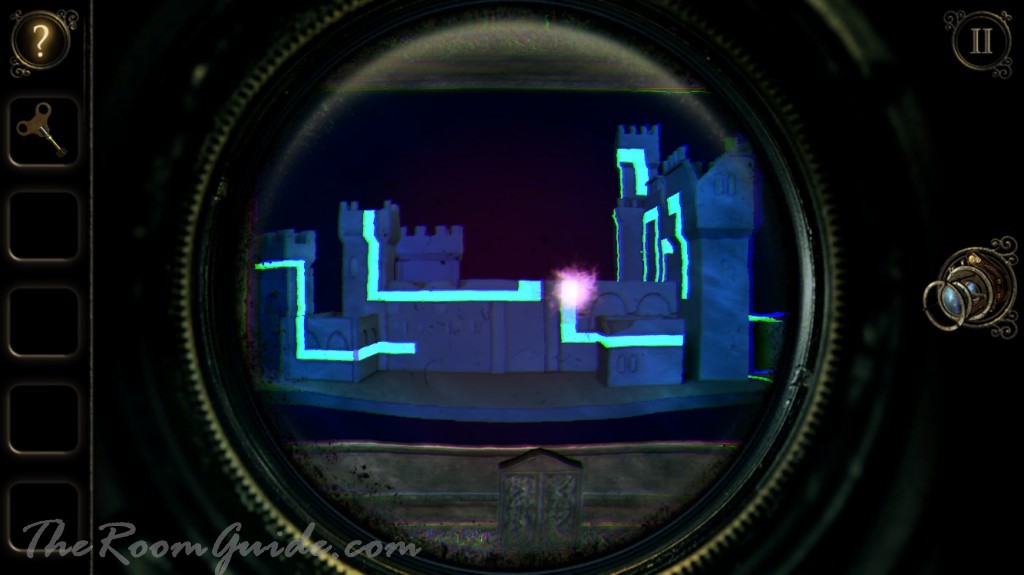
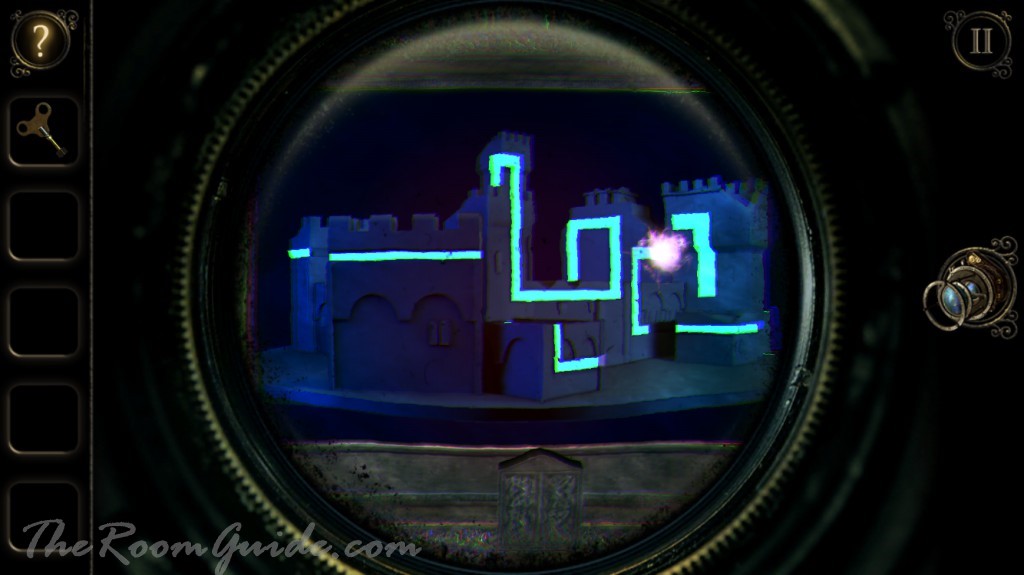
Examine the painting with your eyepiece. Start the puzzle with the sparkling sliding token on one of the towers. Change the view and move the token when the segment connects with the next segment to form a path. Continue until you reach the the bottom of the painting and retrieve a clock face.


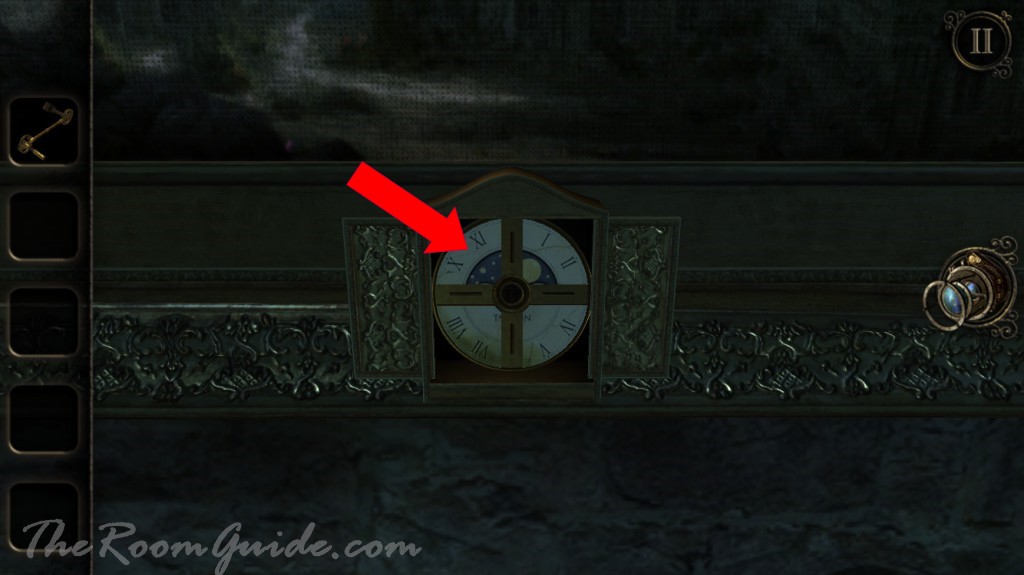
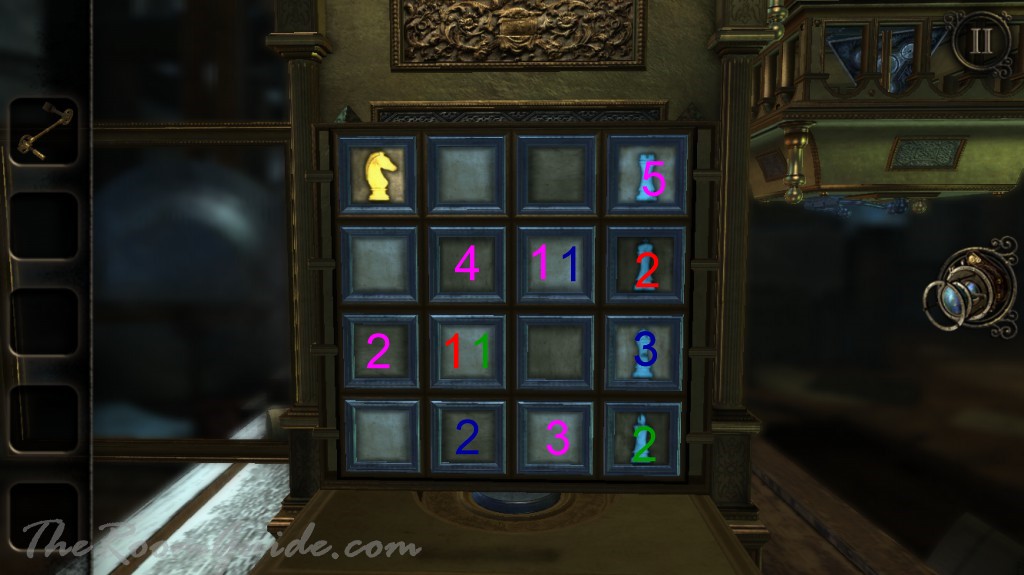
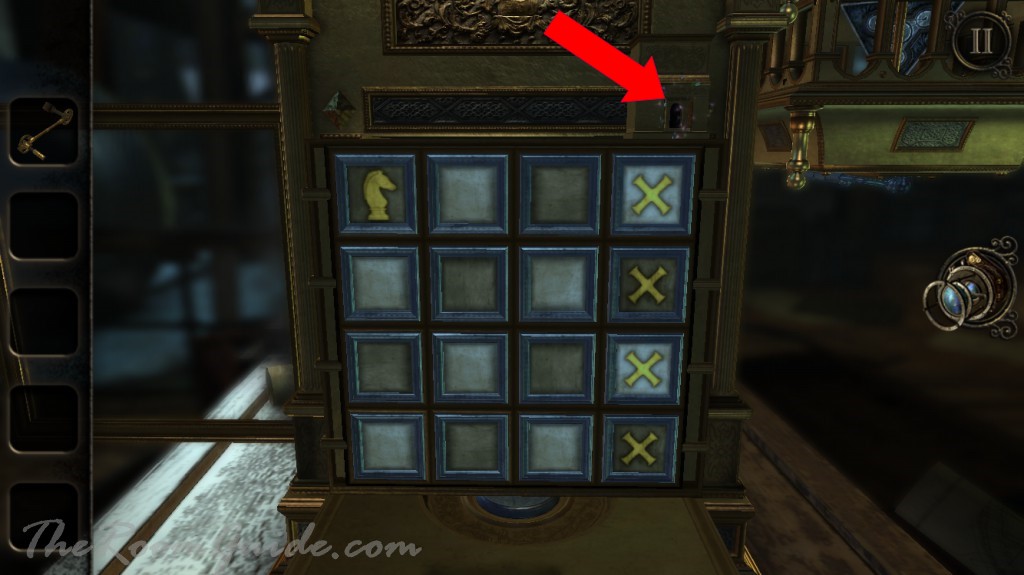
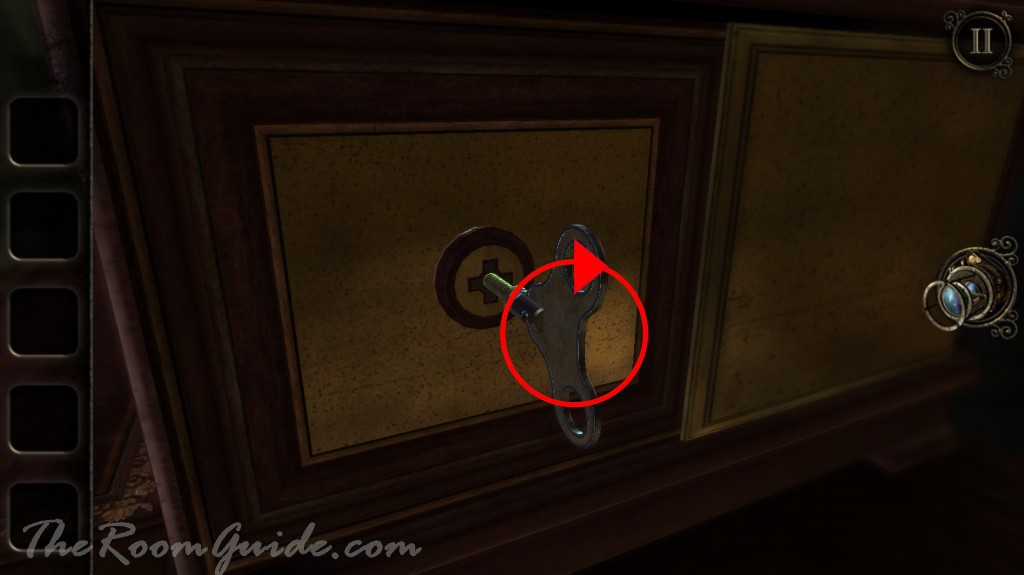
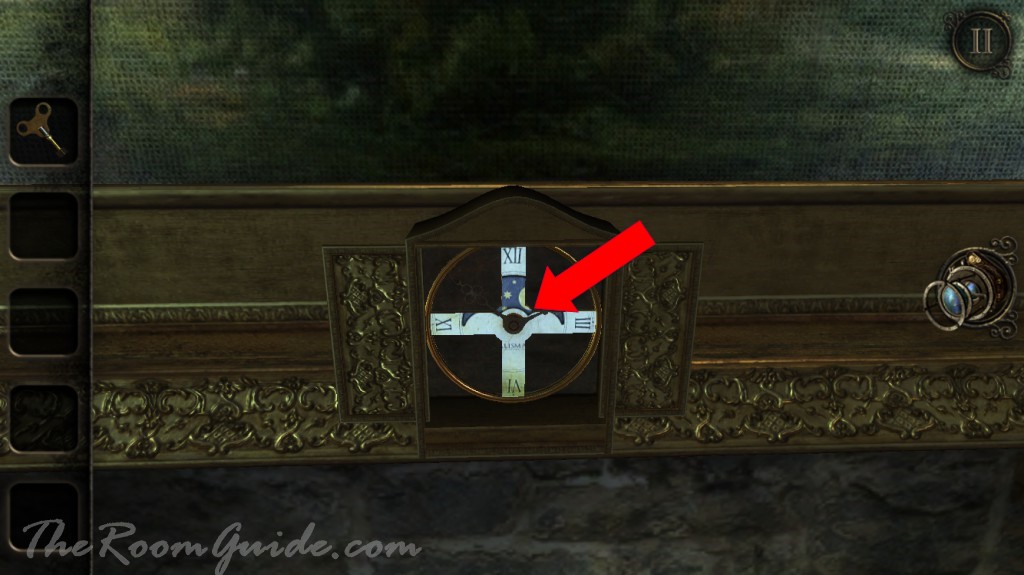
Go back to the gold box. Insert the clock face. A chess puzzle will appear. Move the knight piece (yellow) on top of the four chess pieces (blue) on the left. Like in real chess, knight piece can only move diagonally.

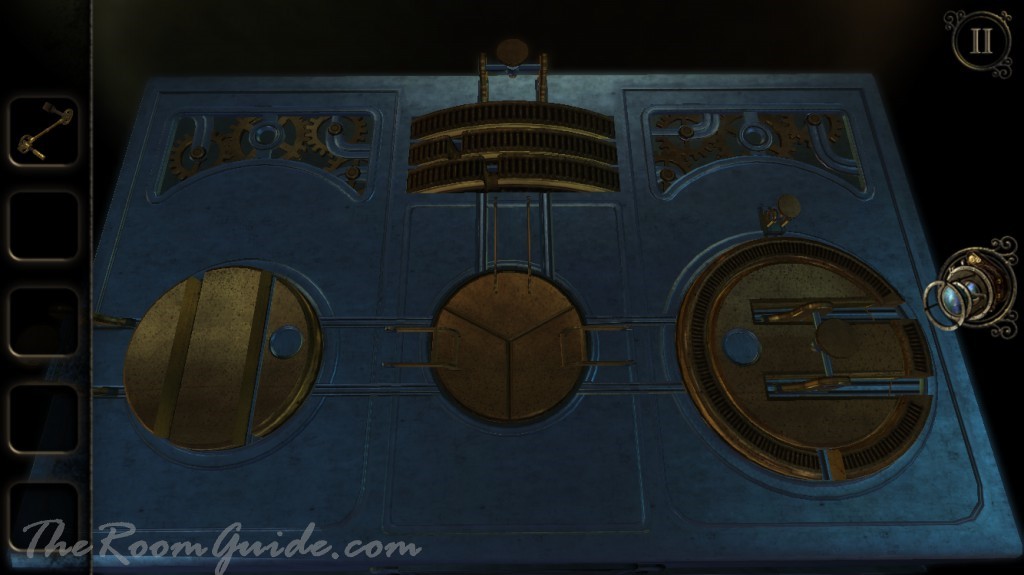
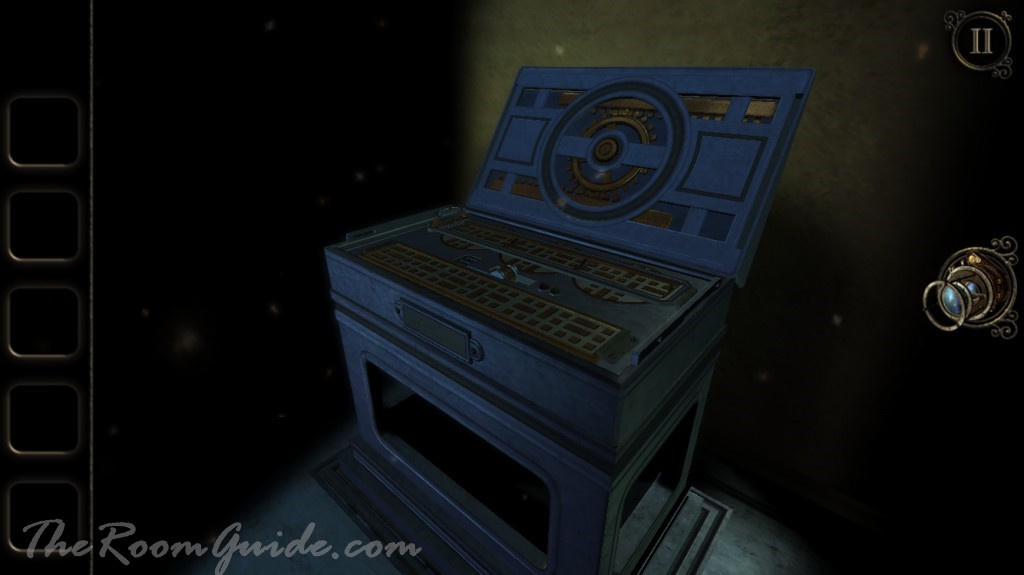
A miniature tower will appear. Put on your eyepiece and enter the tower. Check out the puzzle on top of the blue box. To open the middle round compartment, you have to slide three handles to the middle.
Puzzle Solution:
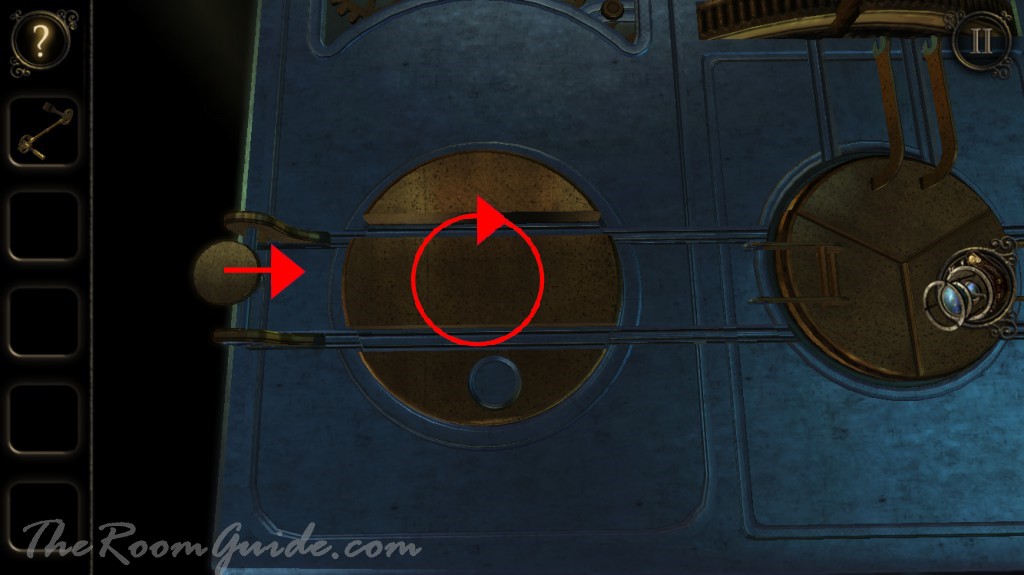
Left: Rotate the dial on the left and slide the handle in place.
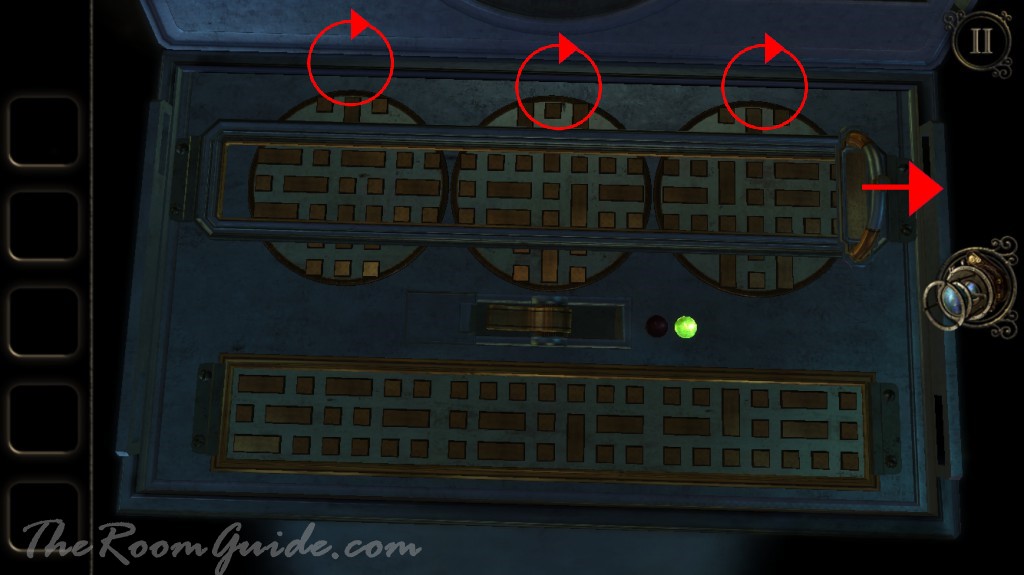
Top: The top consists of three wheels. Rotate the wheels so the indentations on each wheel line up. Move the handle to the middle.
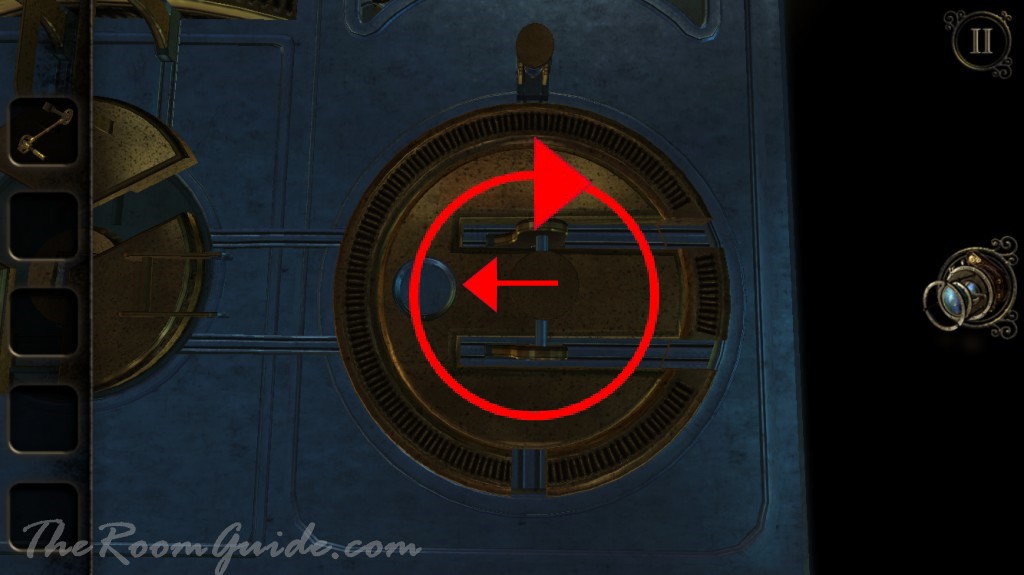
Right: Rotate the outer ring so the tracks line up. Slide the handle. Rotate the inner ring for 180 degree. Rotate the outer ring again. Slide down the notch to hold the outer ring in place. Move the handle to the middle.


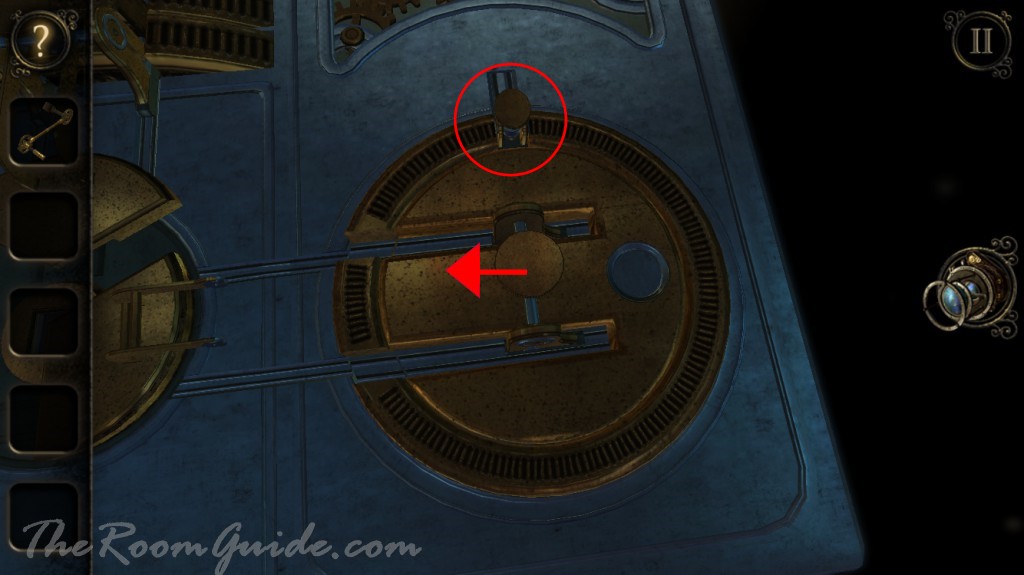
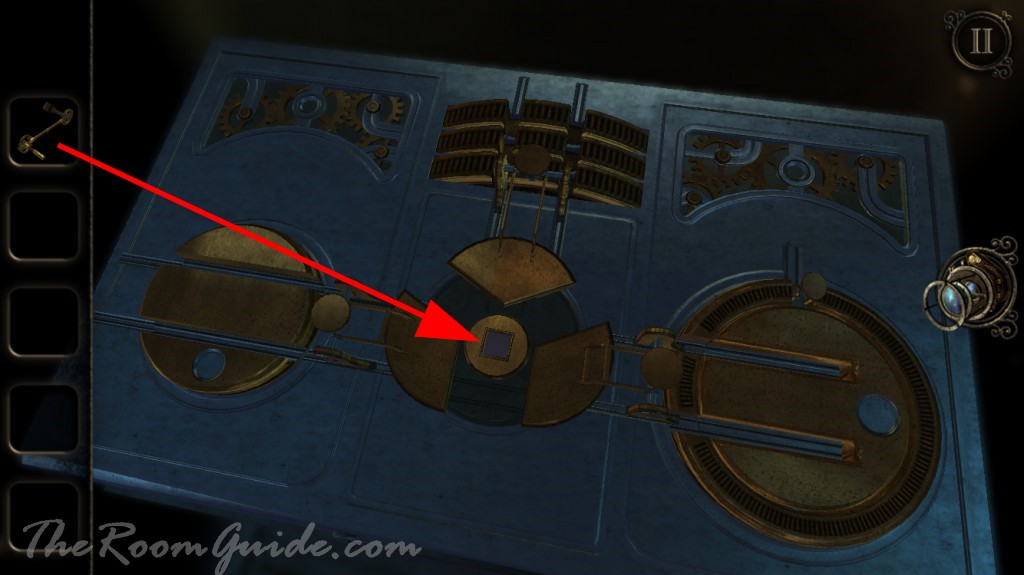
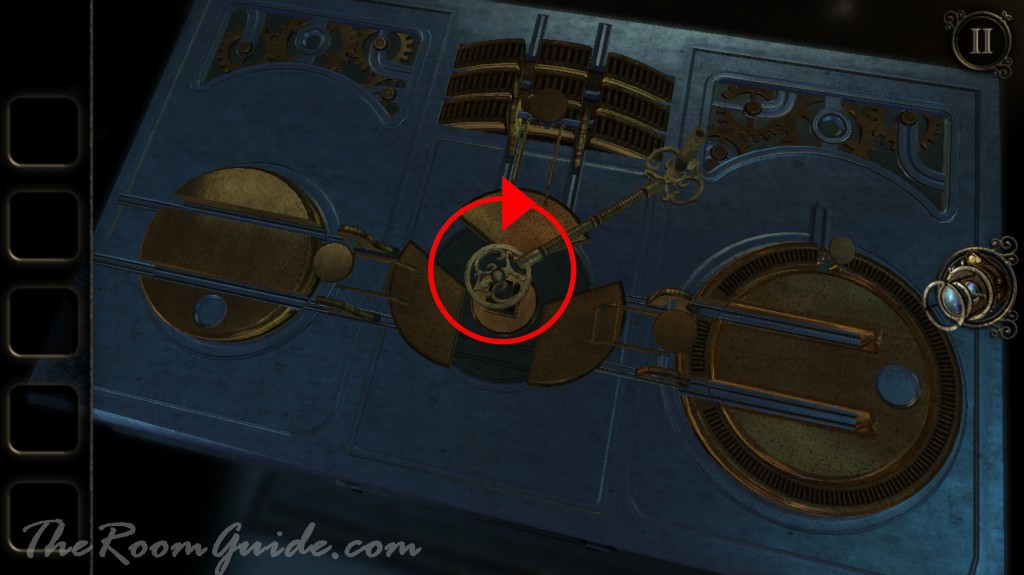
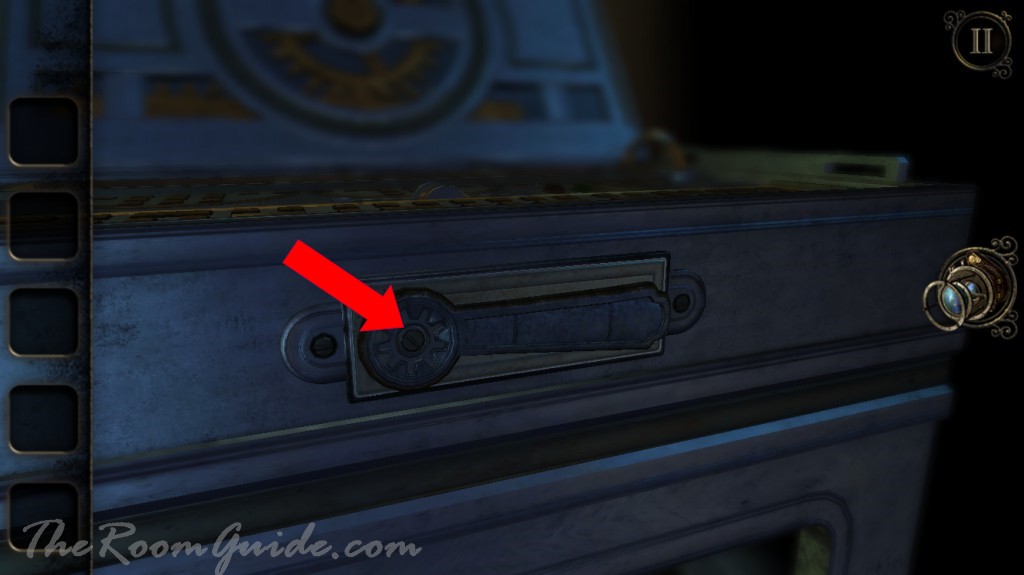
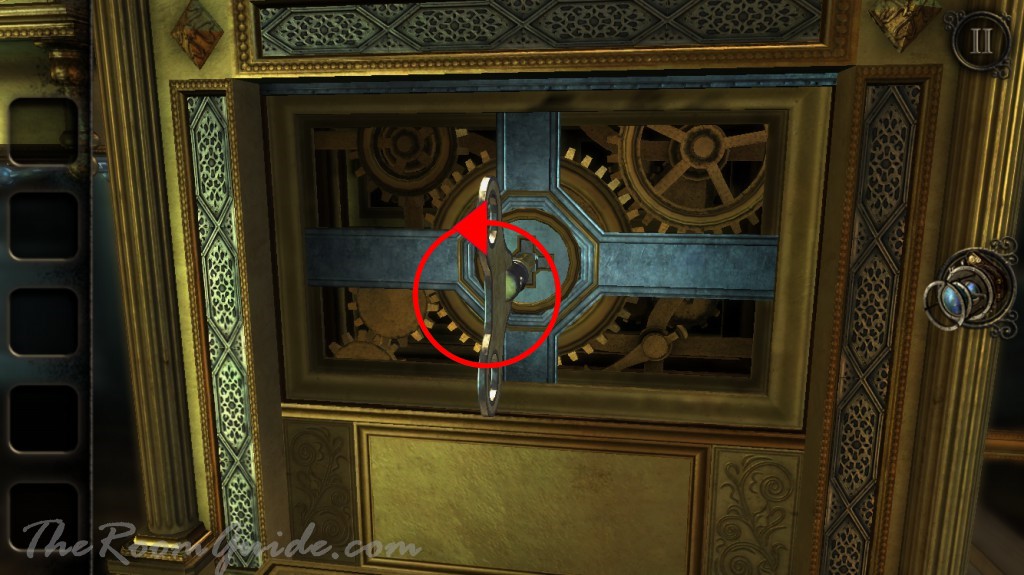
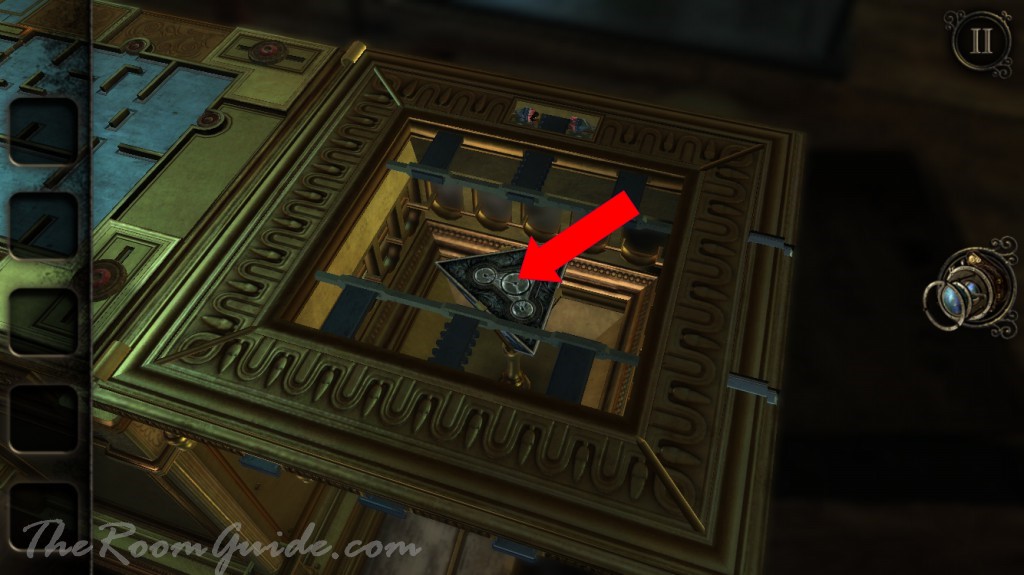
The round compartment contain a square slot. Insert the crank handle. The top of the box will unlock. Check out the puzzle underneath. Rotate the three disks so that the design match the one on the bottom. Turn the switch in the middle. Get a handle with a socket.
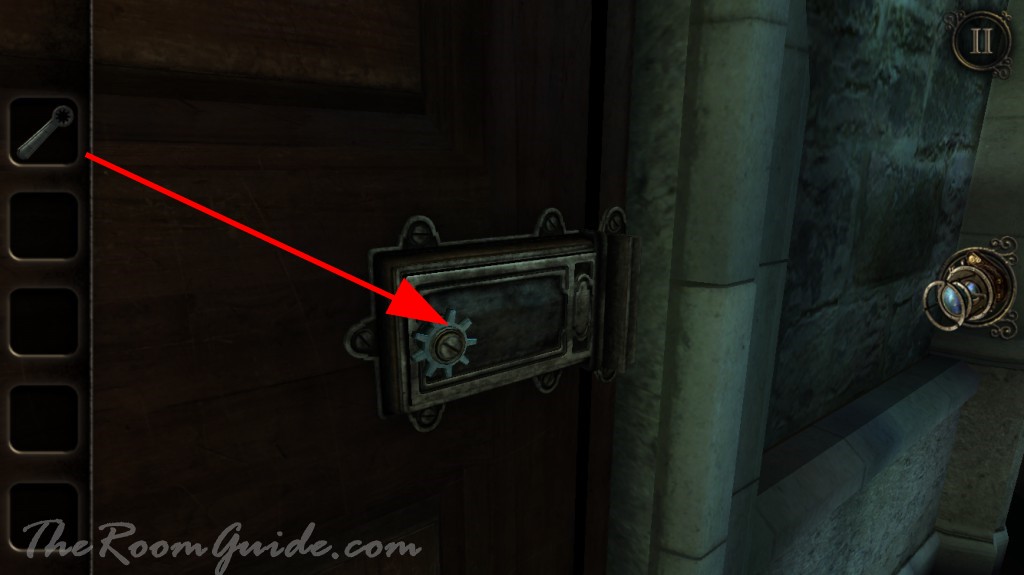
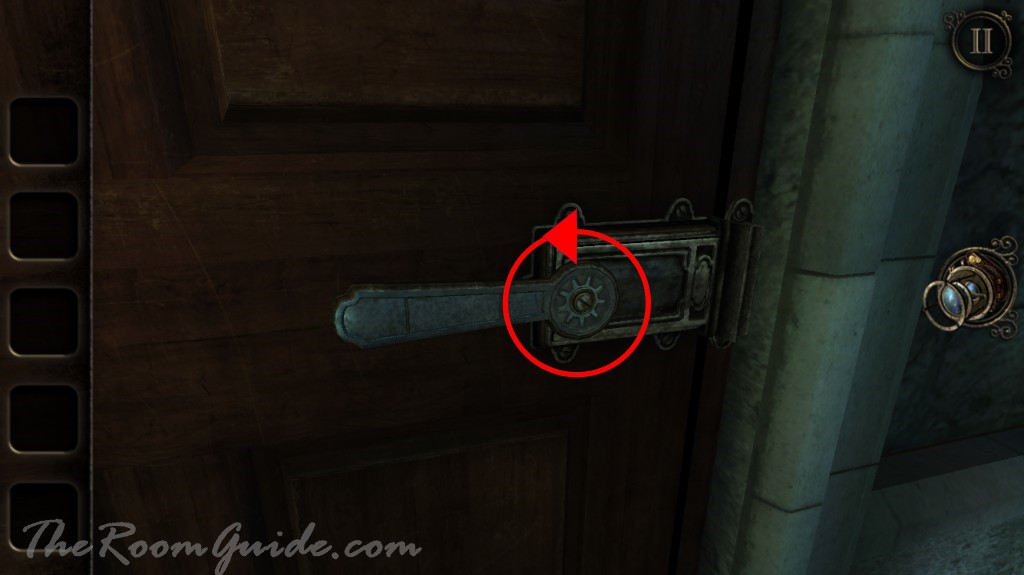
Locate the door to downstairs. Insert handle with a socket on the gear. Turn the handle to unlock the door. Go downstairs.

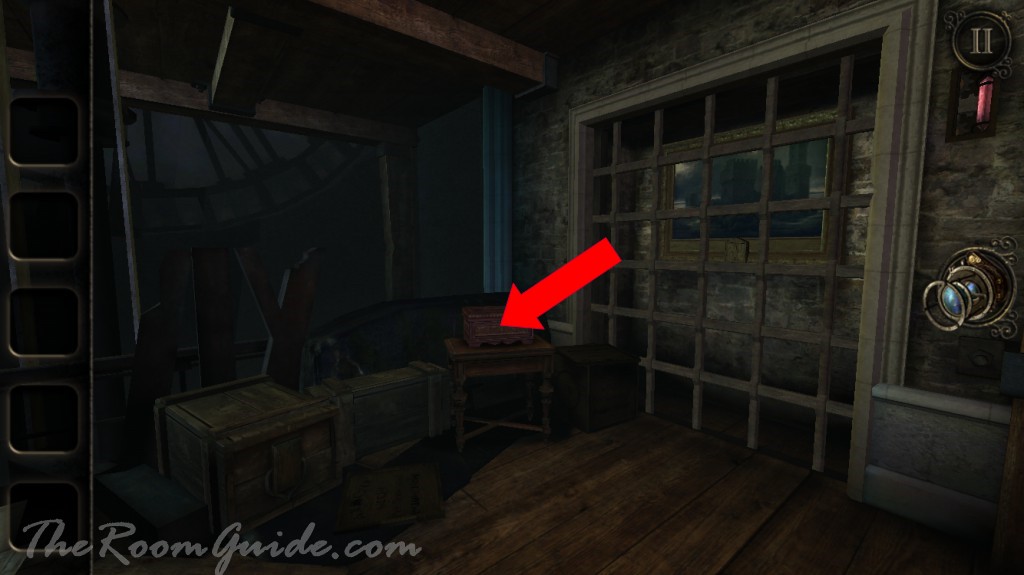
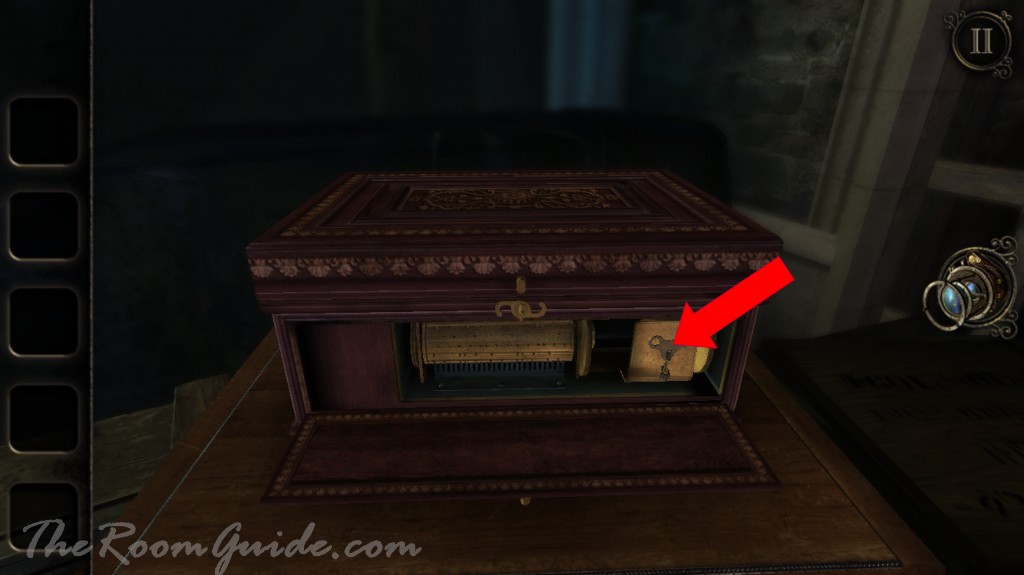
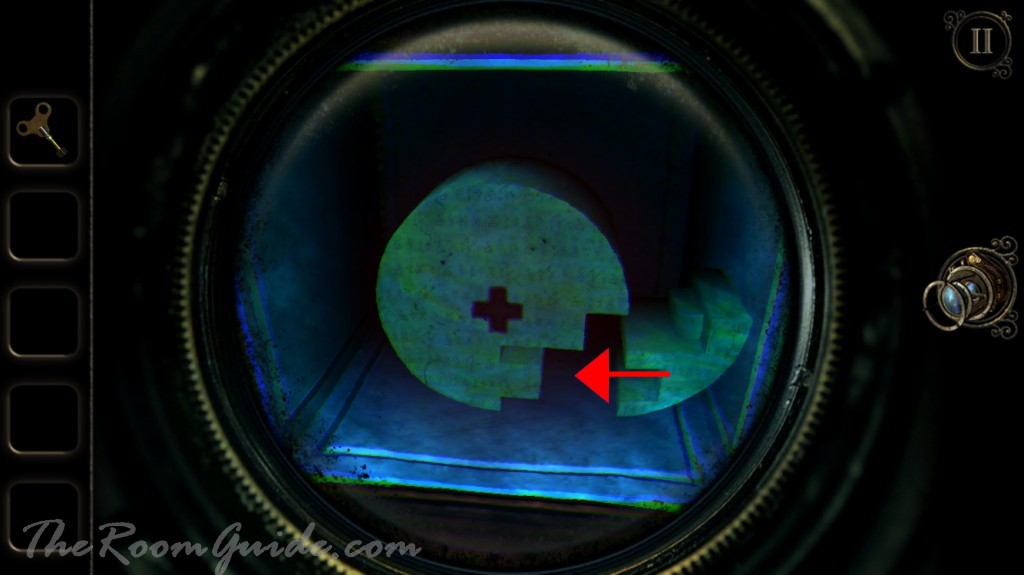
Check out the music box. Undo the switch on the box. Grab the winding key. Go to the left side of the box and put on your eyepiece. Slide the puzzle pieces to complete a circle and the keyhole will reveal. Insert and turn winding key.

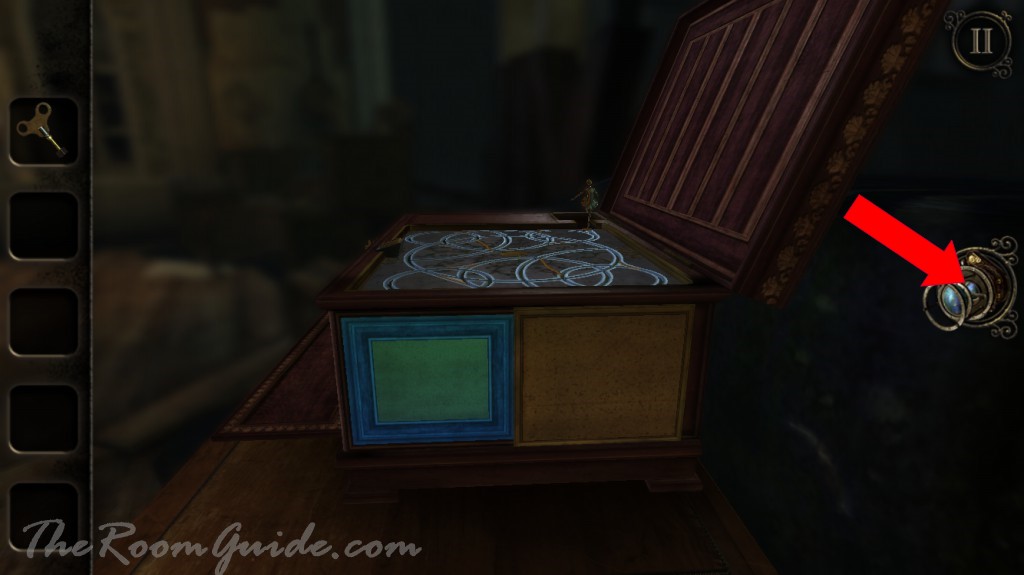

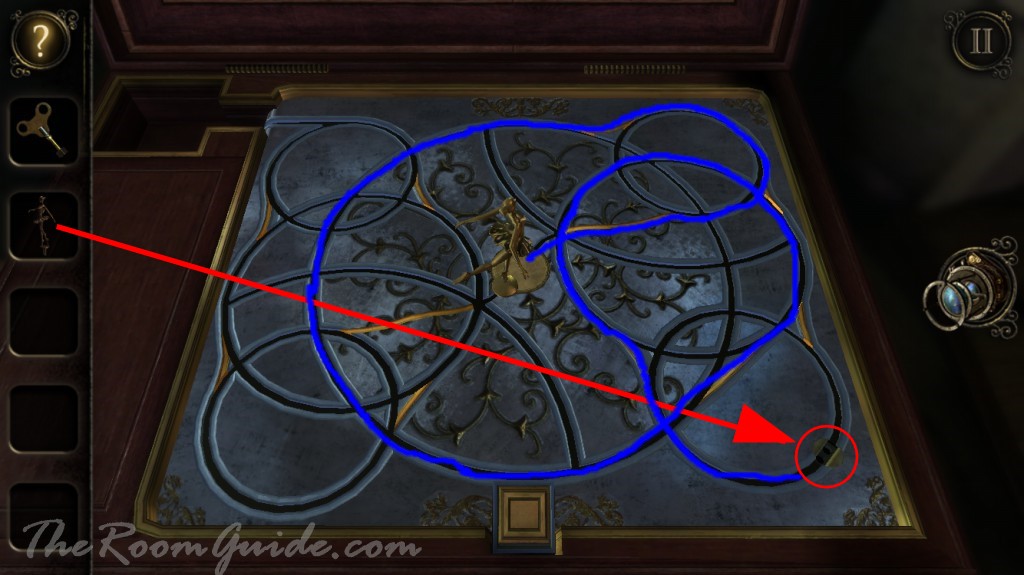
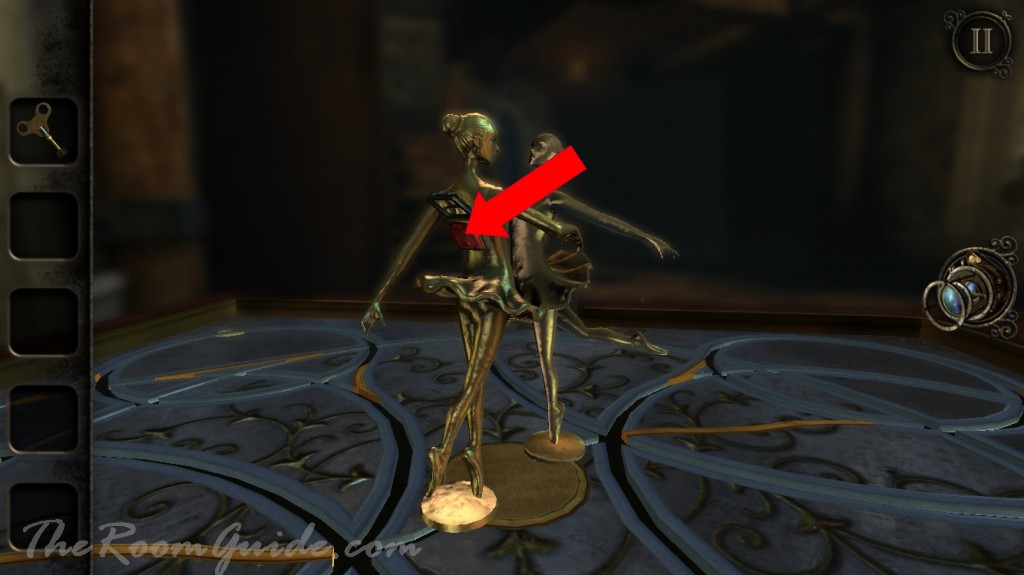
You have to move the ballerina figurine to the center of the box. The path is consist of loops. Use the button at the edge of the box to control connectors between loops.

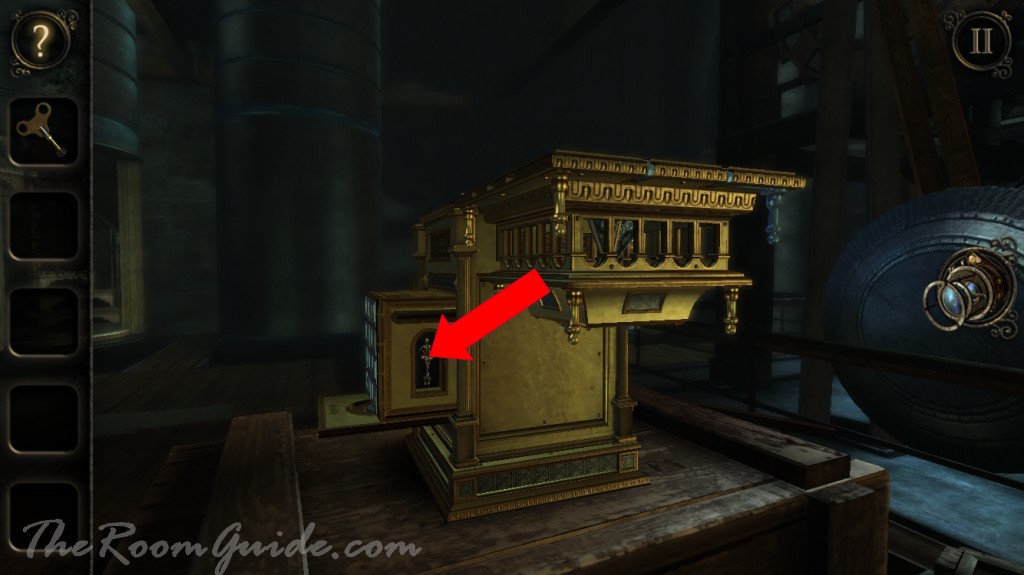
Go back to the gold box. Pick up a second ballerina figurine behind the chess puzzle. Return to the music box. Insert the second figurine. Again, use the button at the edge of the box to control the loop connectors. Once the second figurine reach the center of the box, collect the red gem.
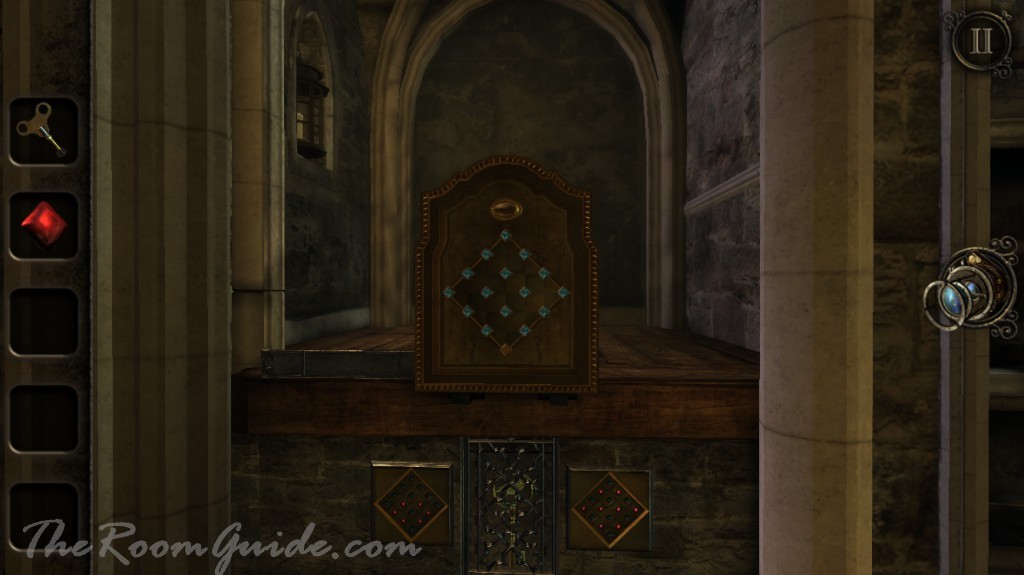
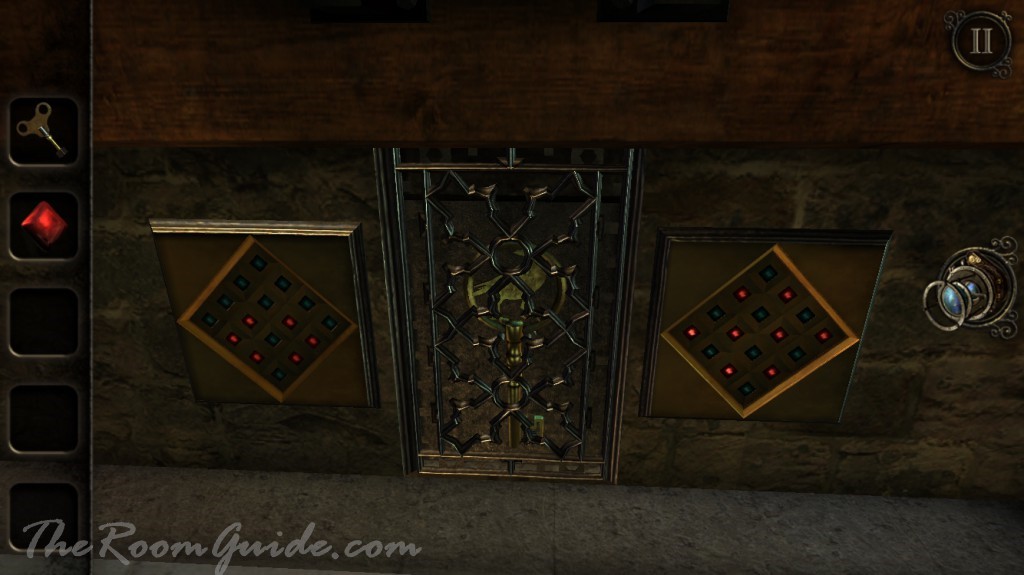
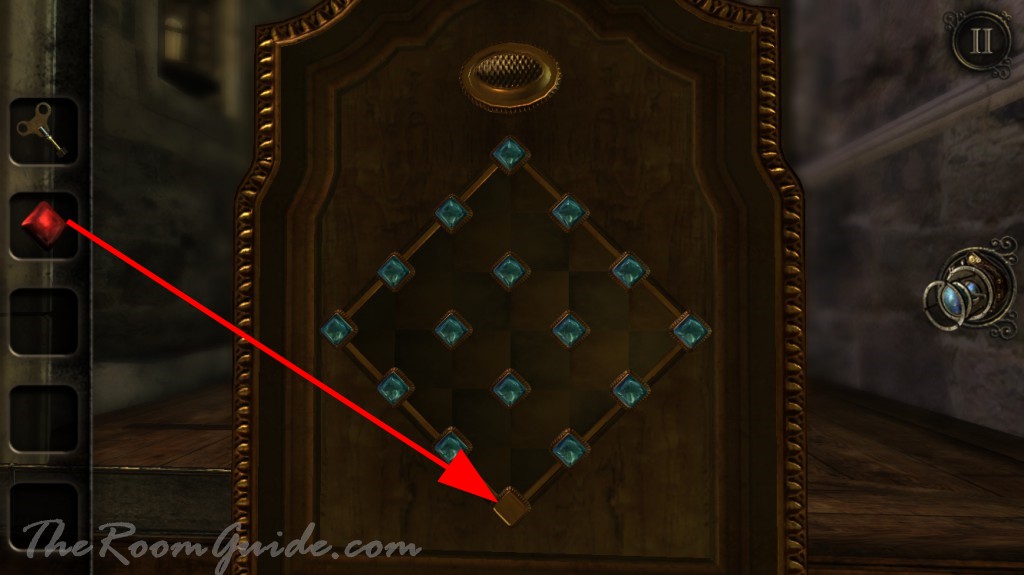
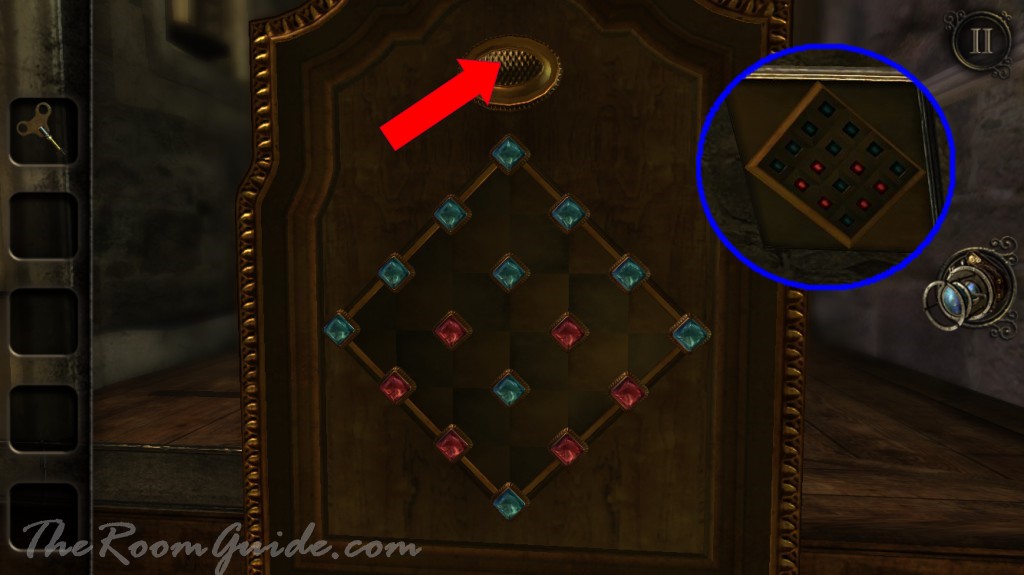
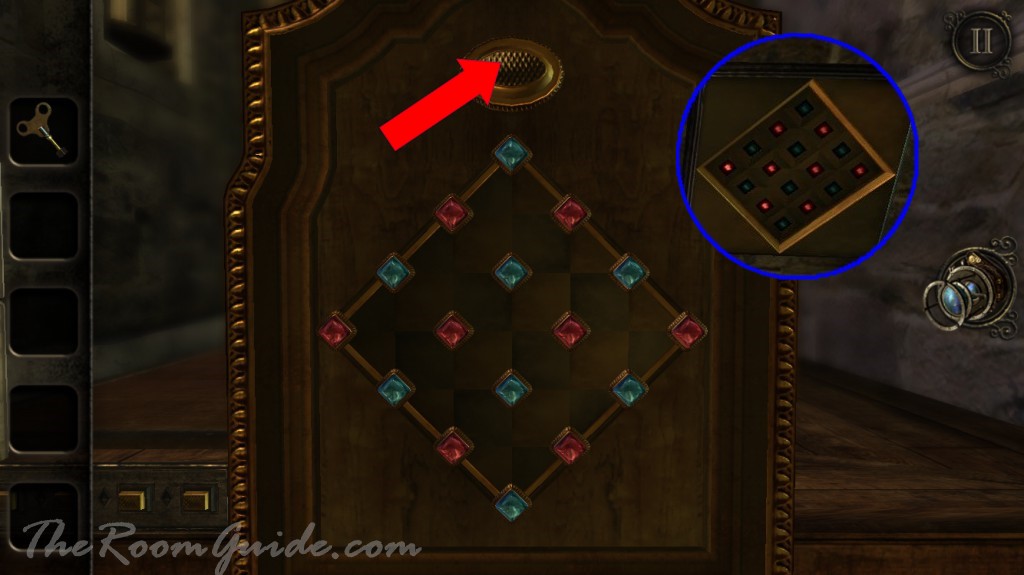
Check out the a board with blue gemstone on the alcove. Notice two sets of gemstone hint at the bottom of the wall. Insert the red gemstone. Tap on the gemstone to change color. Modify the pattern to assemble the hint beneath the board. Press the button at the top of the board once complete. Repeat for the second set.
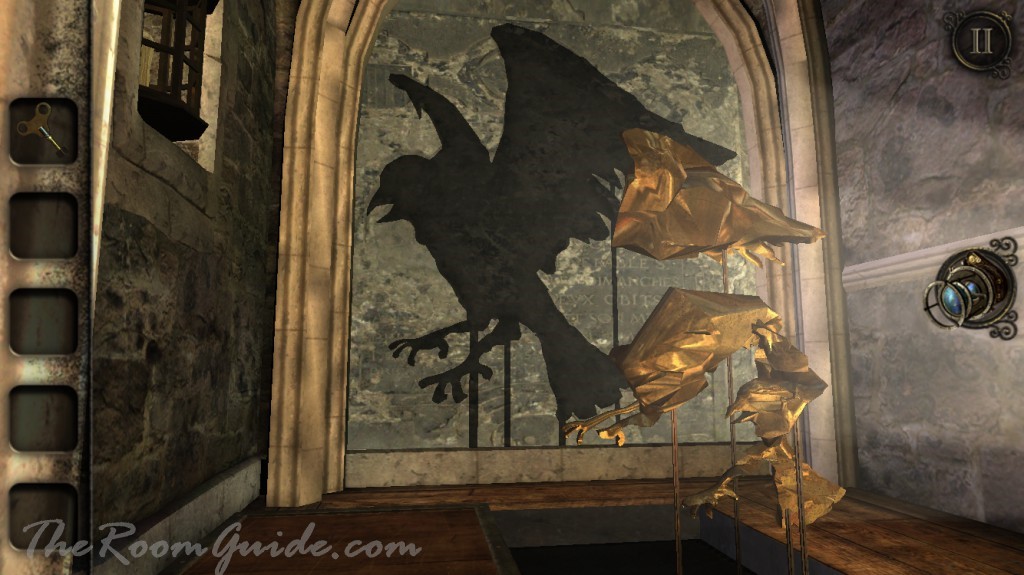
A group of metal pieces on sticks will appear. Use the four buttons at the edge of the wall to move the metal pieces until the shadow resembles a crow. Grab the key with a bird emblem.


Go back to the main room. Locate a control box. Insert the key and flip the switch. The bells will start ringing. A second painting will reveal in the downstairs room.
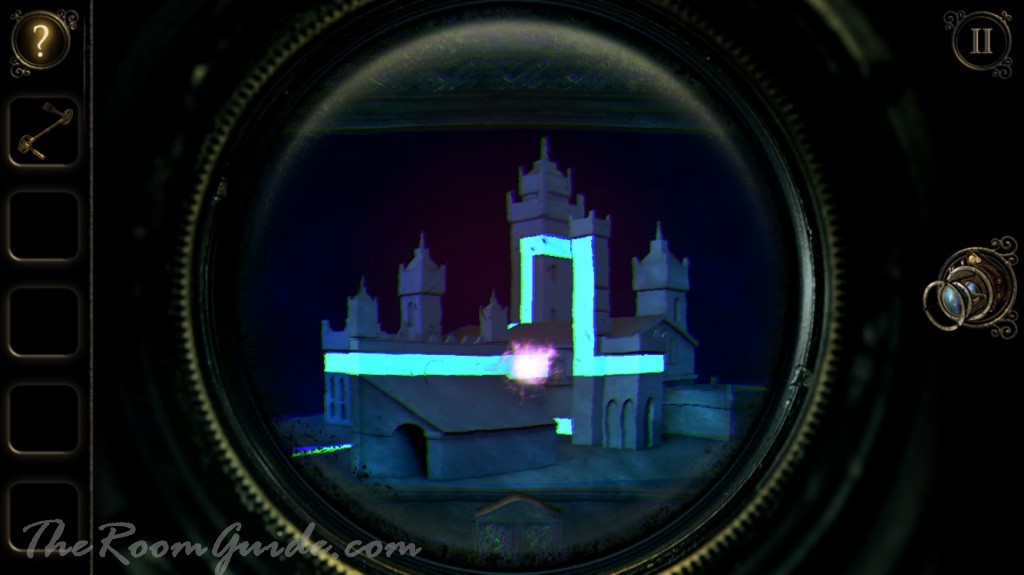
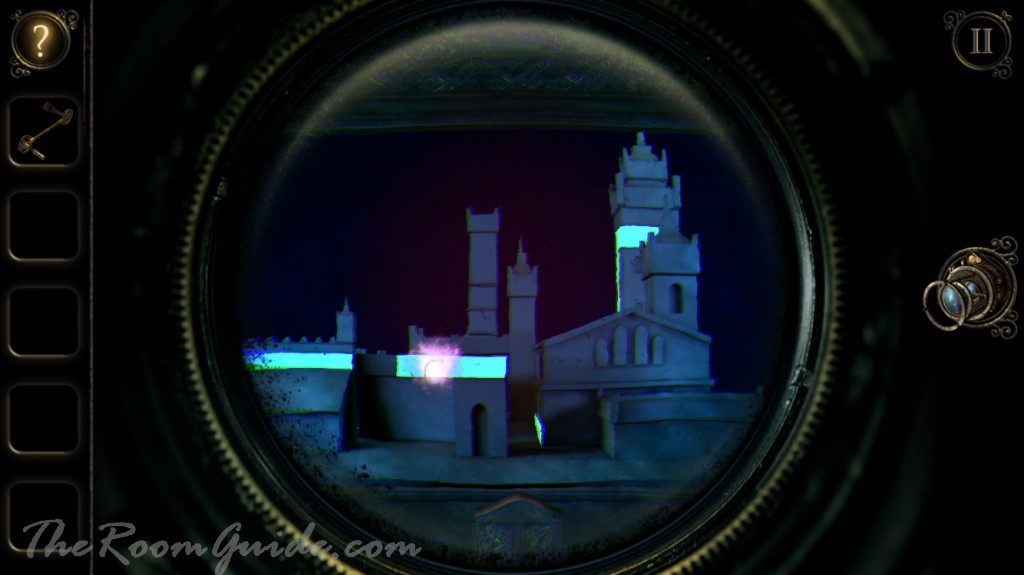
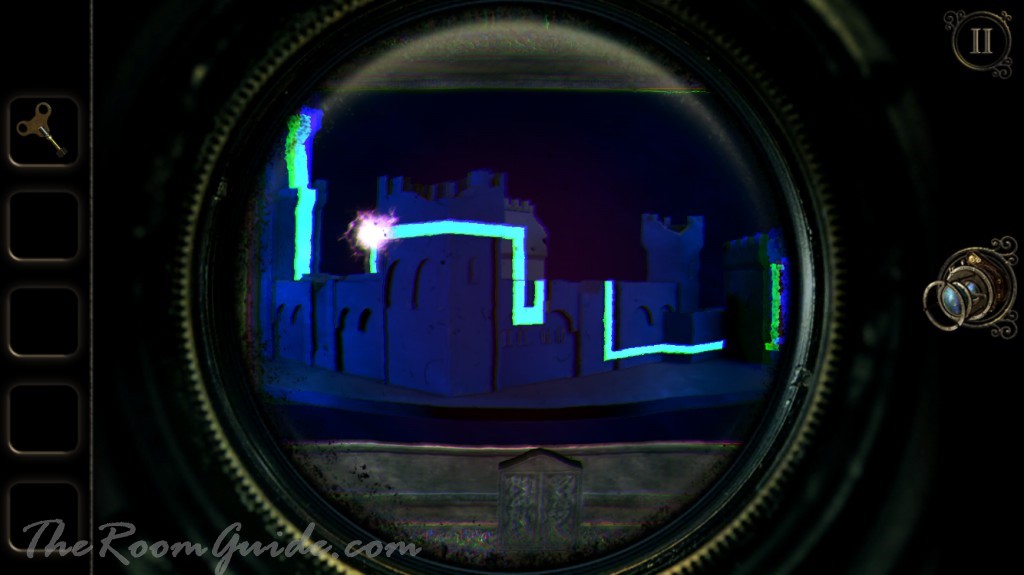
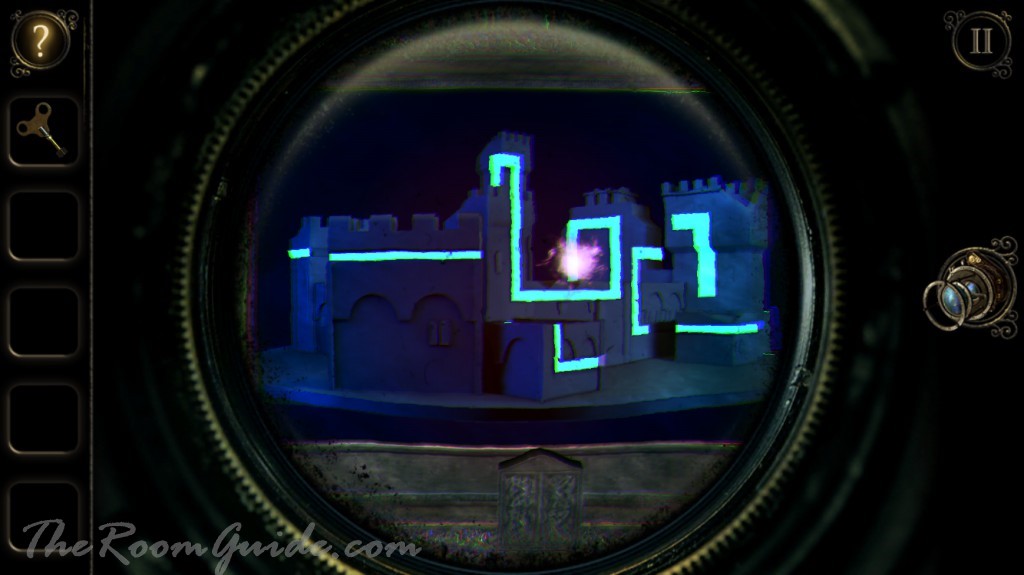
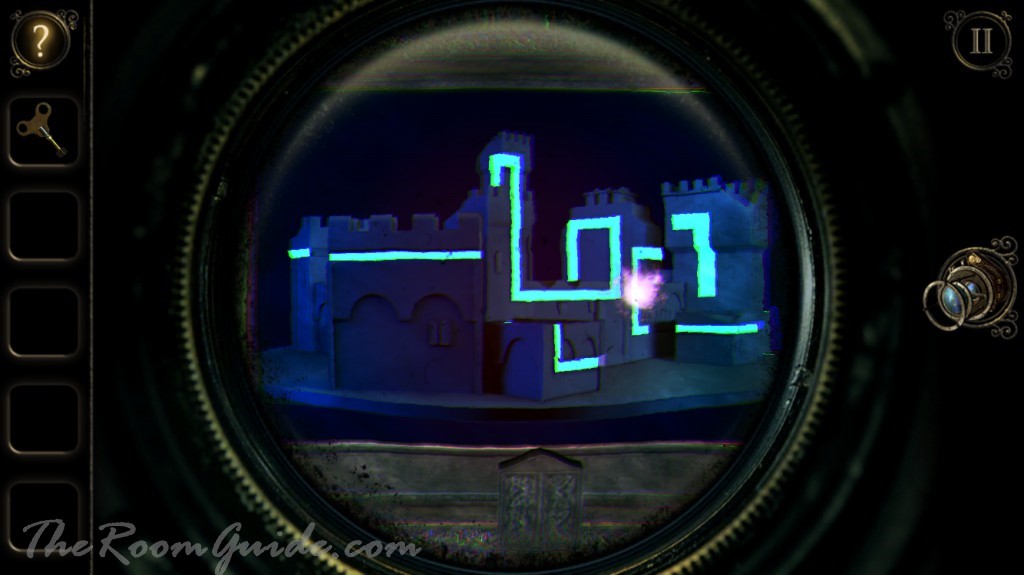
Check out the painting in the downstairs with your eyepiece. Like the first painting puzzle, move the sparkling sliding token. Adjust your eyepiece angle view to reveal the path until you reach the bottom of the painting. Get a hands of a clock.


Go back to the gold box. Insert hands of a clock. A keyhole will appear. Insert the winding key. Get the pyramid and complete the chapter.


Has anyone else gotten stuck on the music box? I can’t get the second ballerina to move in the right direction no matter what I do w/the button. It won’t go on the path to the big center circle. Help please!
use youtube to see what to do its what i did
from a nine year old
Yes I was stuck on the music box second ballerina for a few days. I was convinced my button was broken. After watching the pattern of the guides I discovered that if I focused my timing when the ballerina was at the far right I was able to guide her on to the large circle and two moves later she was in the center. Love the challenges of this puzzle!
I can’t seem to get the buttons at the edge of wall to work. I need to get them to move to make a picture of a crow. Don’t know what I am doing wrong.
The second ballerina is glitch. I can’t get the button to highlight the lines right. It works sometimes then won’t work, then highlights when im not pressing the button,then nothing again.
I found that all the button does is turn the gold “roadblocks” OFF. There is no “ON”. You have to wait about 5 seconds for them to turn back on again. So just plan the ballerina’s route based on removing the roadblocks rather the adding them.
For those struggling to open / unlock the gate on the second painting: After getting the crow out of the cage, you have to go back UPSTAIRS to where the first painting is. An animation will play out where the crow lands on a bell, and that is what finally opens / unlocks the gate to the second painting.
I am having a issue that I did the control box with the key and nothing has happened the gate didn’t open for the painting at the bottom of the stairs.