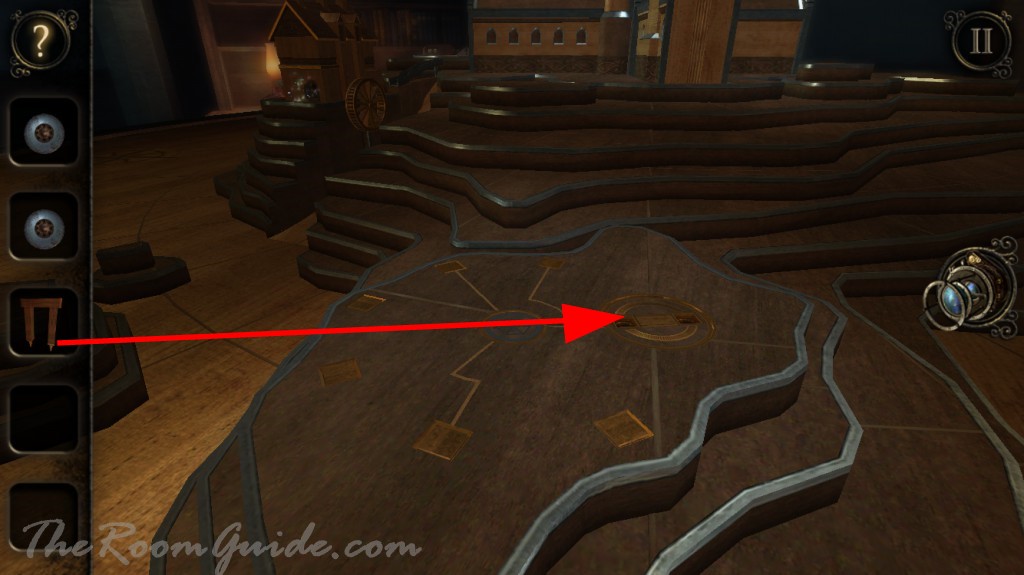
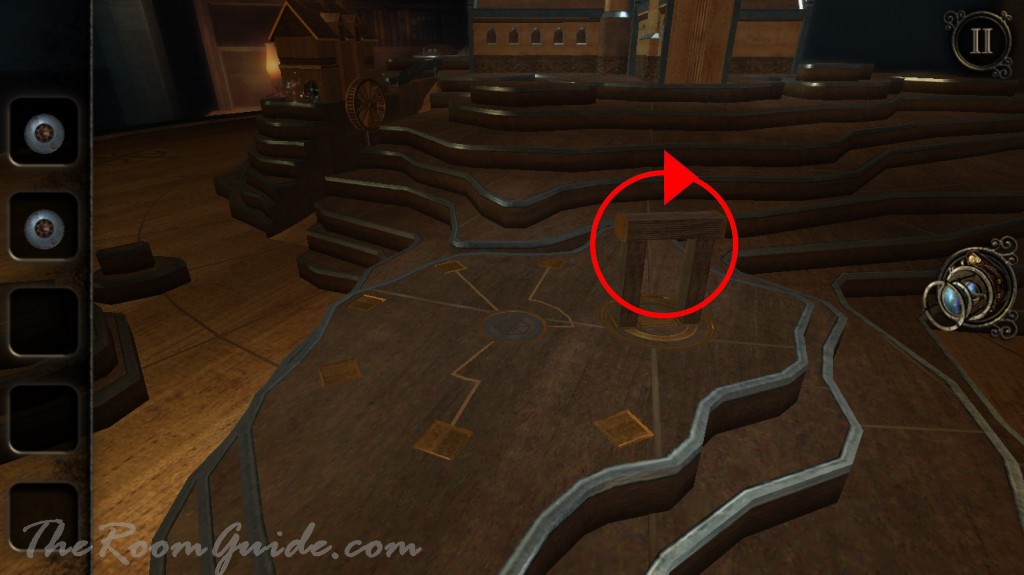
Locate six squares surround a blue circle on the table. Insert wooden arch into the circular panel with two sockets. Turn the arch. Six stone pillars will appear. Put on your eyepiece and enter the archway.


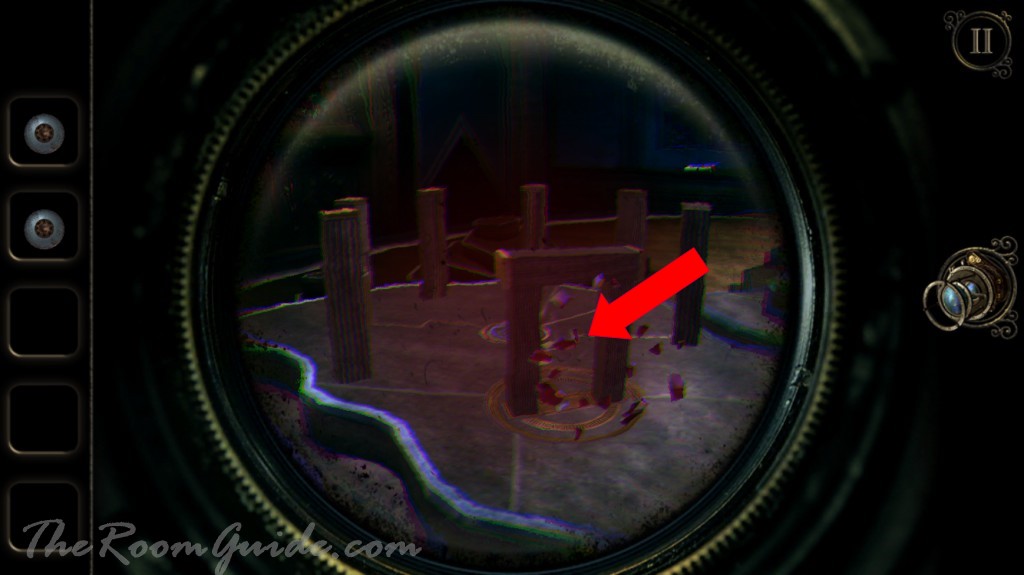
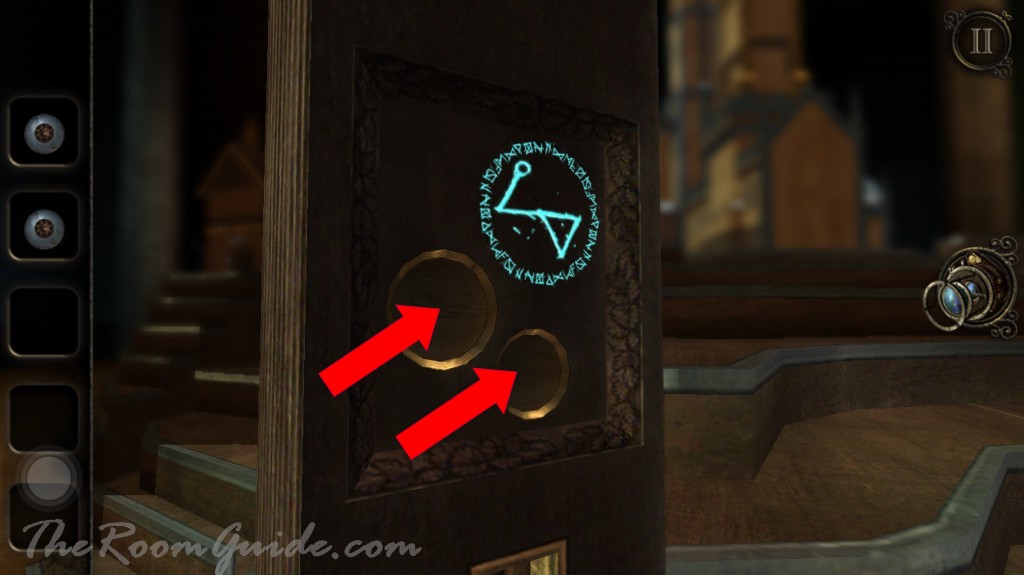
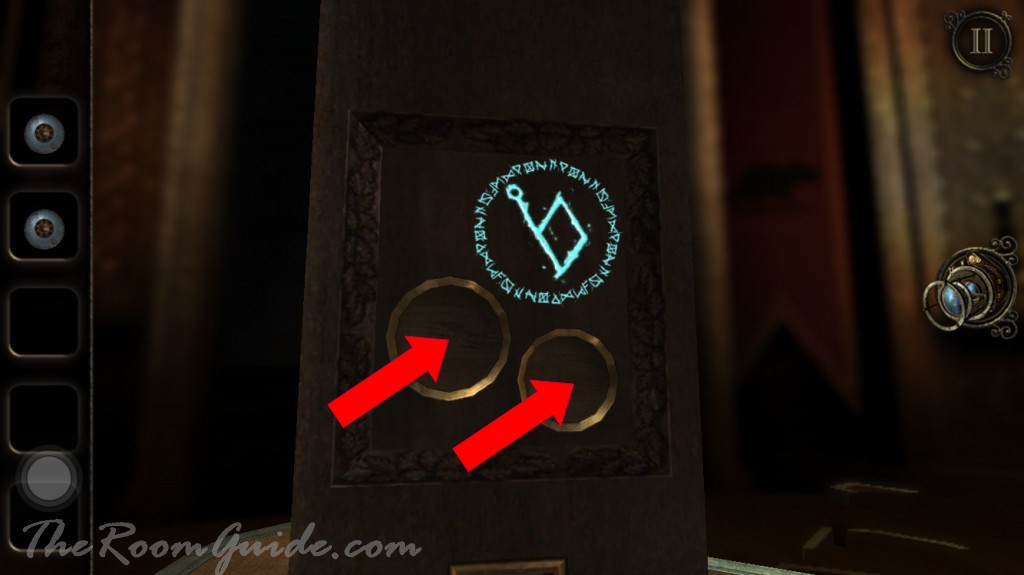
Notice three pillars have pressure sensitive panel with two circles on top. A symbol will appear when you press and hold the two circles at the same time. Do this for all three pillars.

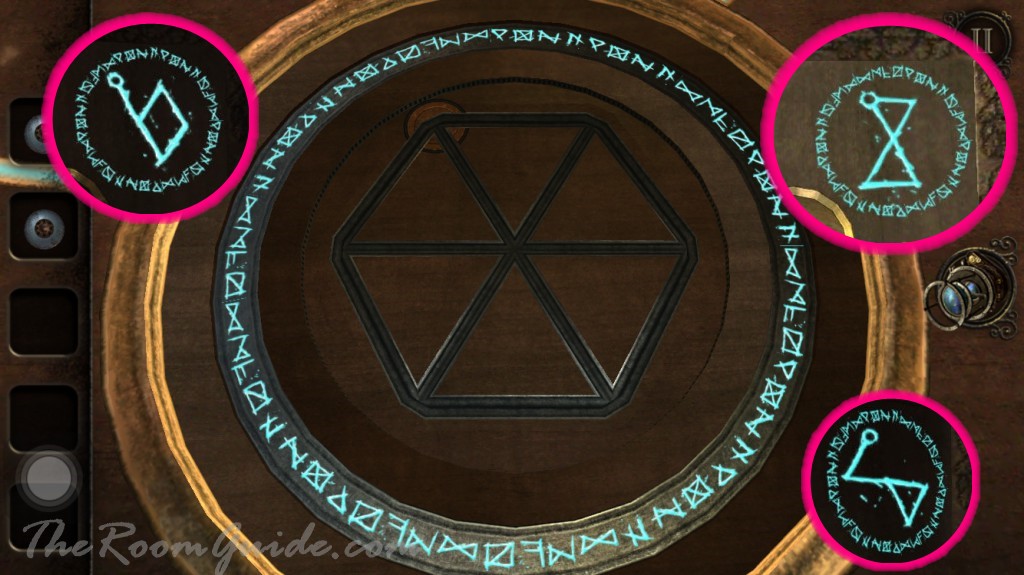
Check out the circle at the center of the stone circle floor. The lines illuminate upon touch. Recall the three symbols on the pillars. Trace each symbol into the shape. A tower model will appear.
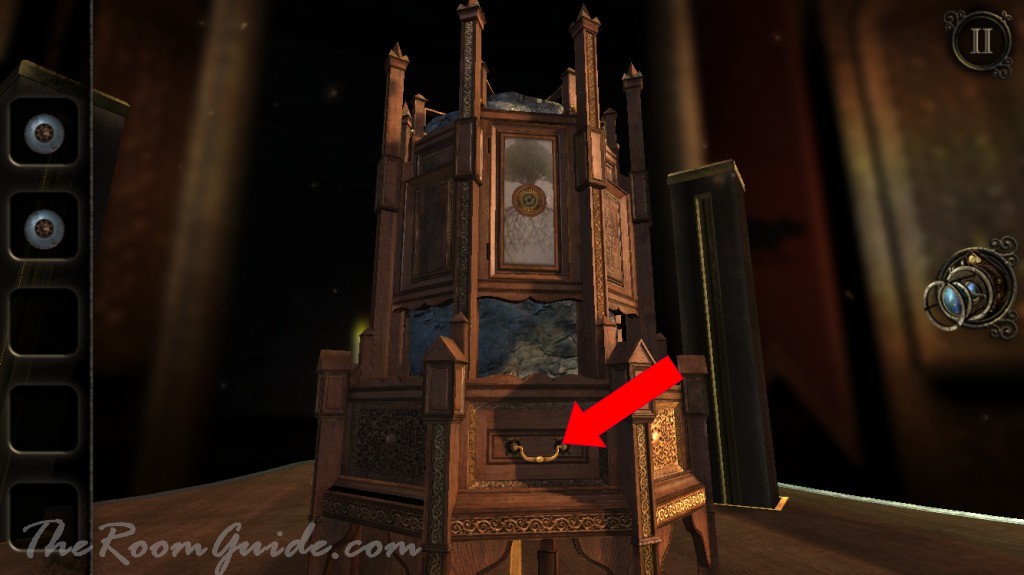
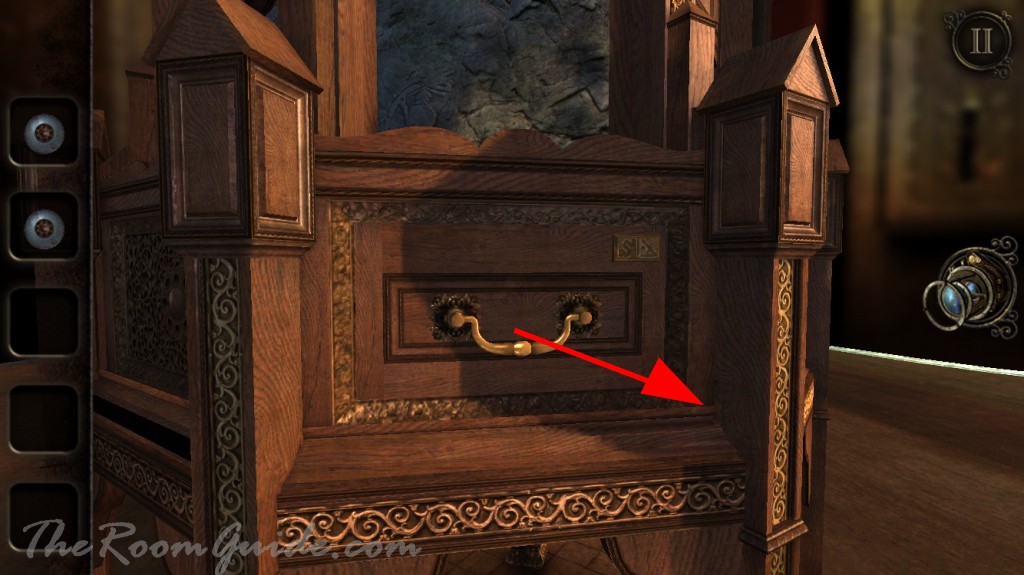
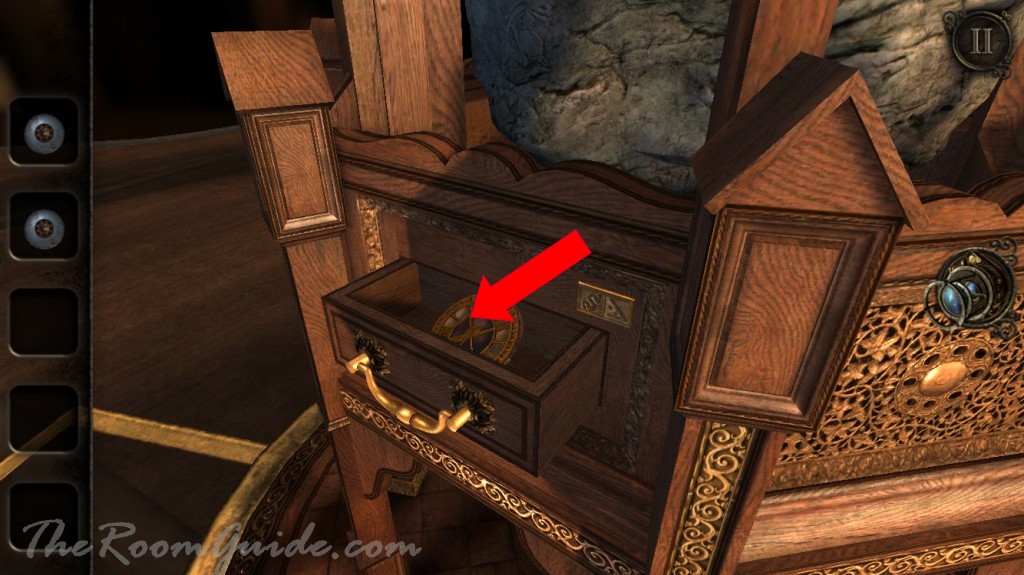
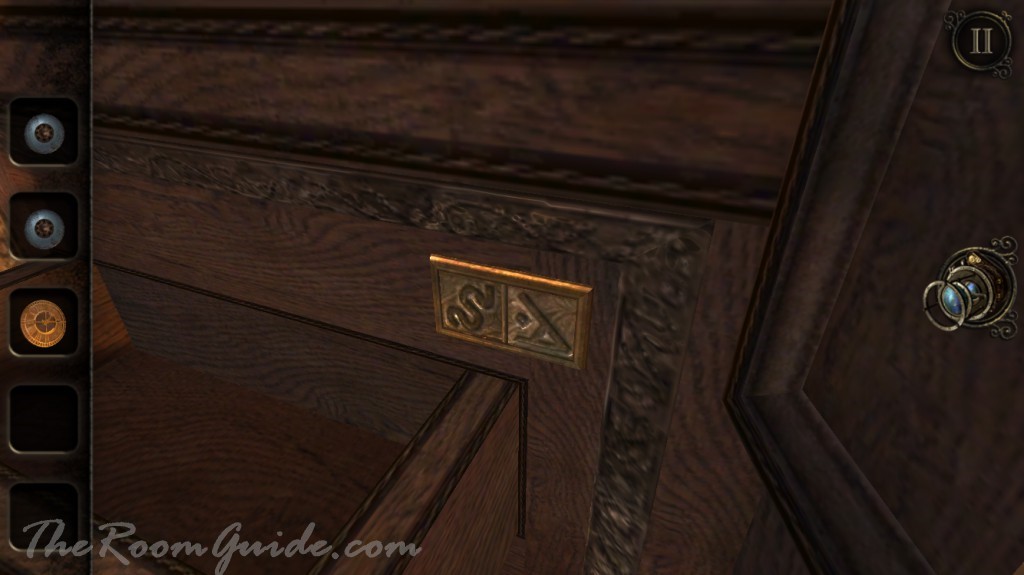
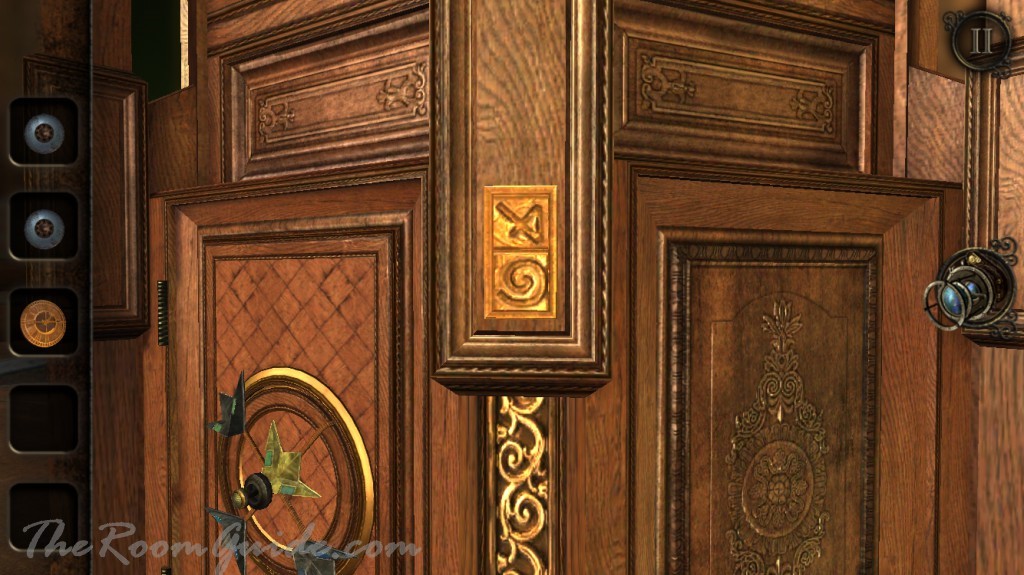
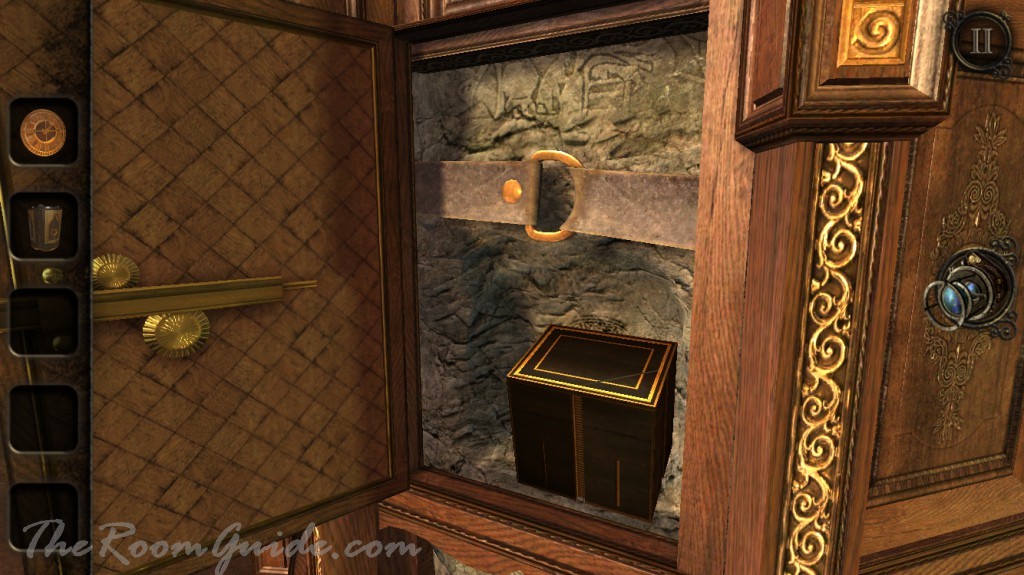
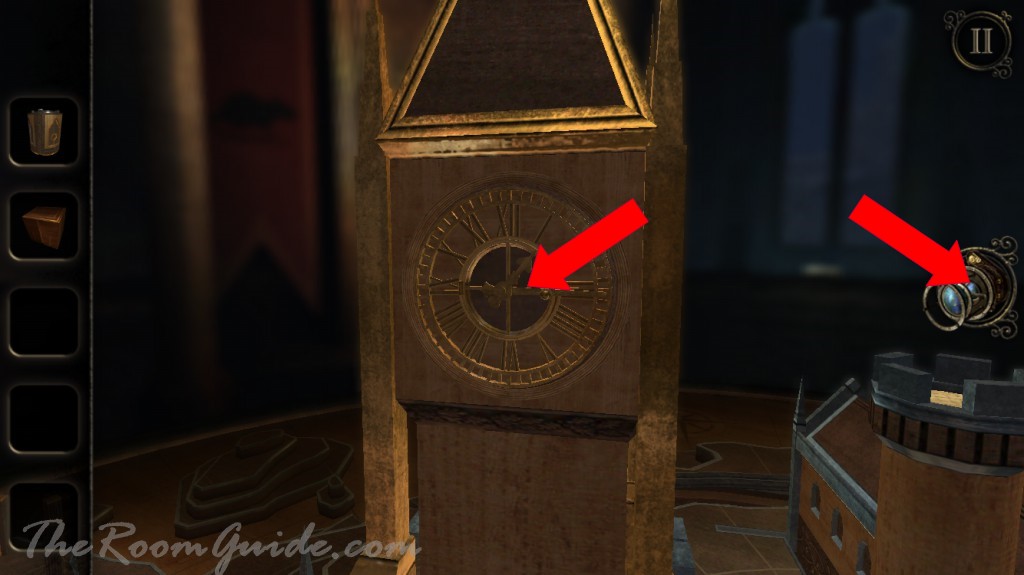
Open the drawer. Get a clock-face. Notice a set of two symbols is carved next to the drawer. Similar set of symbols can be found on one of the columns.
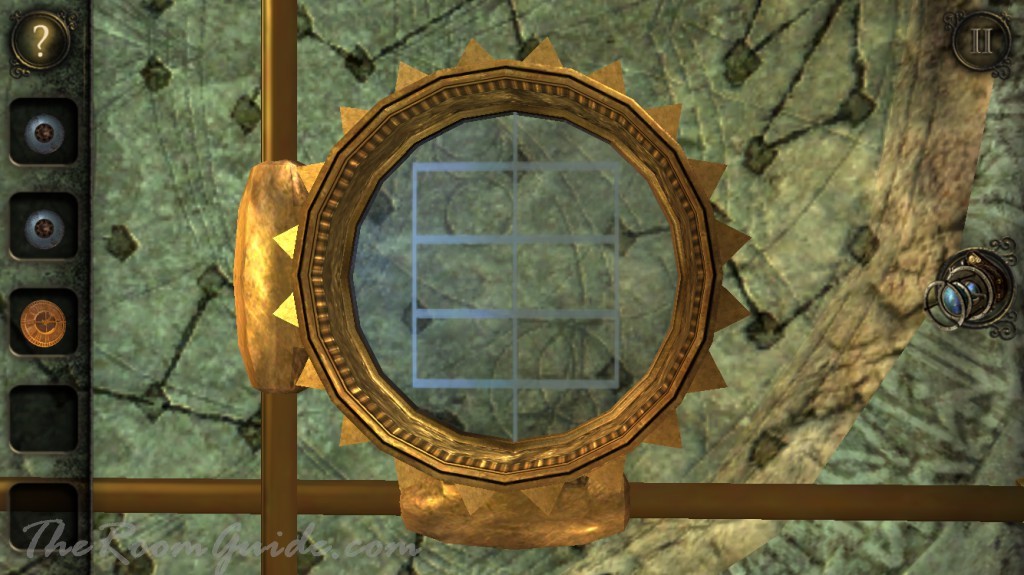
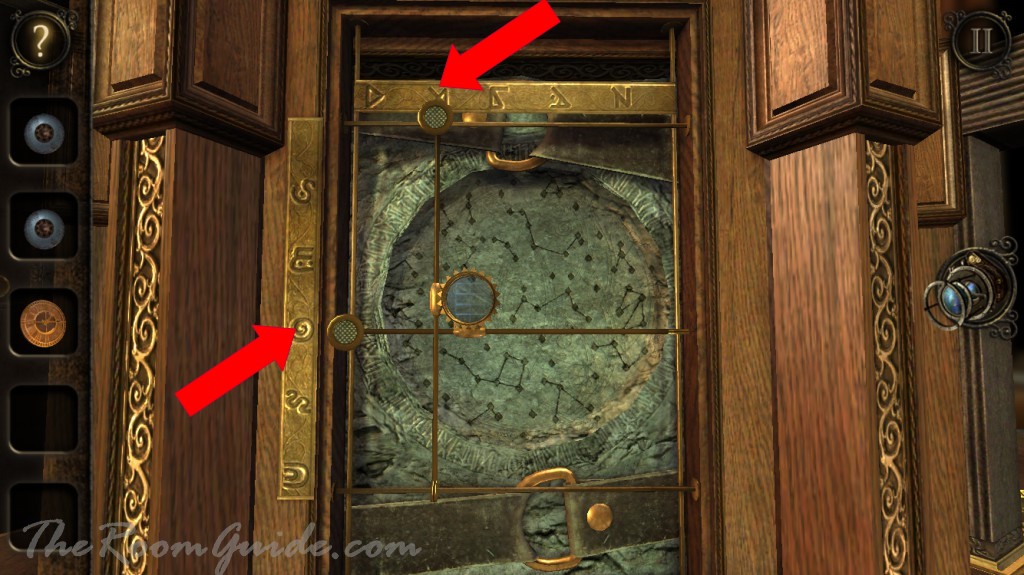
Locate an astrology map with symbols on the top and on the left. Two metal bars are attached to a circle with grid mark. Use the two sets of symbols as lookup. Slide the metal bars to the correct symbols. Then look into the circle. Obtain two sets of star locations.


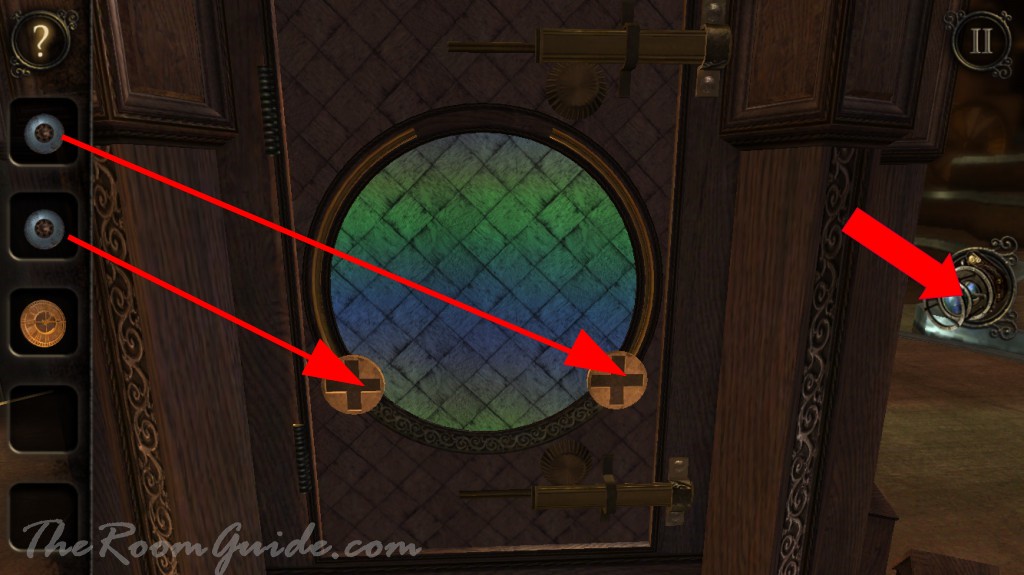
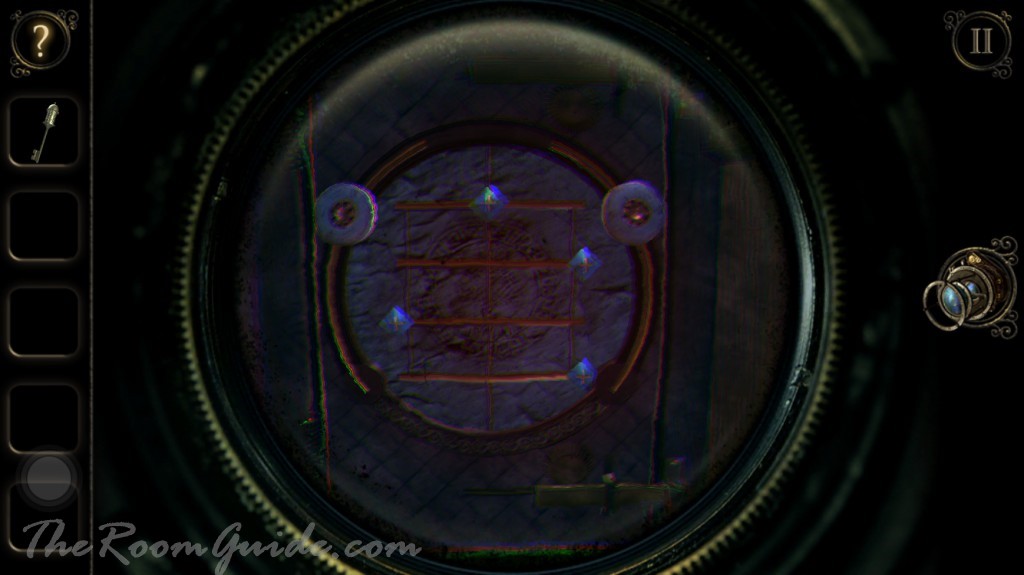
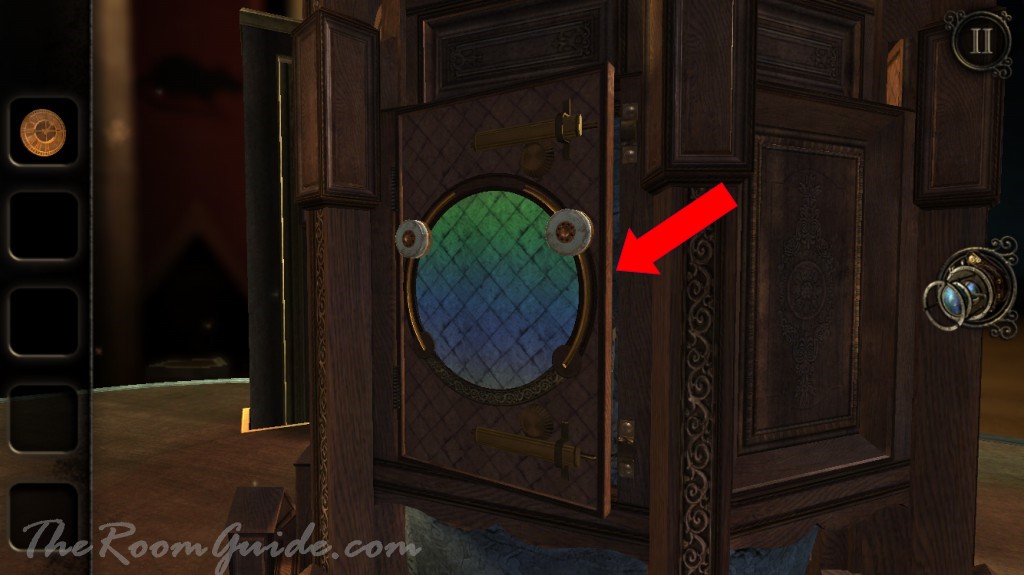
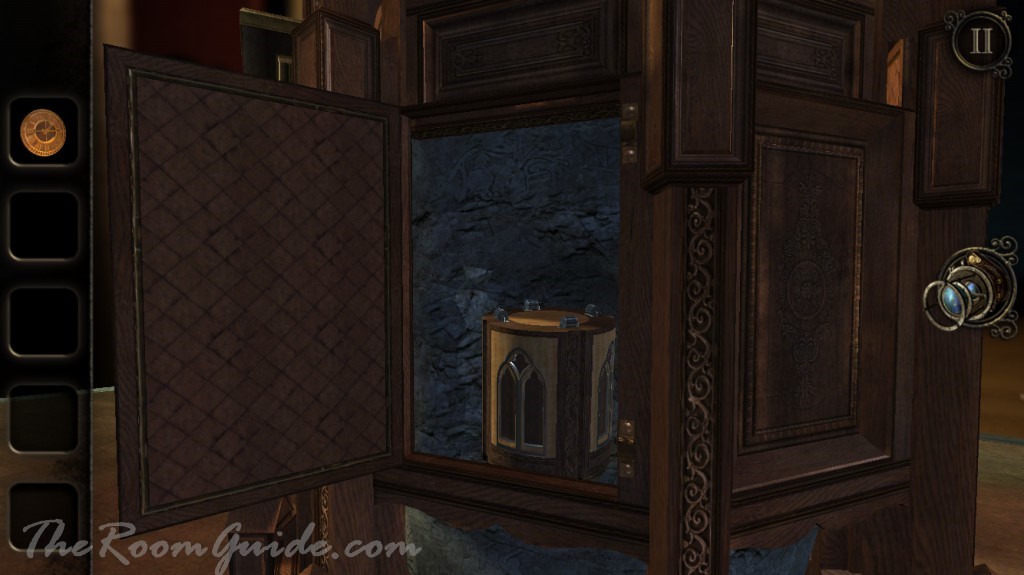
Go over to a blue-green circle. Place two magnet on the circle. Look at the circle with eyepiece. A similar grid mark as the astrology map will appear. Slide the magnet to match the star locations. The latch will undo and panel will open. Grab the cylinder wooden model piece.

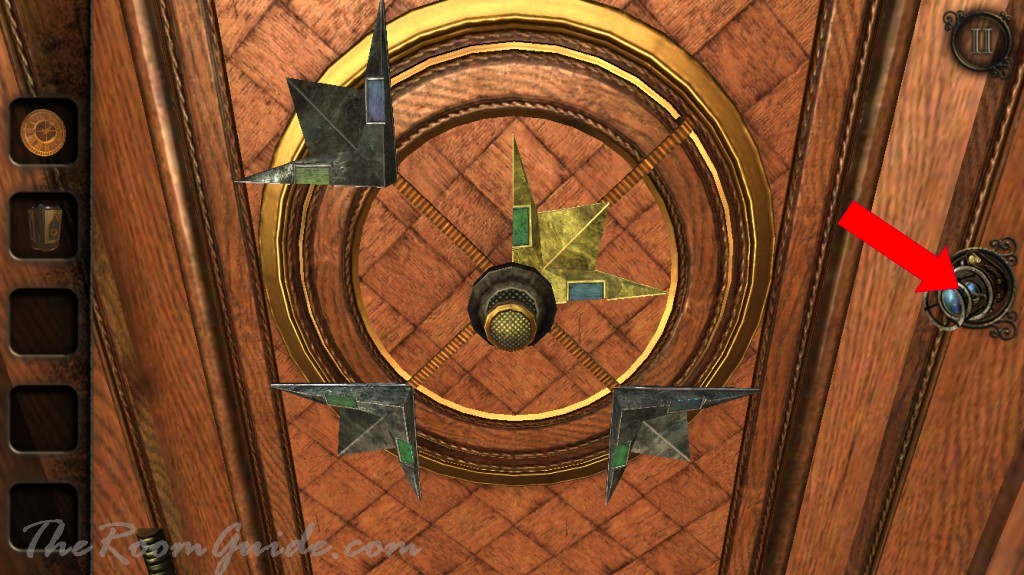
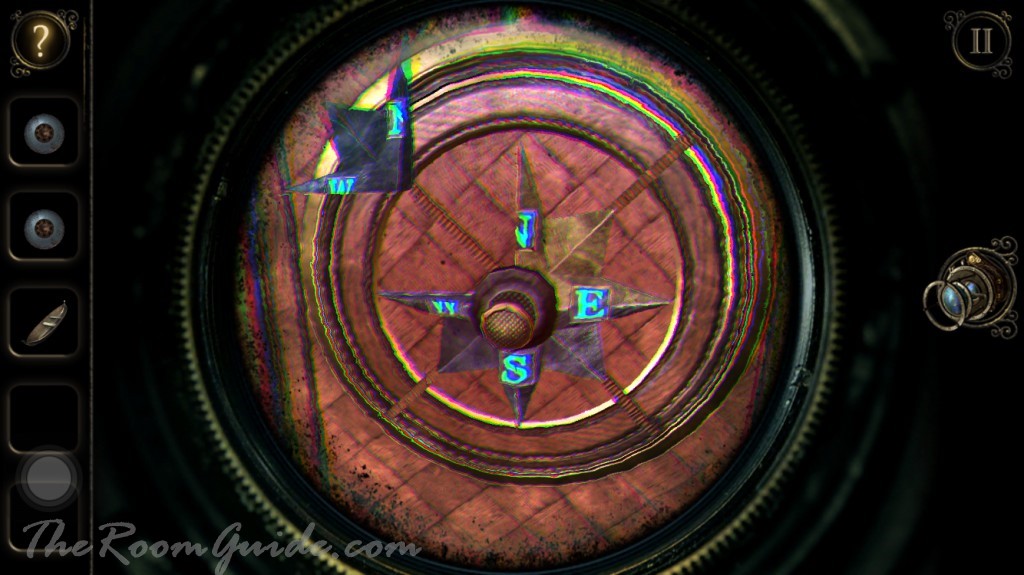
Locate a circle with four pointers. Put on your eyepiece and check out the pointers. Each pointer has two partial letters. Press the center dial to rotate the circle and slide the pointer towards the center to create a compass. Open the panel and grab a square wooden model piece.
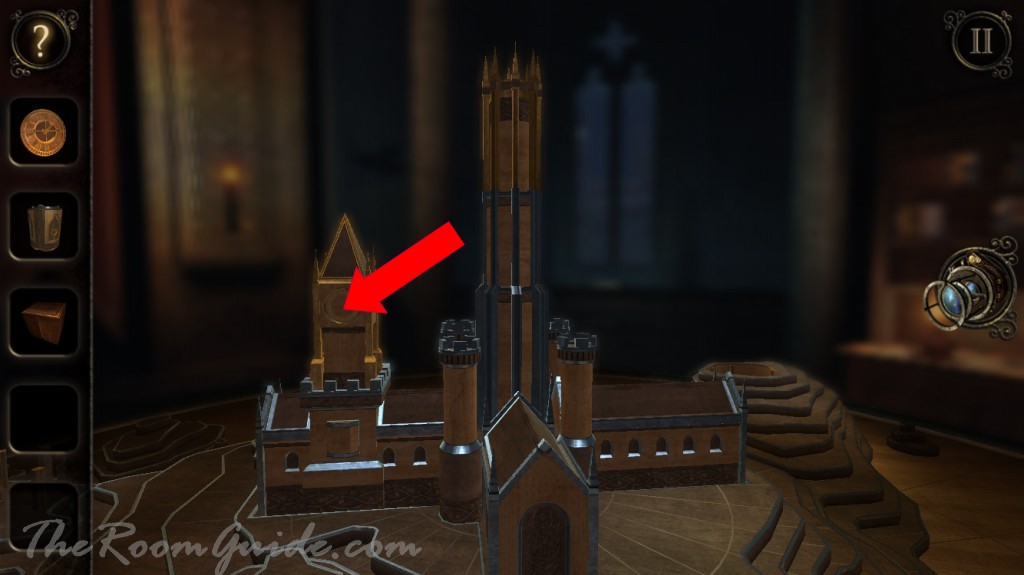
Exit the standing stone model. Locate the clock tower on the church model. Insert the clock face and open the clock. Put on your eyepiece and enter the clock tower.


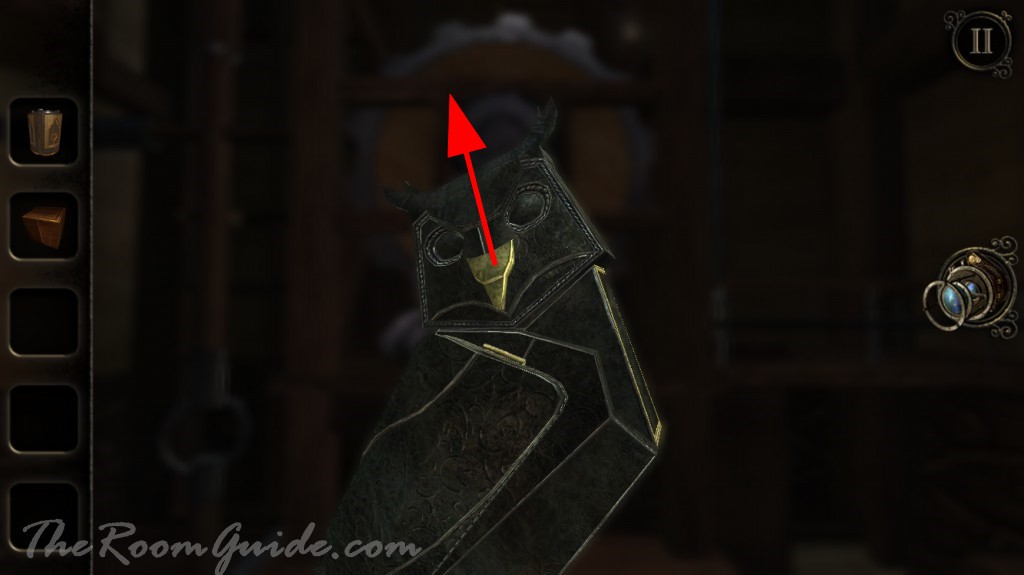
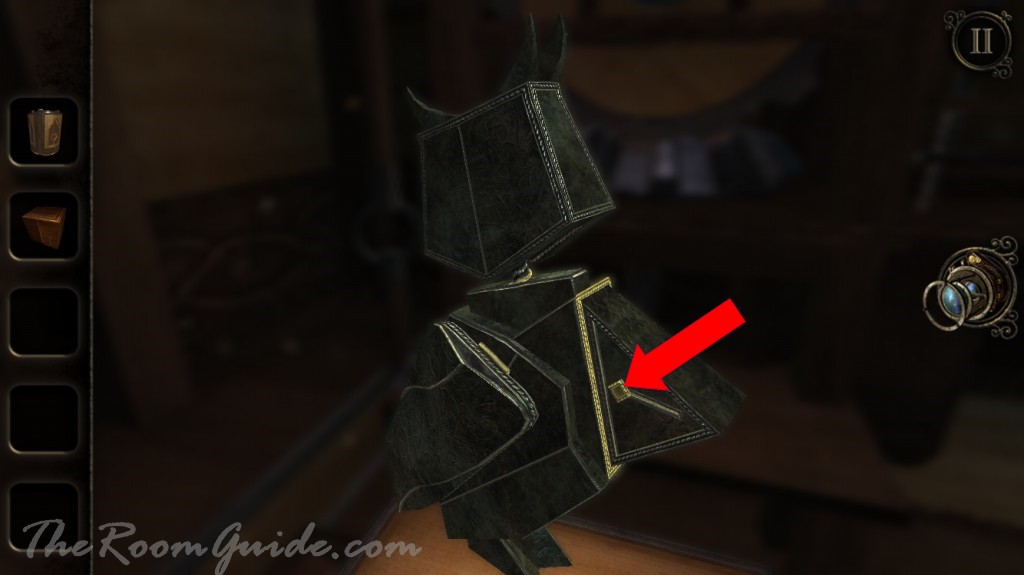
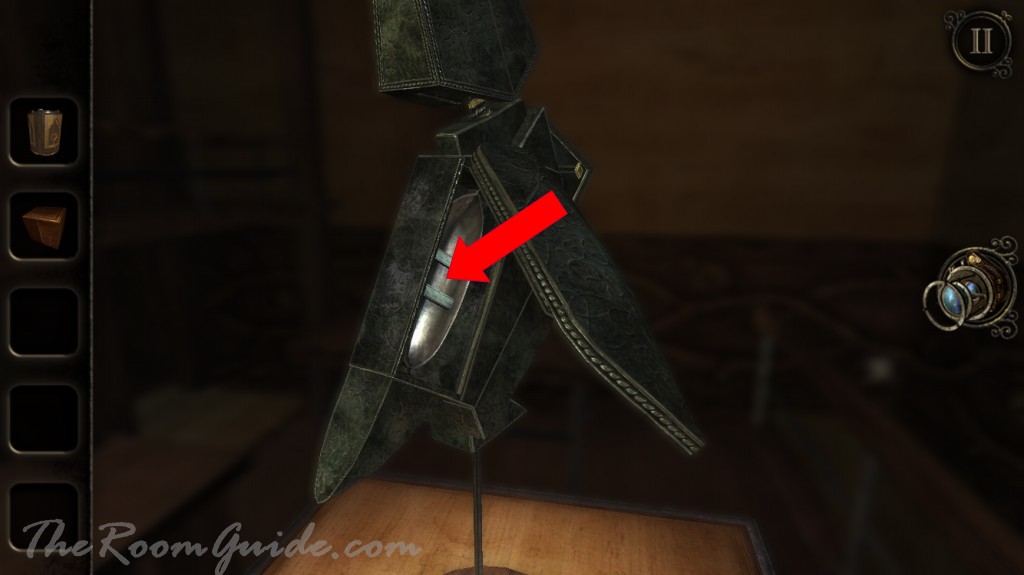
You will see a miniature owl model. Pull up and rotate the head to open the wing. Slide the switch to open the other wing. Look under the wing and get a model boat. Exit the clock tower.

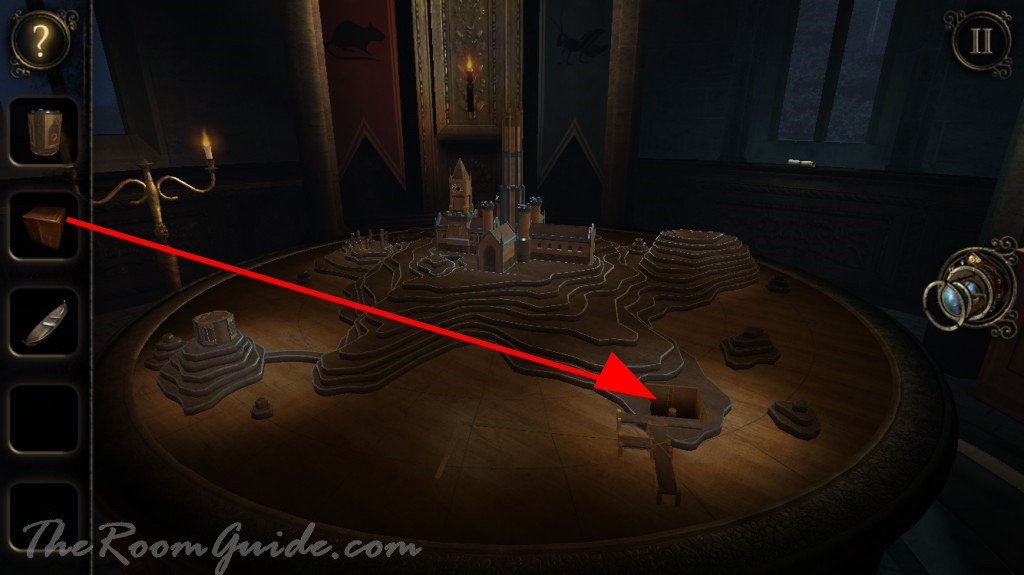
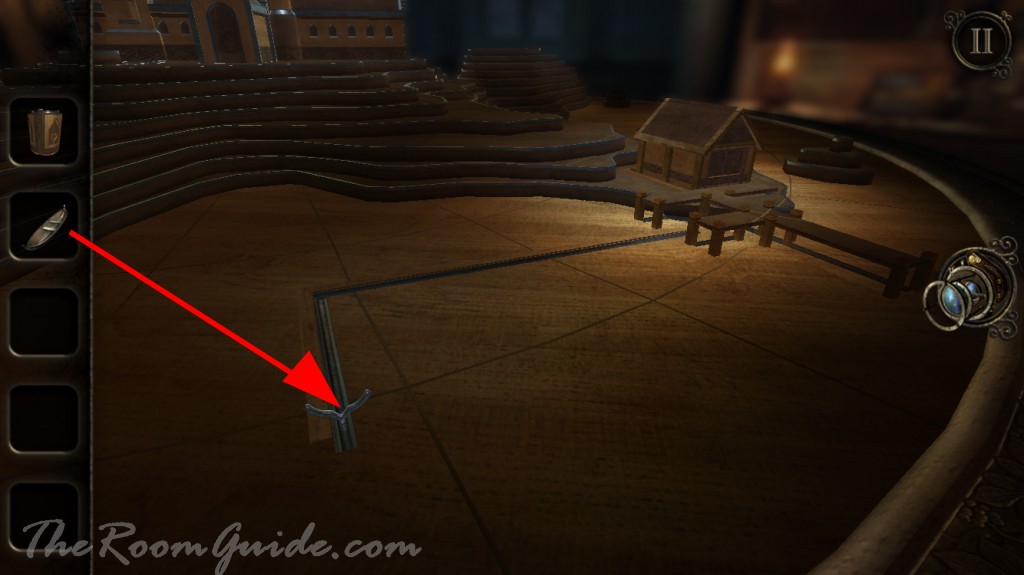
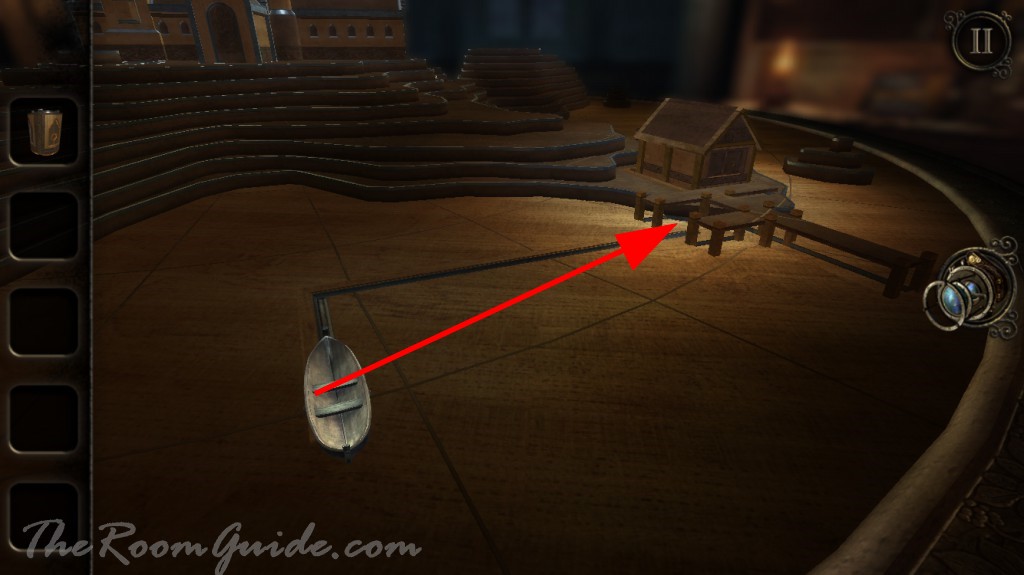
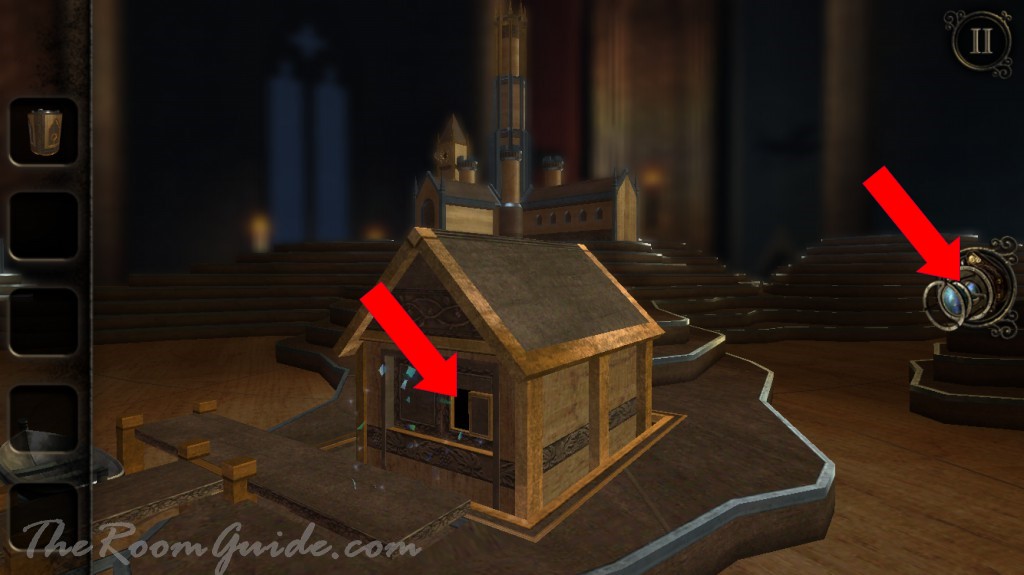
Locate an empty square slot on the table. Insert the square wooden model piece. A boat house will appear. Place the boat on the cradle and move the boat towards the boat house. A window will open. Put on your eyepiece and enter the boat house.
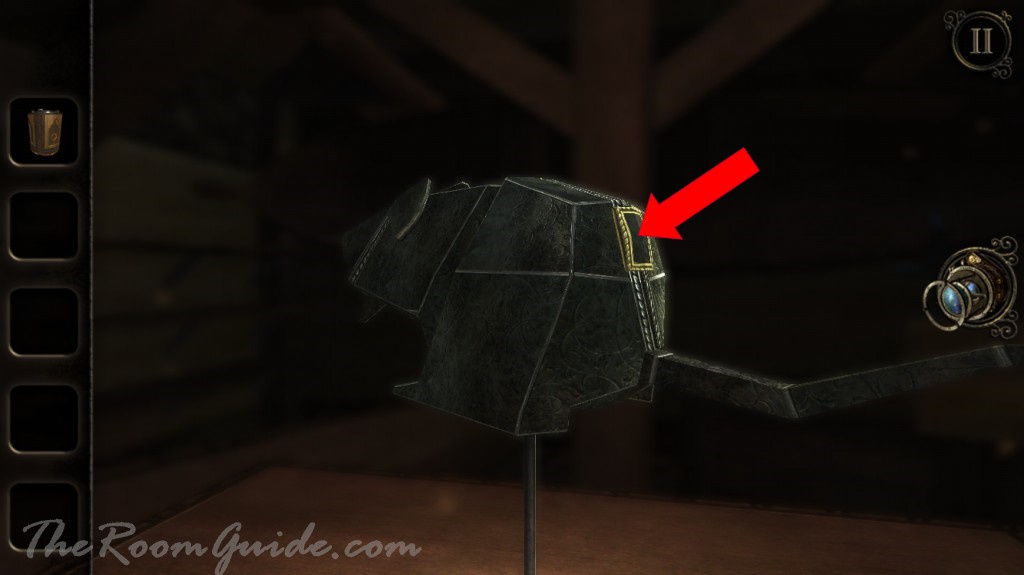
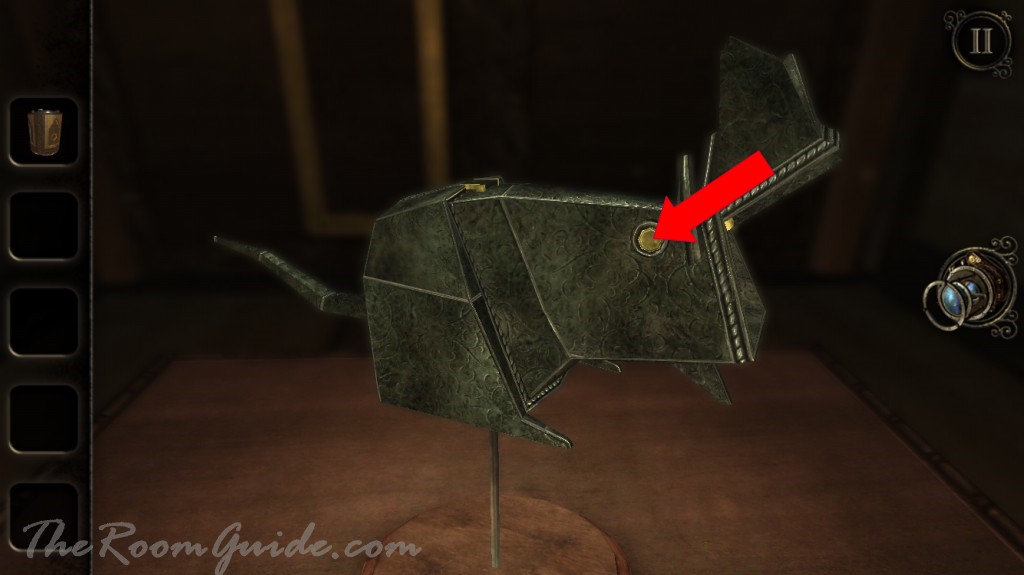
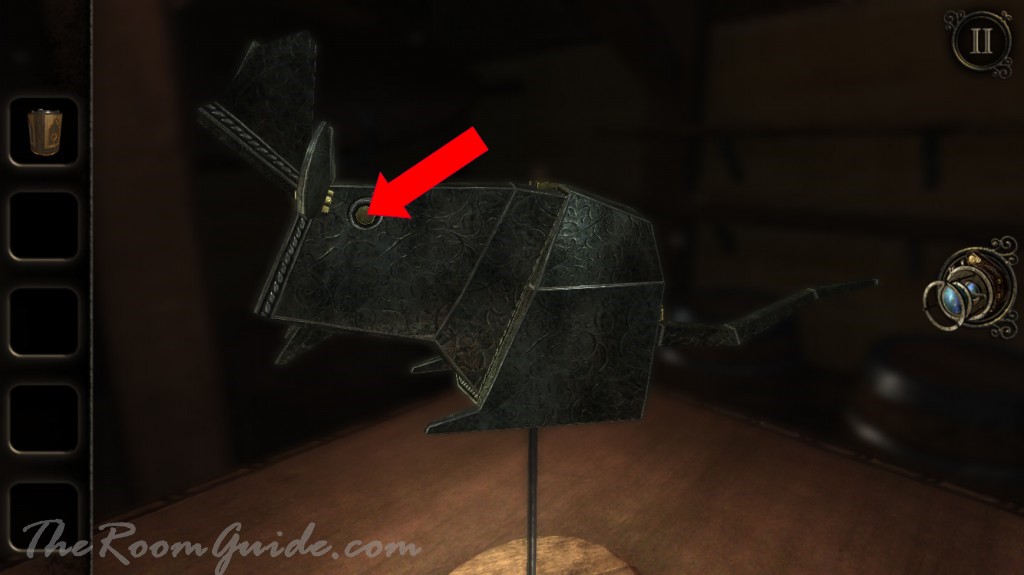
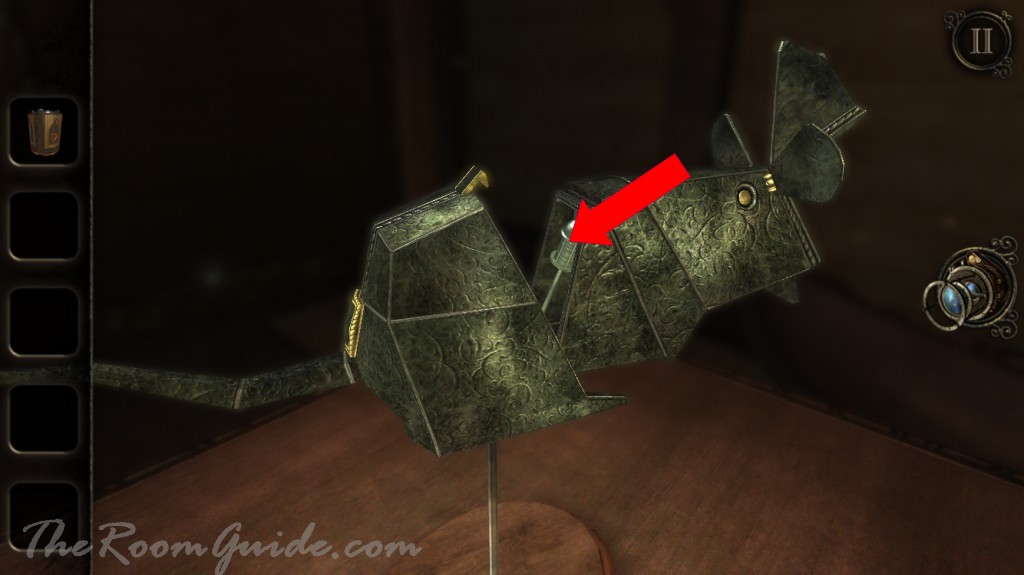
Inside the boat house, you will see a miniature mouse model. Slide the switch on the tail. Then rotate the wheel inside the head. Push both of mouse’s eyes and slide the body. Get a small key. Exit boat house.

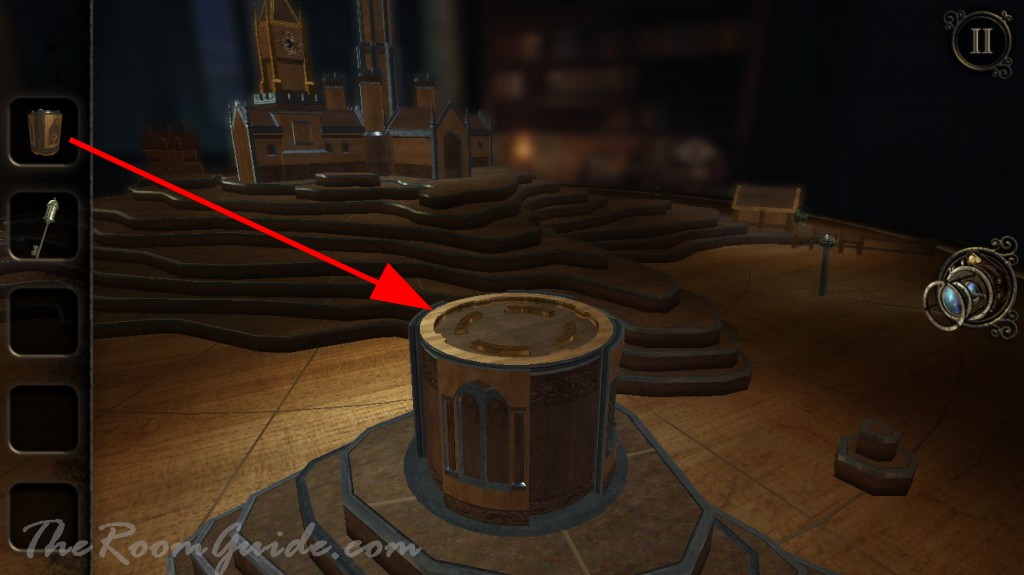
Locate a cylinder tower on the table. Place the cylinder wooden model piece on top. The table will ascend to a second level.

Thank you
I have the bottom latch on the magnetic star map undone, but the upper latch won’t unlock. I have all the makers placed like your picture. Please help !
There are 2 star maps. One for the bottom and one for the top
Yes but the wrong symbols are shown on the PC edition!
I have same issue. It appears to be a glitch, but not positive. Tried every suggested position of BOTH star charts, but only the bottom latch opened. That said, if you return to the star chart to get the second set of symbols off the TWO plates, then return to the green screen, it might work. That will be my next effort. GL w/ that.