Section 3: Middle Seal (Last Seal)
A mechanism will trigger and expel some kind of a clock.
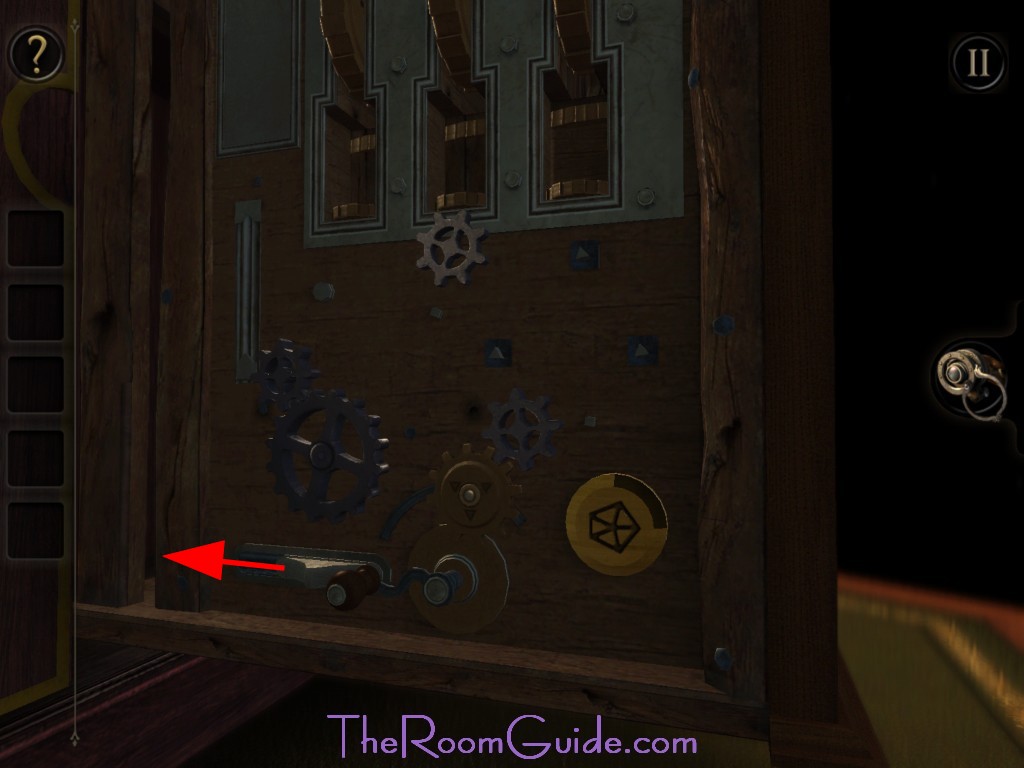
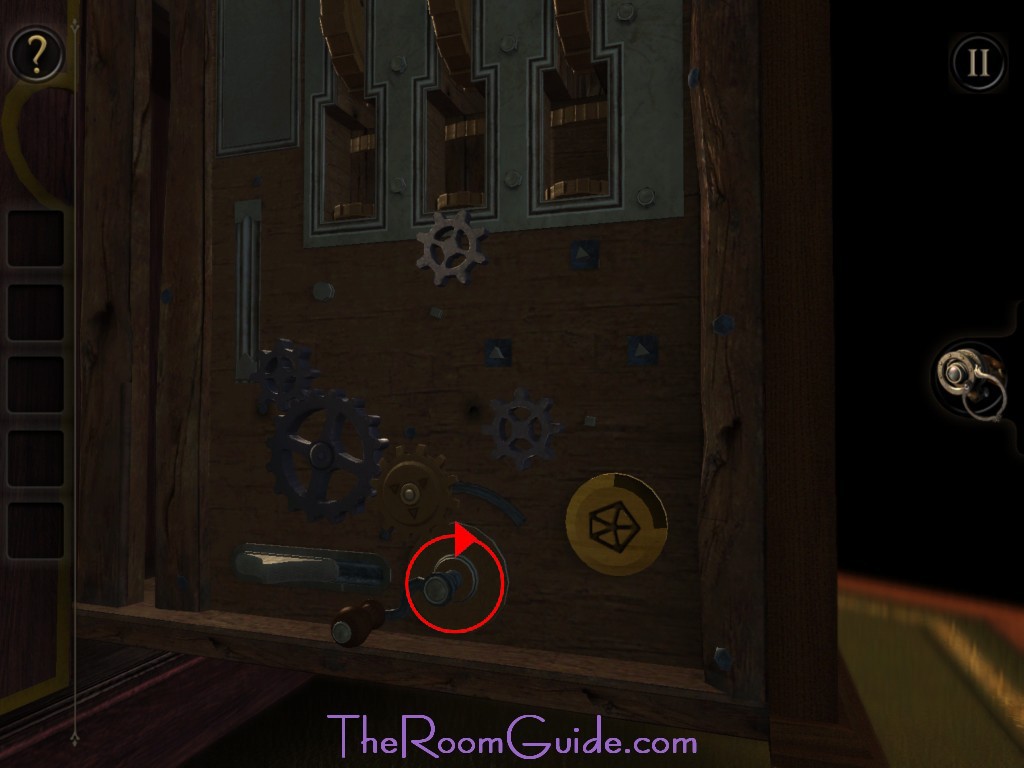
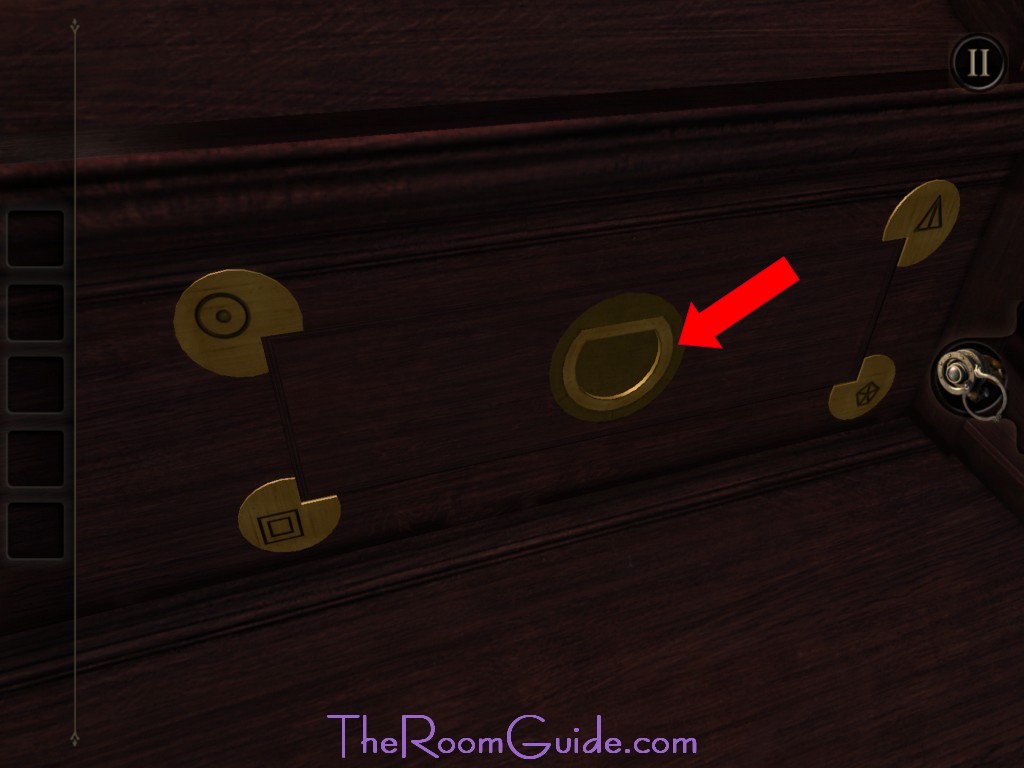
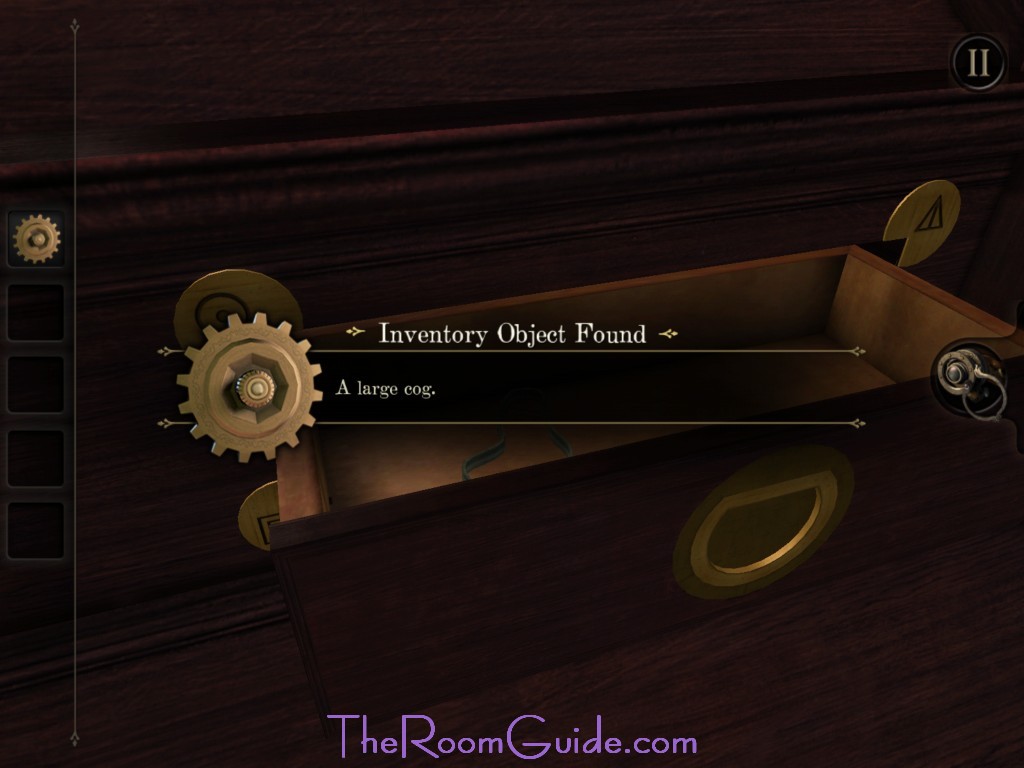
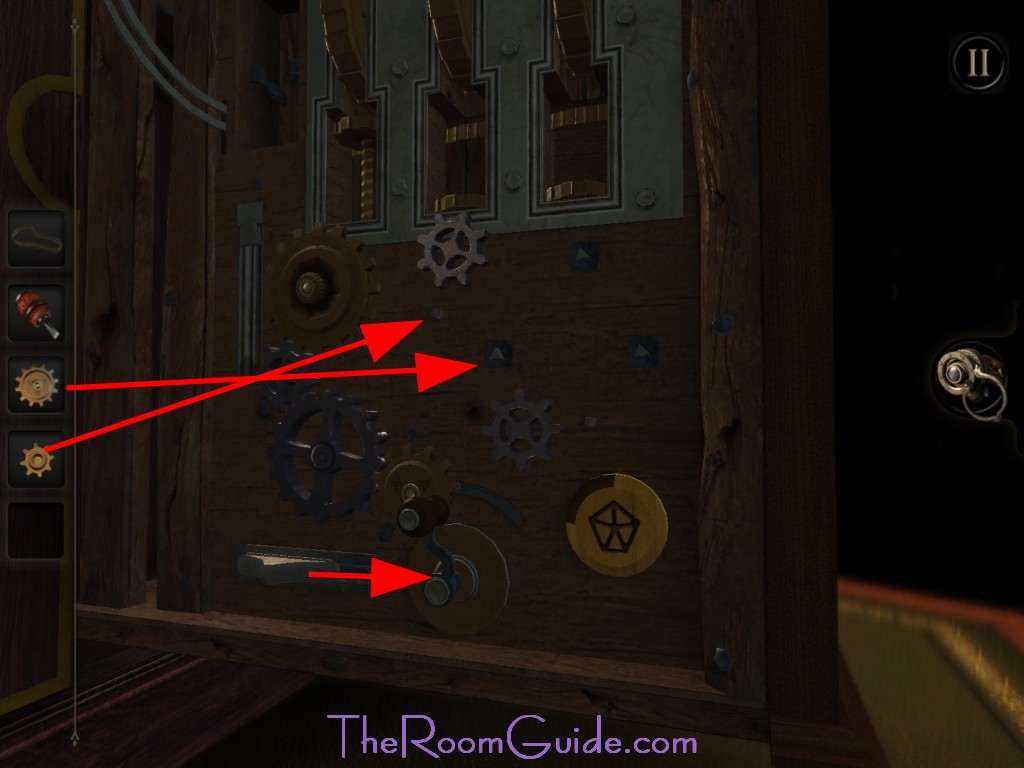
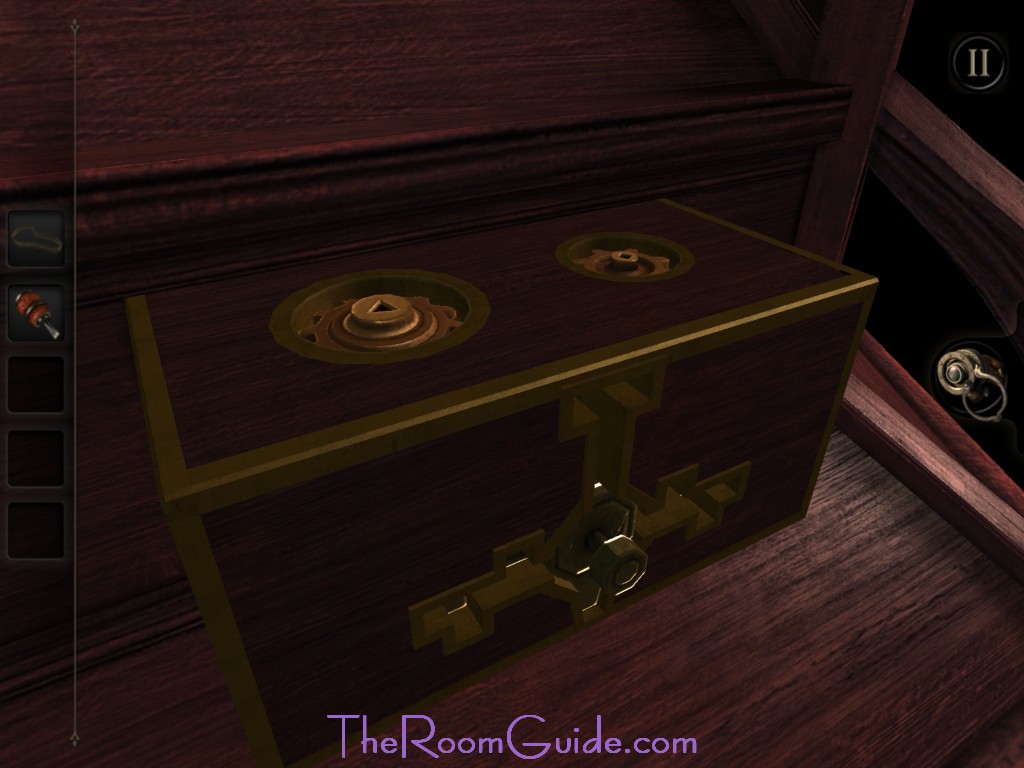
15. Drawer: Go to the left side of the clock. There is a control panel. Turn the switch to change the gear location. Then turn the handle. A locked drawer will reveal. The drawer is locked by four metal circles at each corner. The control for each circle is located throughout the case. See image below for their locations. Once you adjusted each control, open the drawer. Grab the Large Cog and Elastic Band.


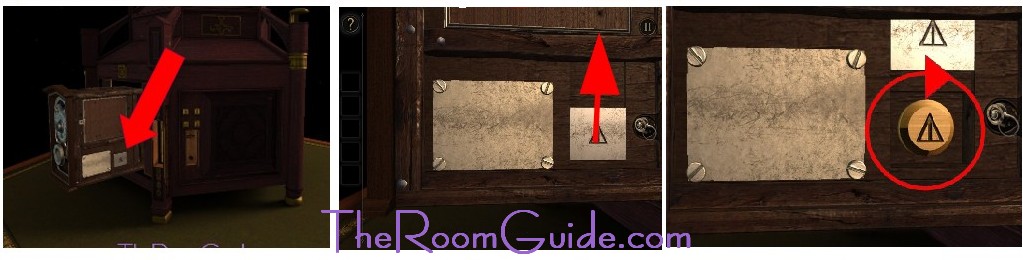


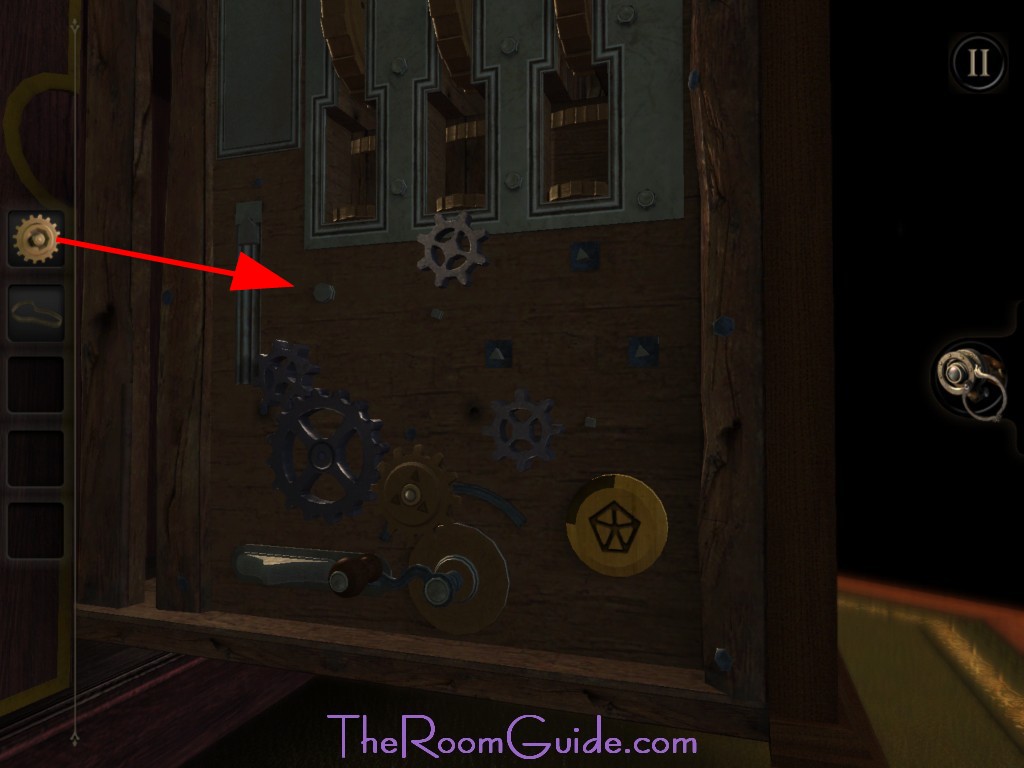
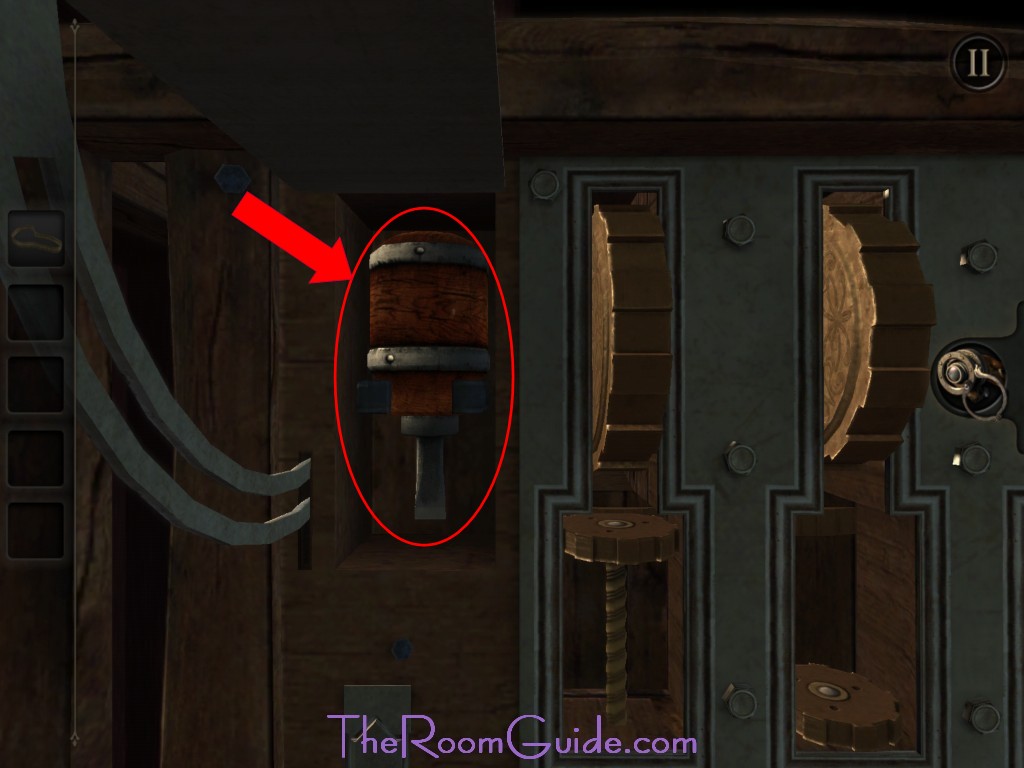
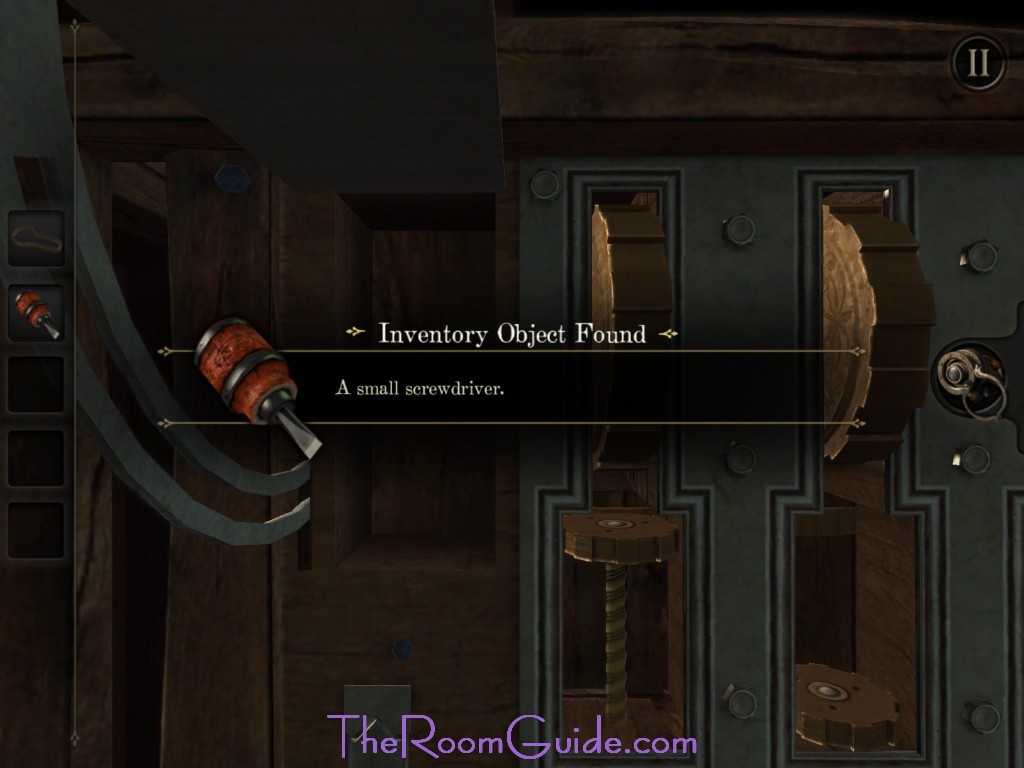
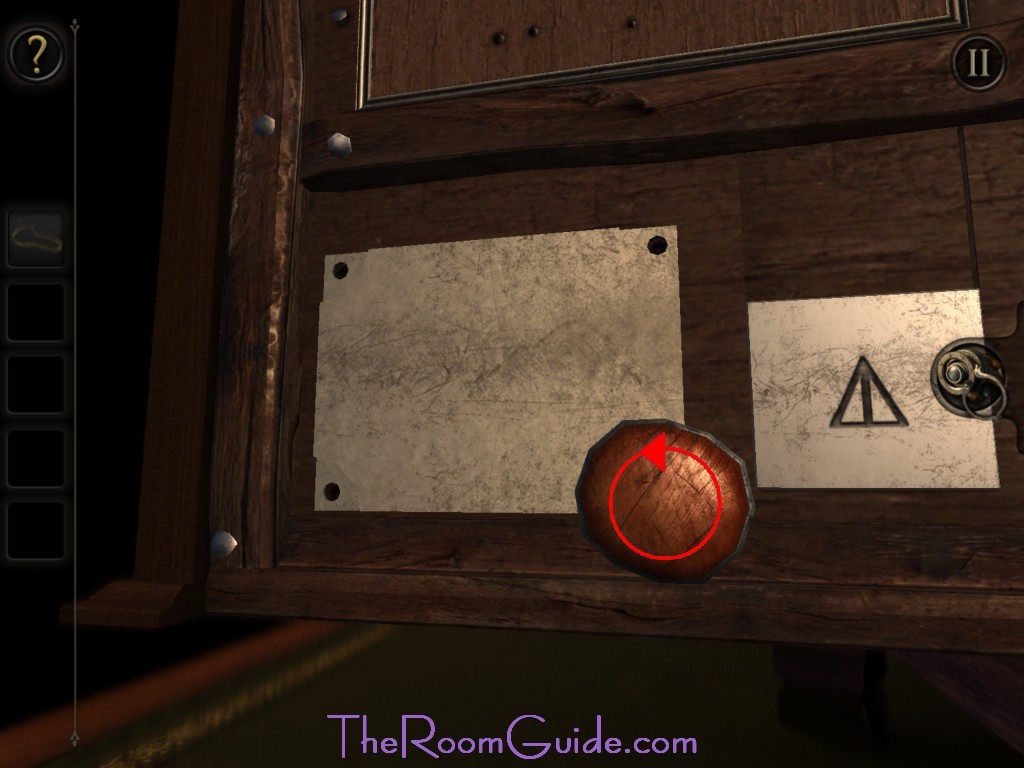
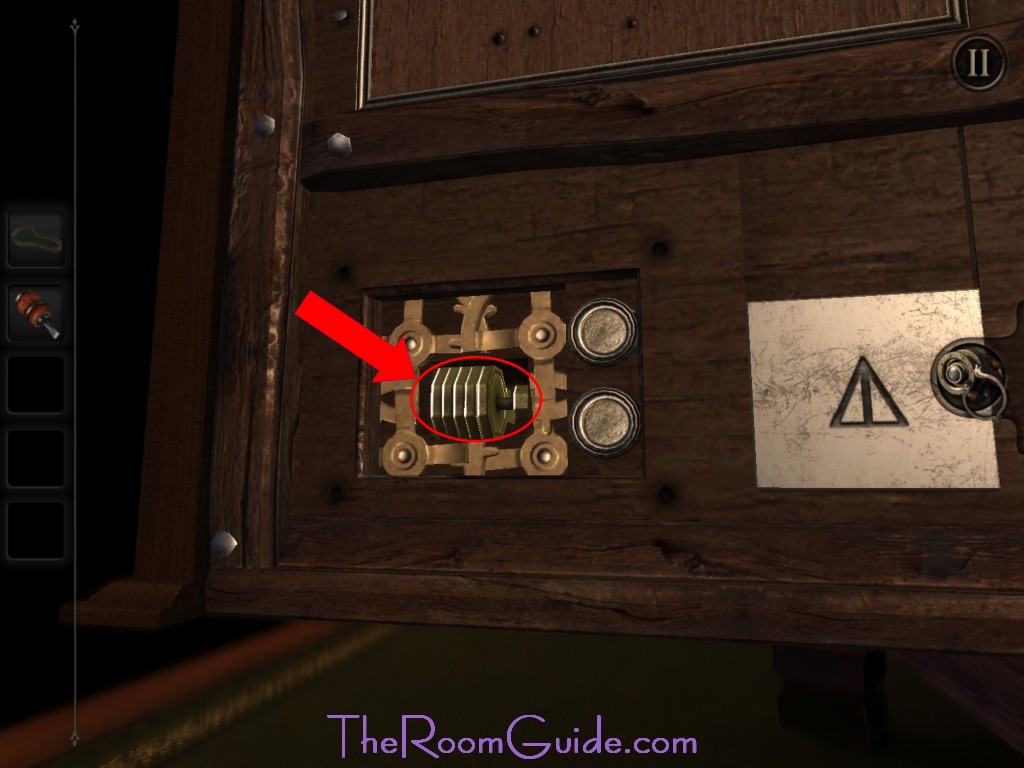
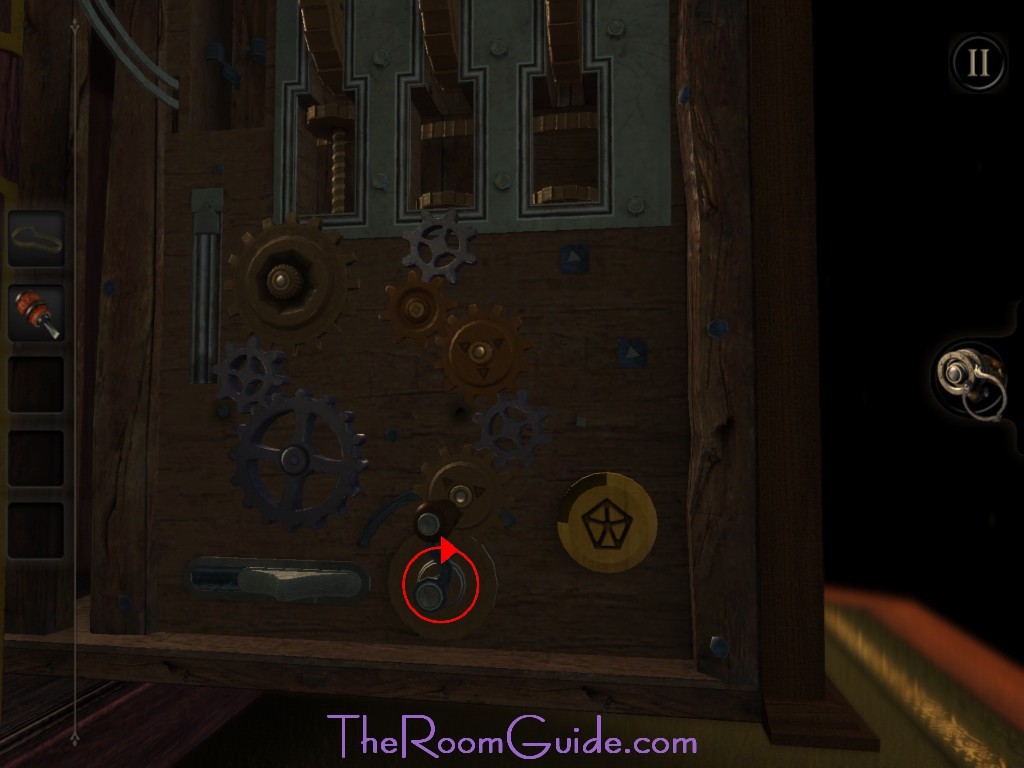
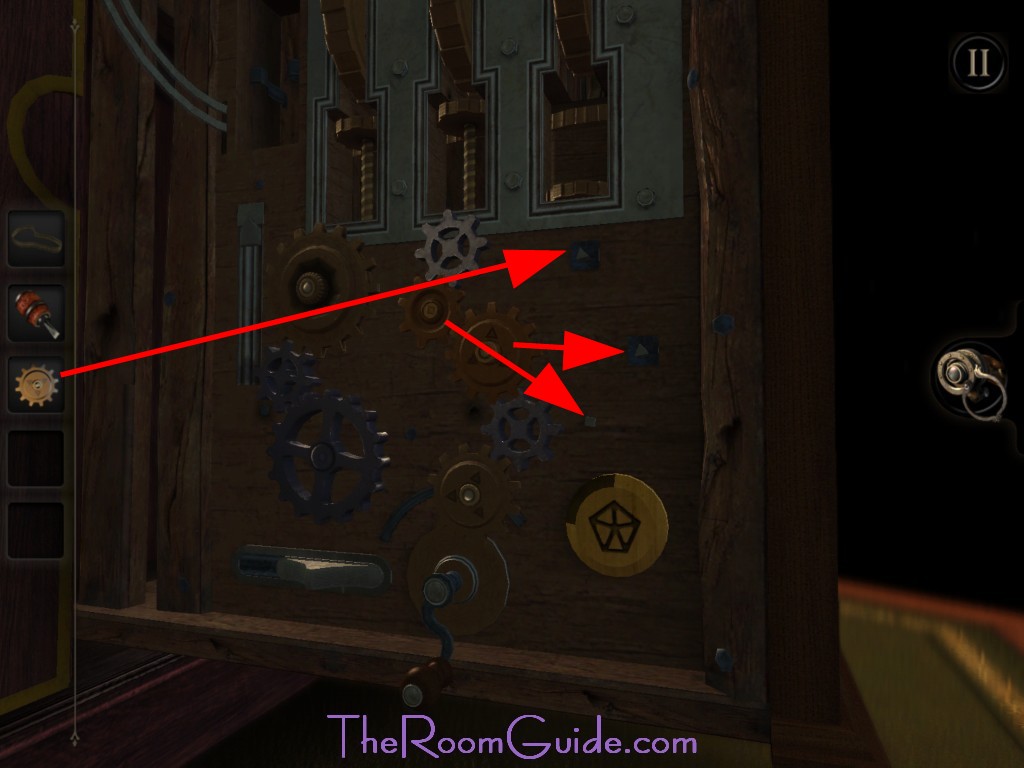
16. Screwdriver: Go back to the clock. Insert the Large Cog as shown below. Turn the handle. A mechanism will trigger and reveal a compartment. Get the Small Screwdriver. Go to the right side of the clock. Use the screwdriver to loosen a metal plate. The top button controls gears at the top right and bottom left. The button controls the other two gears. Press down each button as shown below. You have to press them down simultaneously. Grab the Peculiar Folding Key.


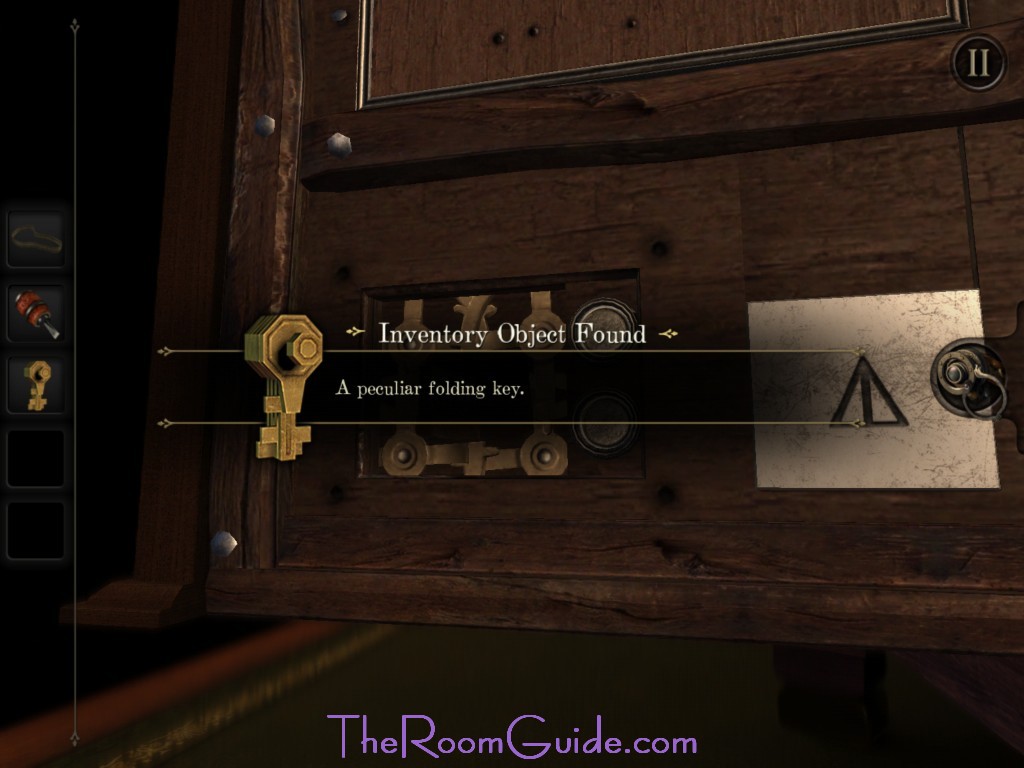
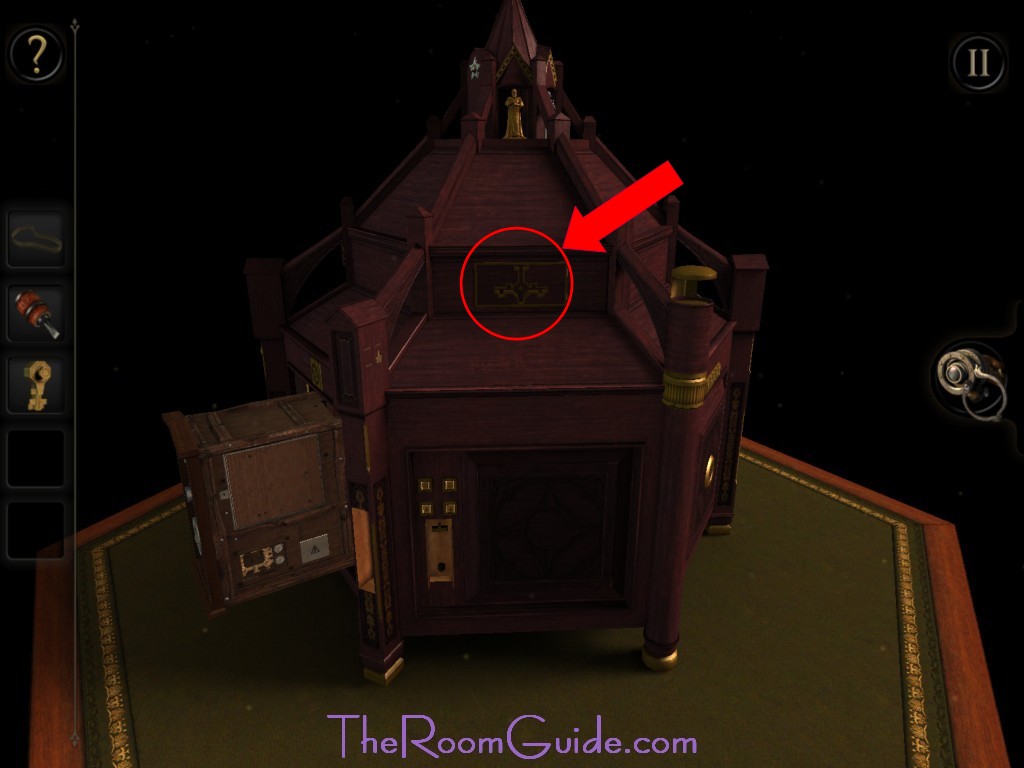
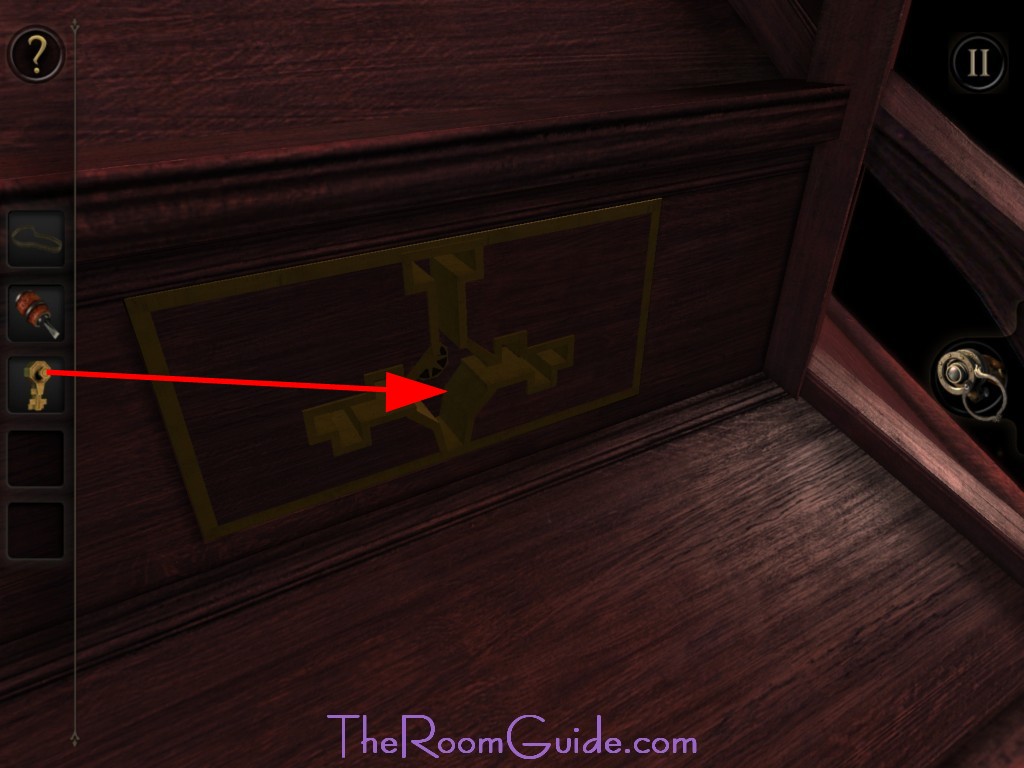
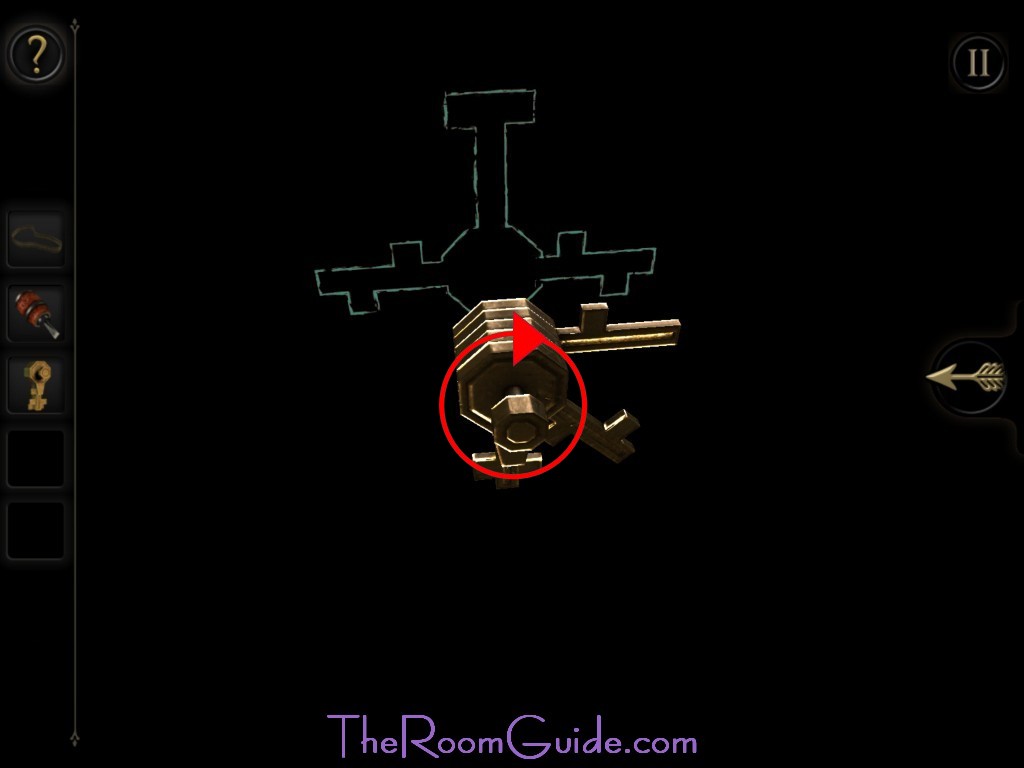
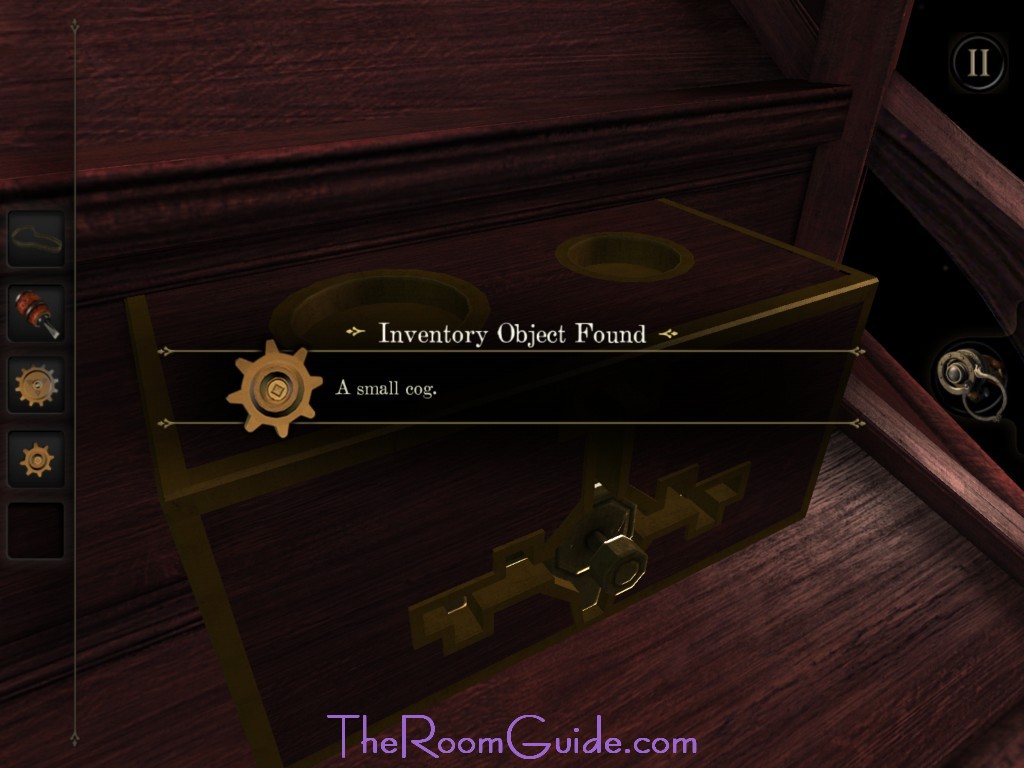
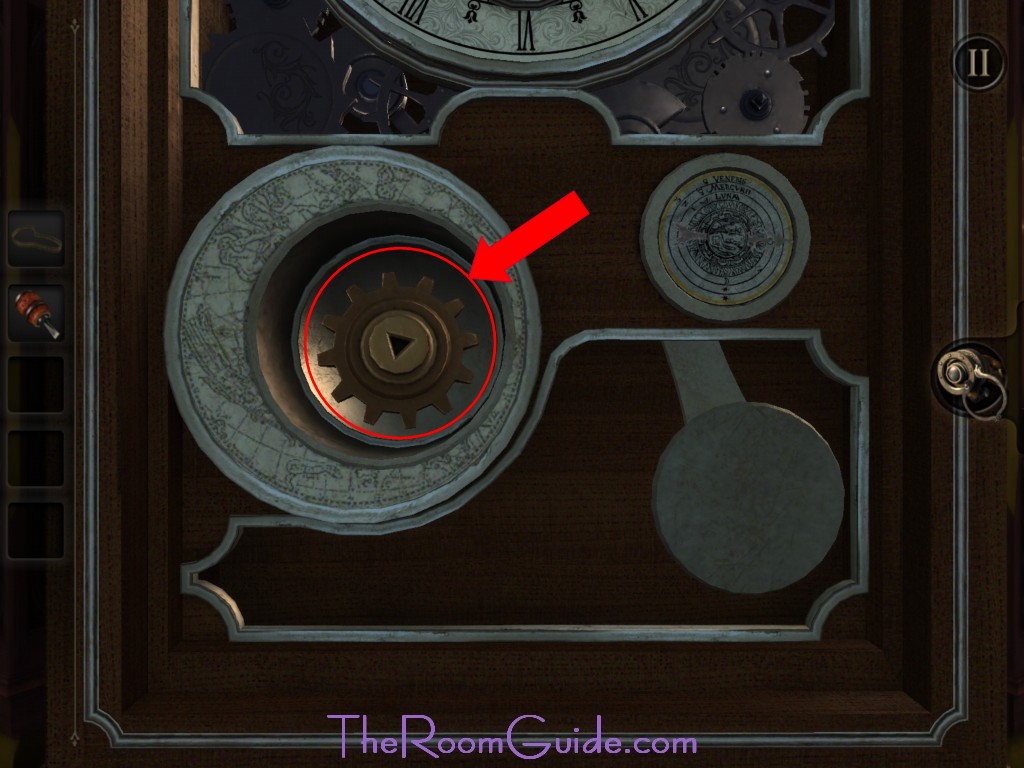
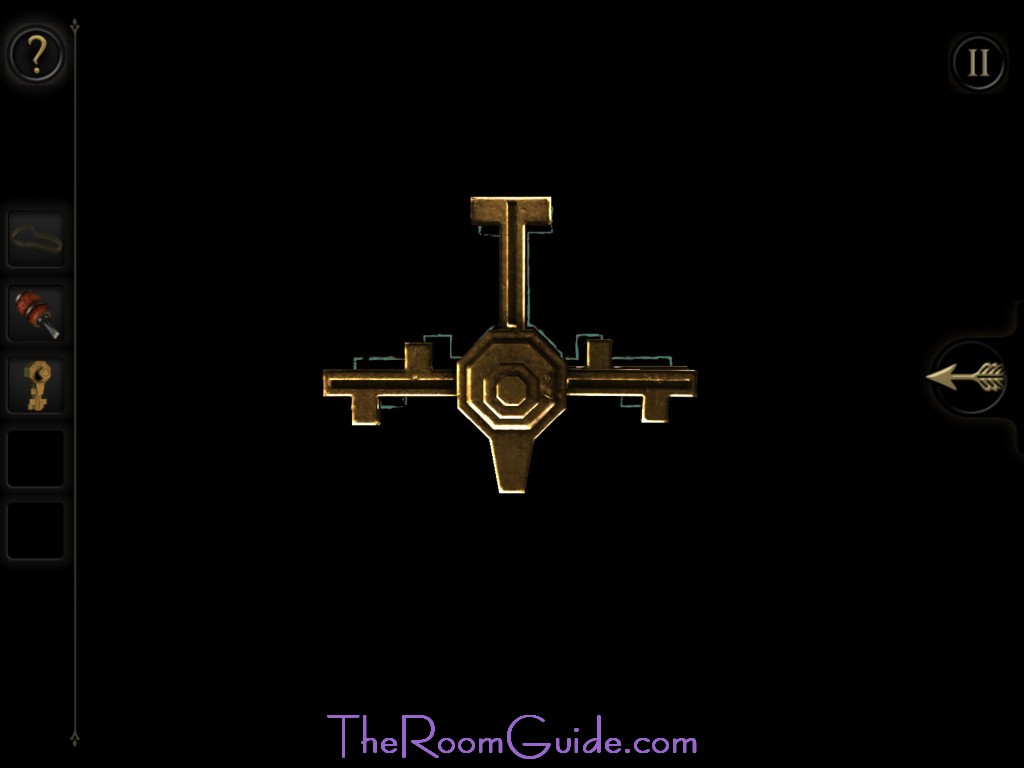
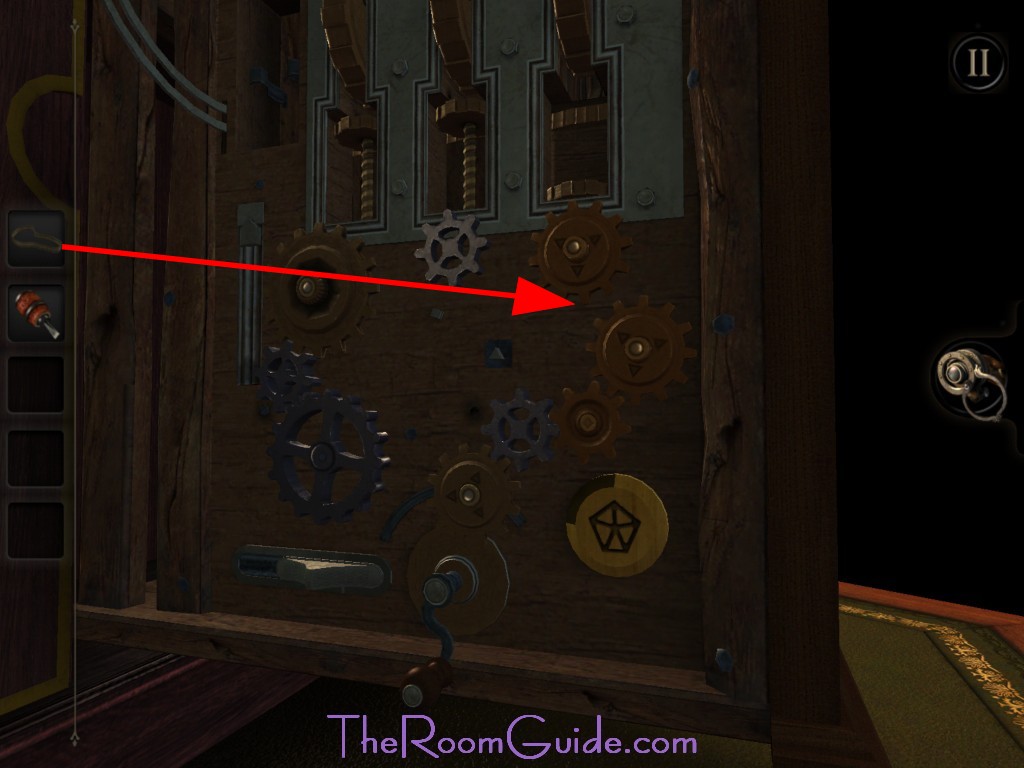
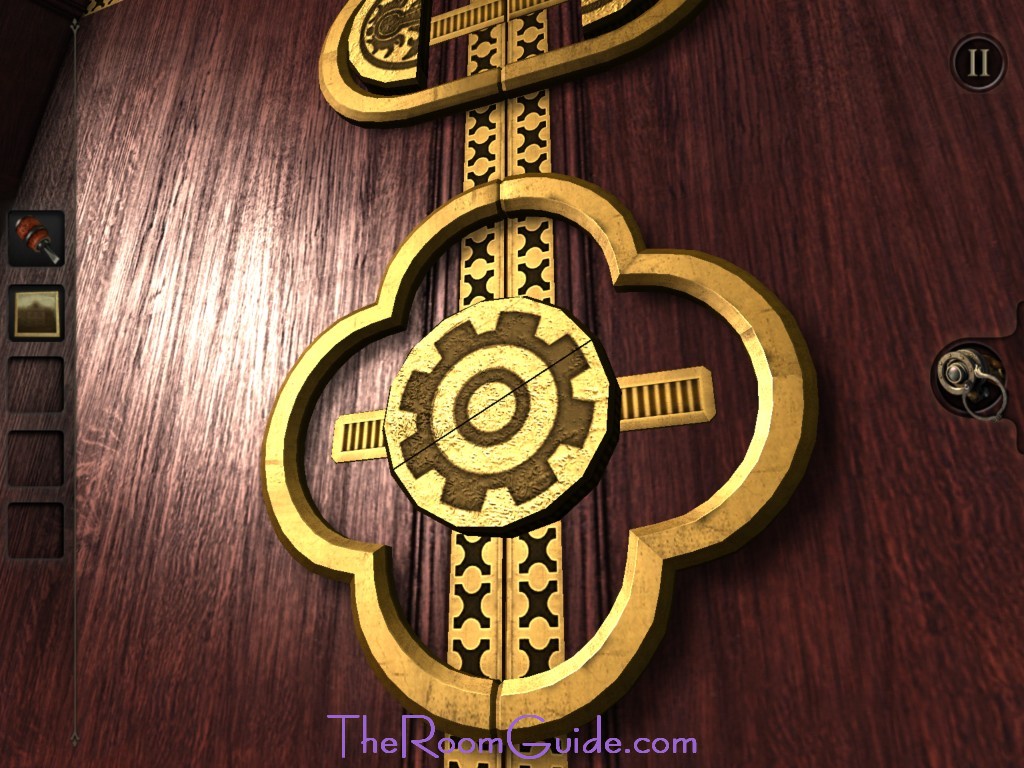
17.Control Panel: Find the keyhole. Location as shown. Try insert the Peculiar Folding Key. Then look at the key closely. A pattern will appear showing you how to rearrange the key. Rotate your view can make the task easier. Once key are rearranged. Insert the key again and turn. Collect the Medium Sized Cog and Small Cog. Go back to the control panel and insert the cogs as shown in the image below. Turn the switch to change the gear location. Then turn the handle. A mechanism will activate, and a secret compartment will open. Grab the Gear inside.


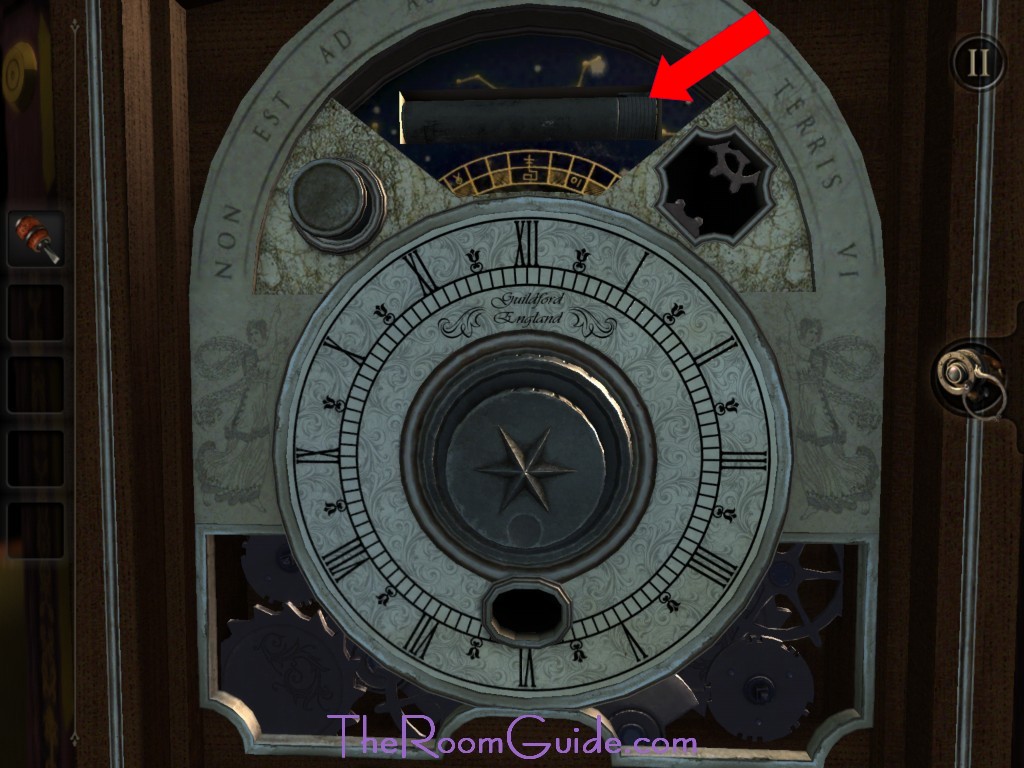
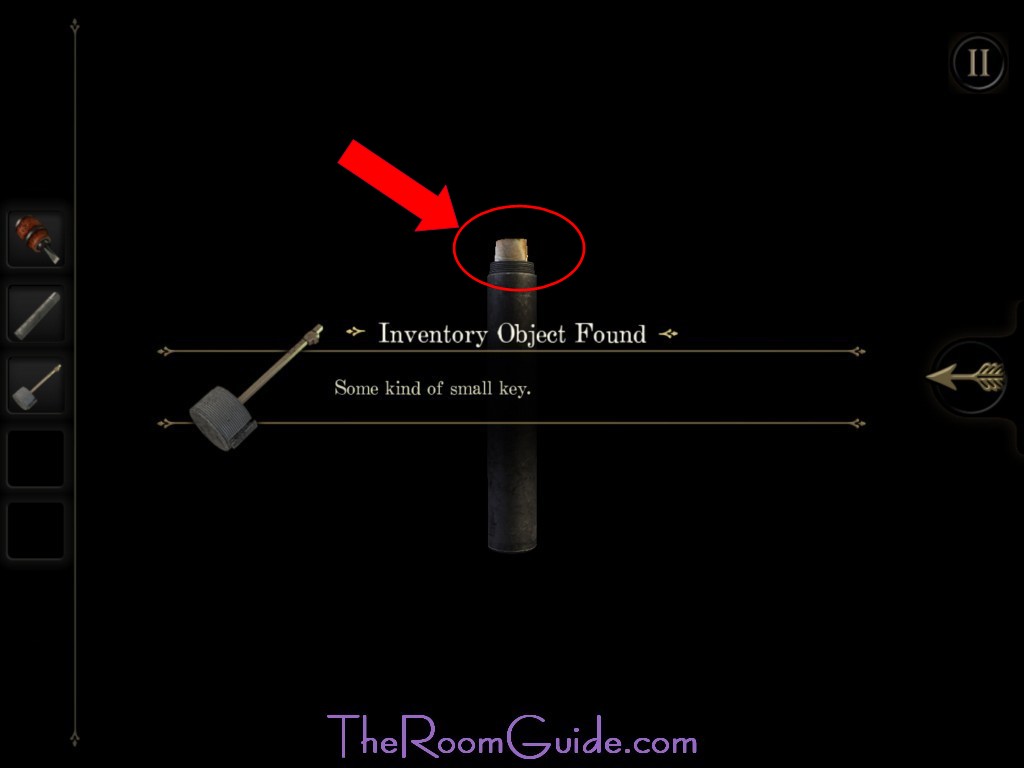
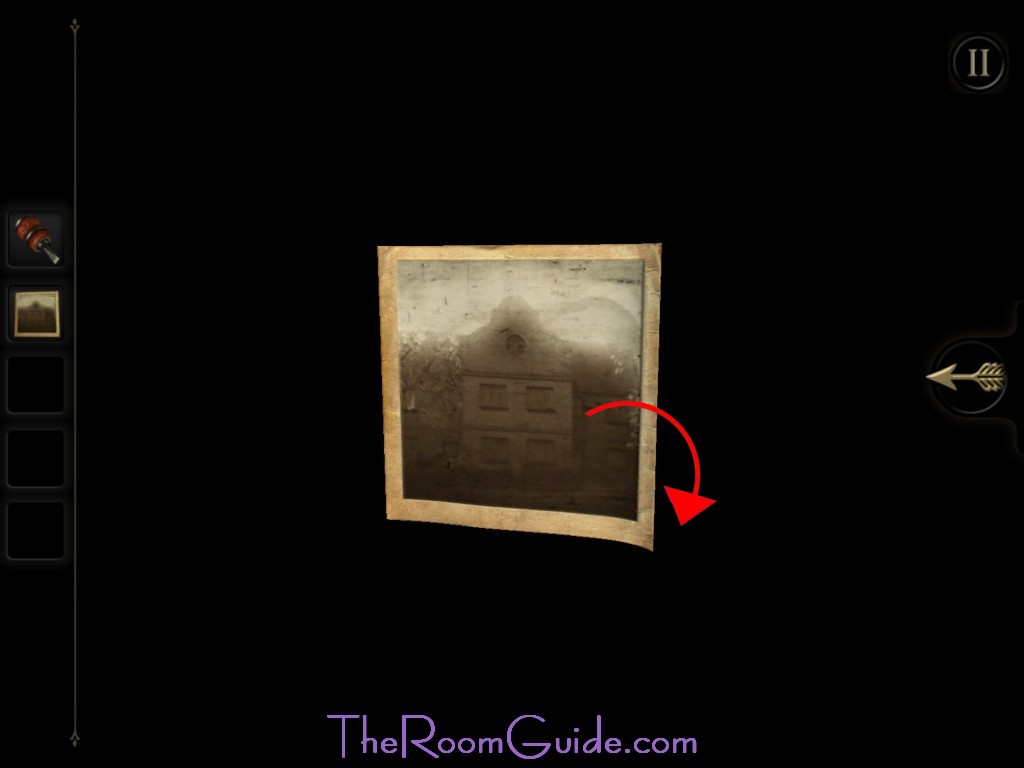
18. Tube: Return to the control panel. Rearrange the gears as shown below. Insert the Elastic Band. Then turn the handle. A mechanism will start. Go to the front of the clock. Press the button on the top left corner until you see a Long, Narrow Steel Tube. Grab and open the tube. You will get Some Kind of Small Key and An Old Photograph.


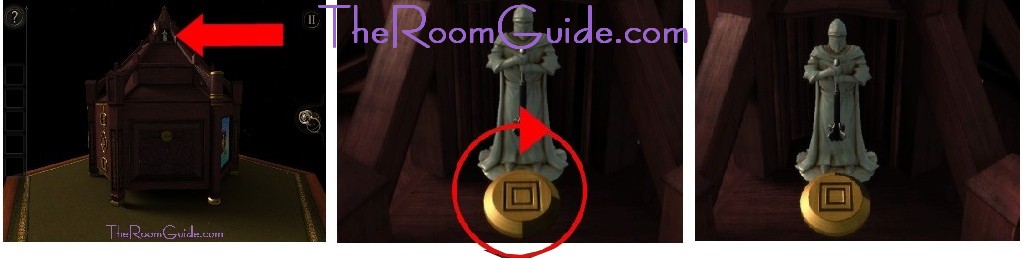
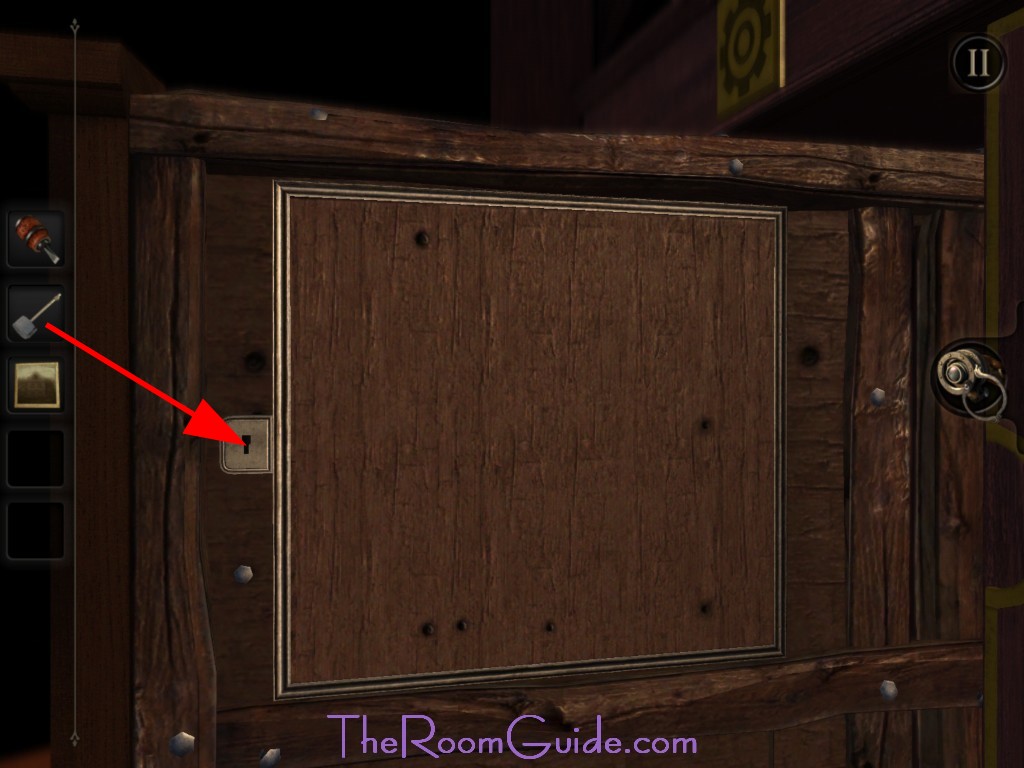
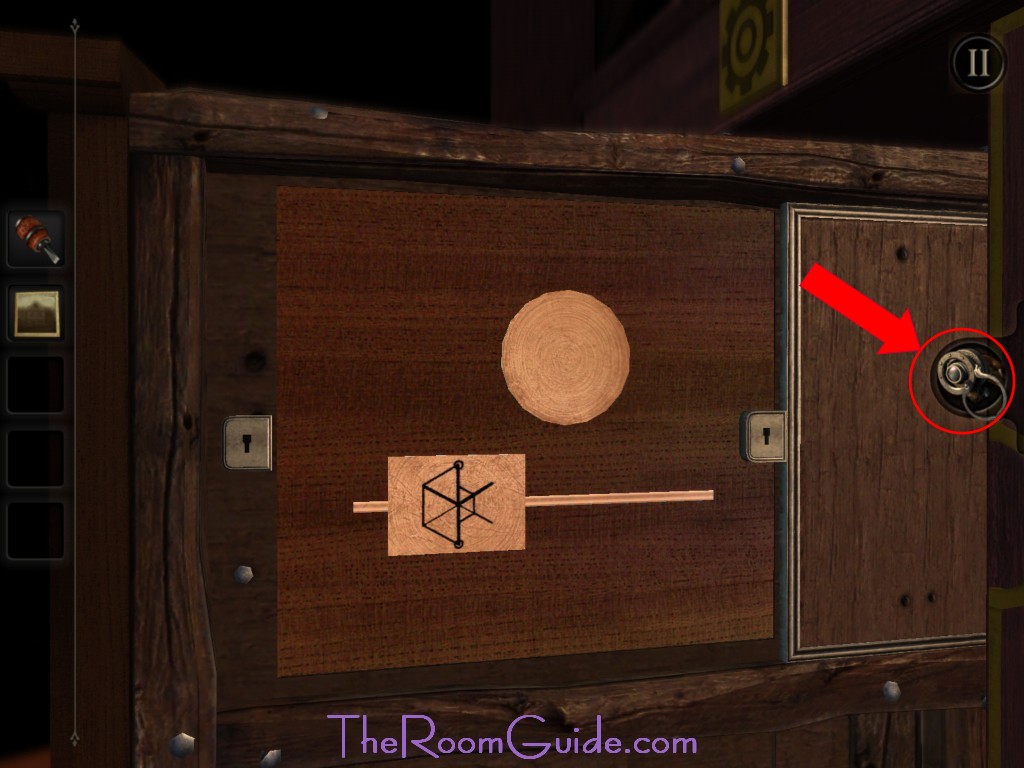
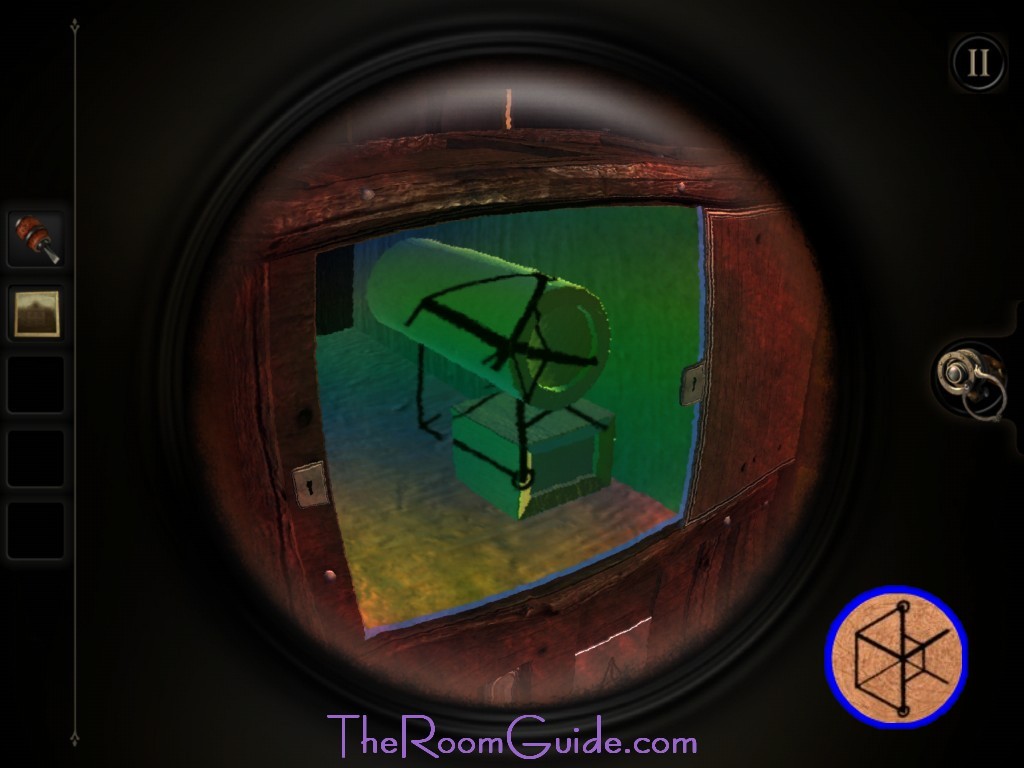
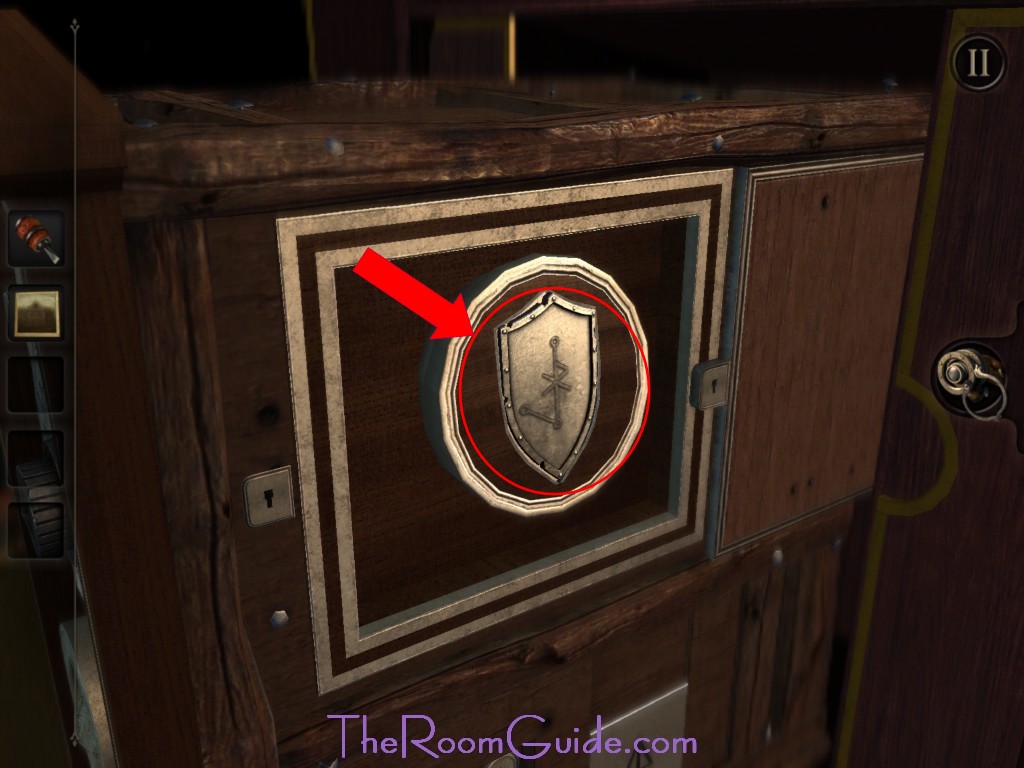
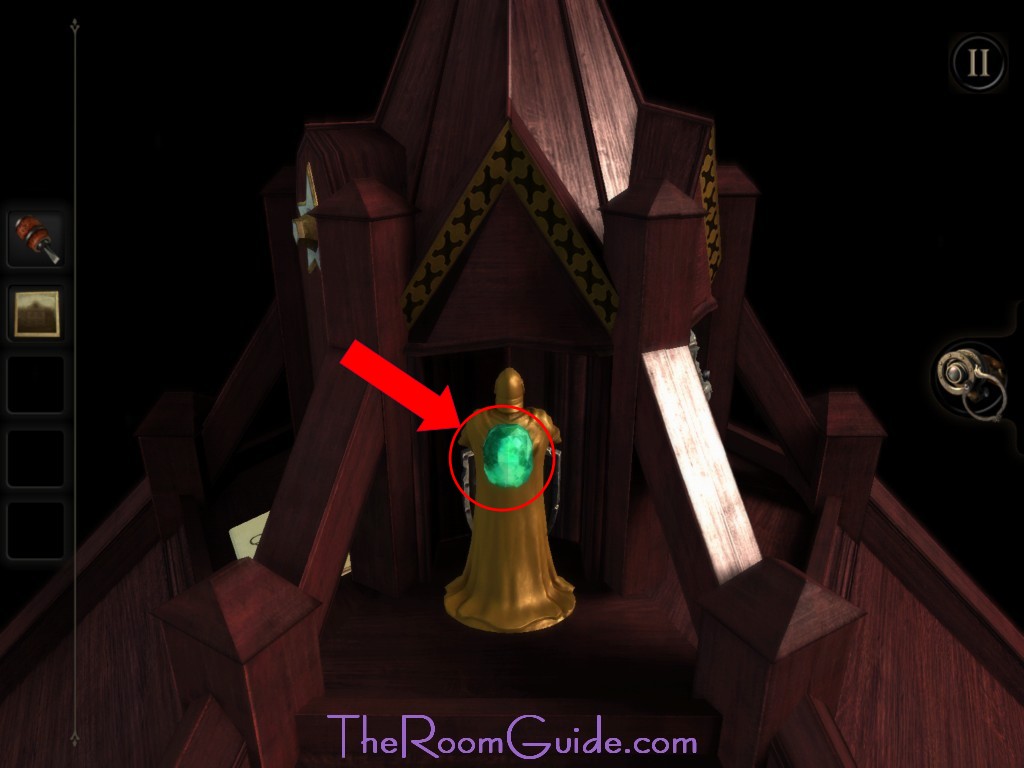
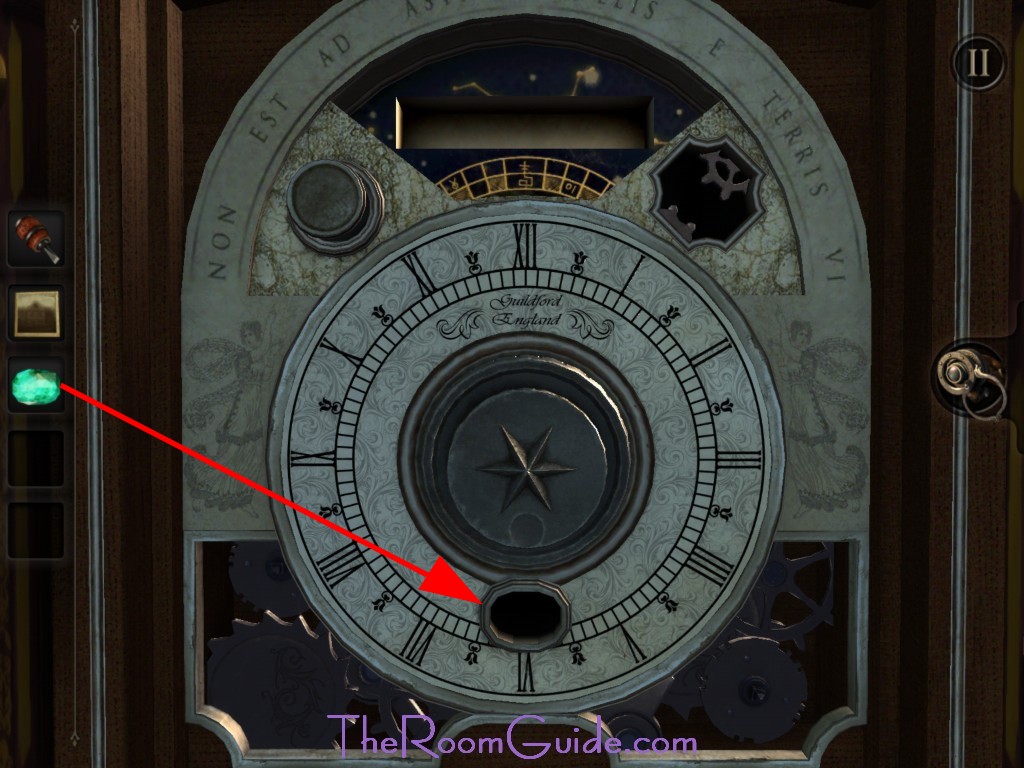
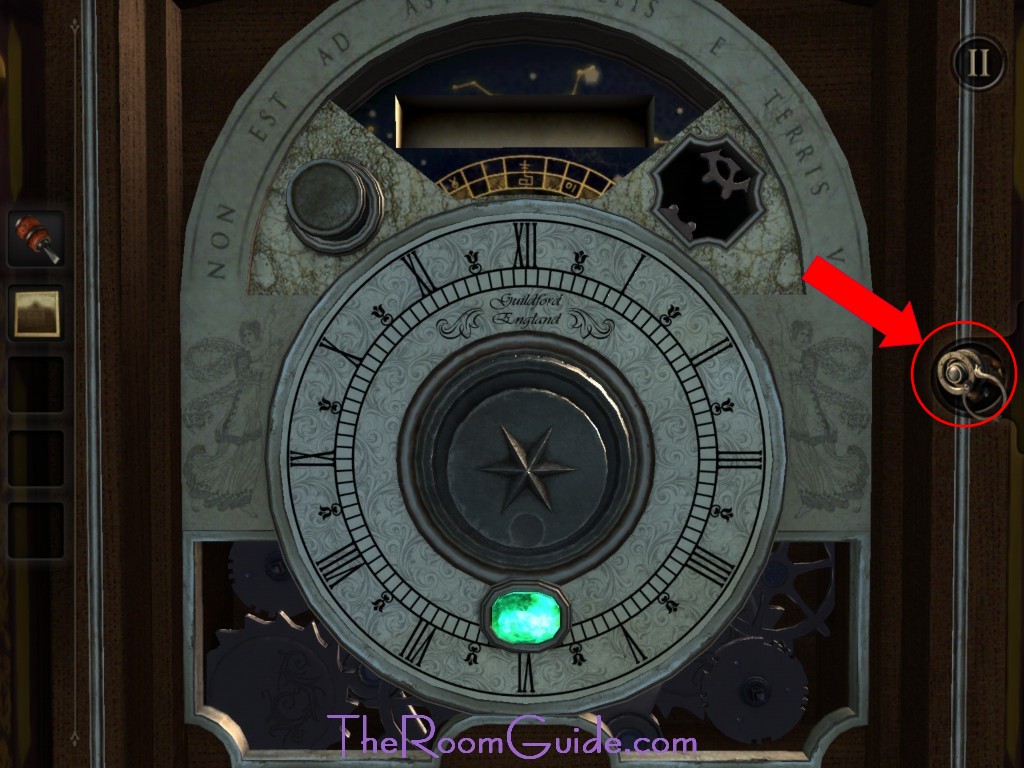
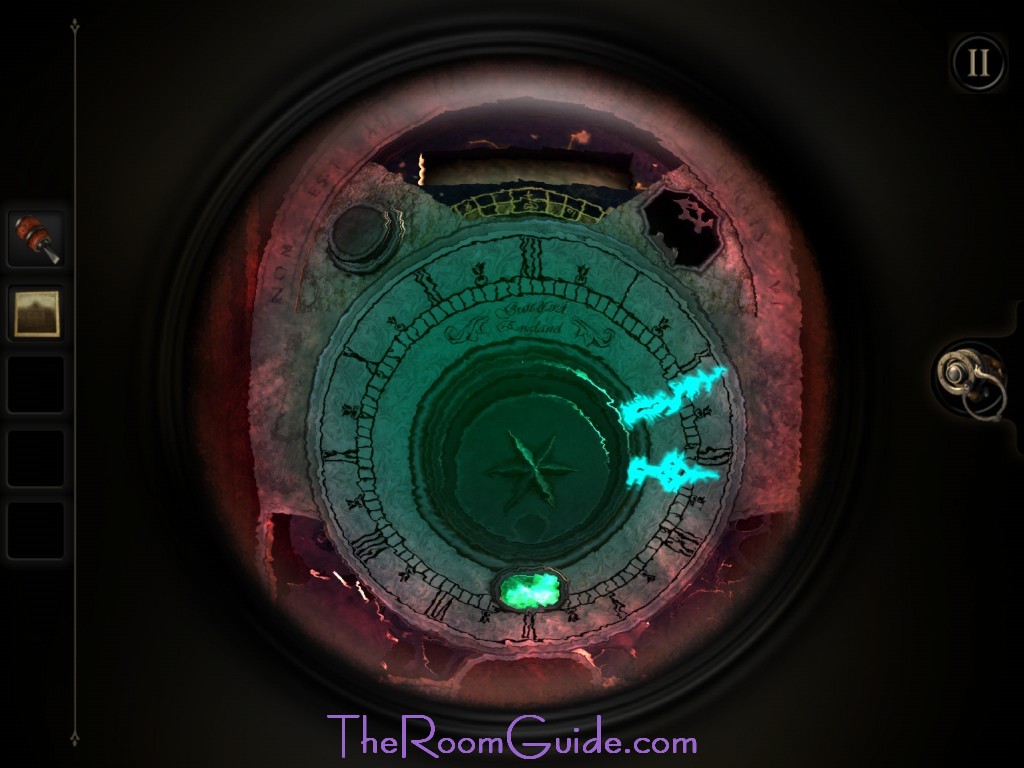
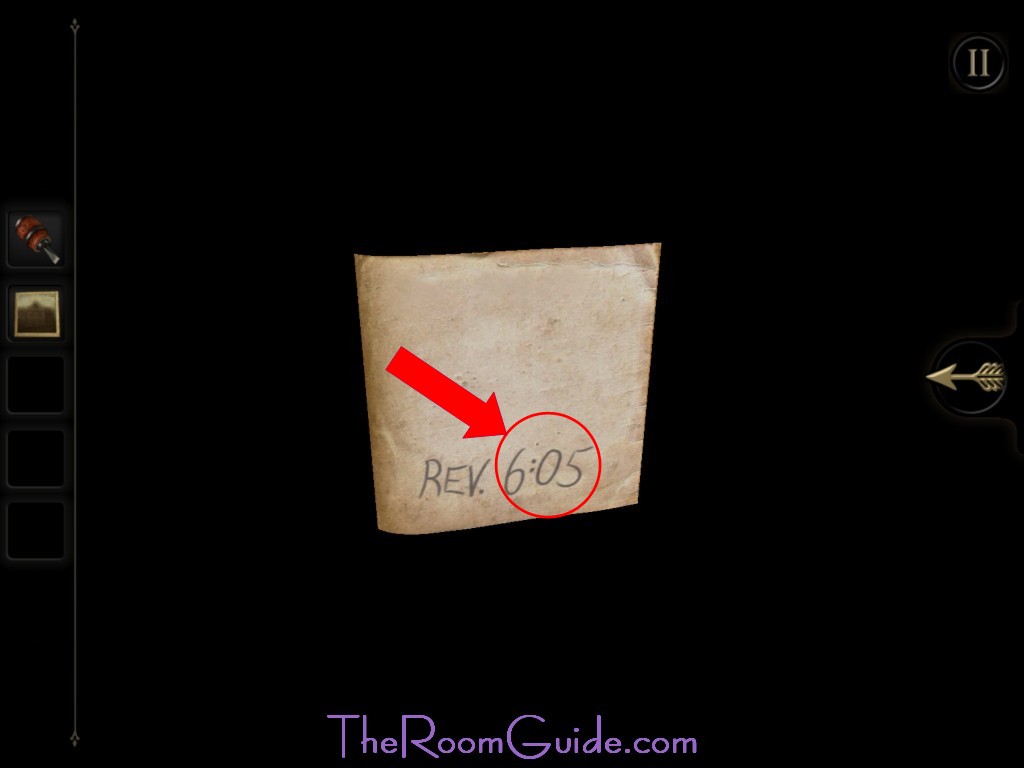
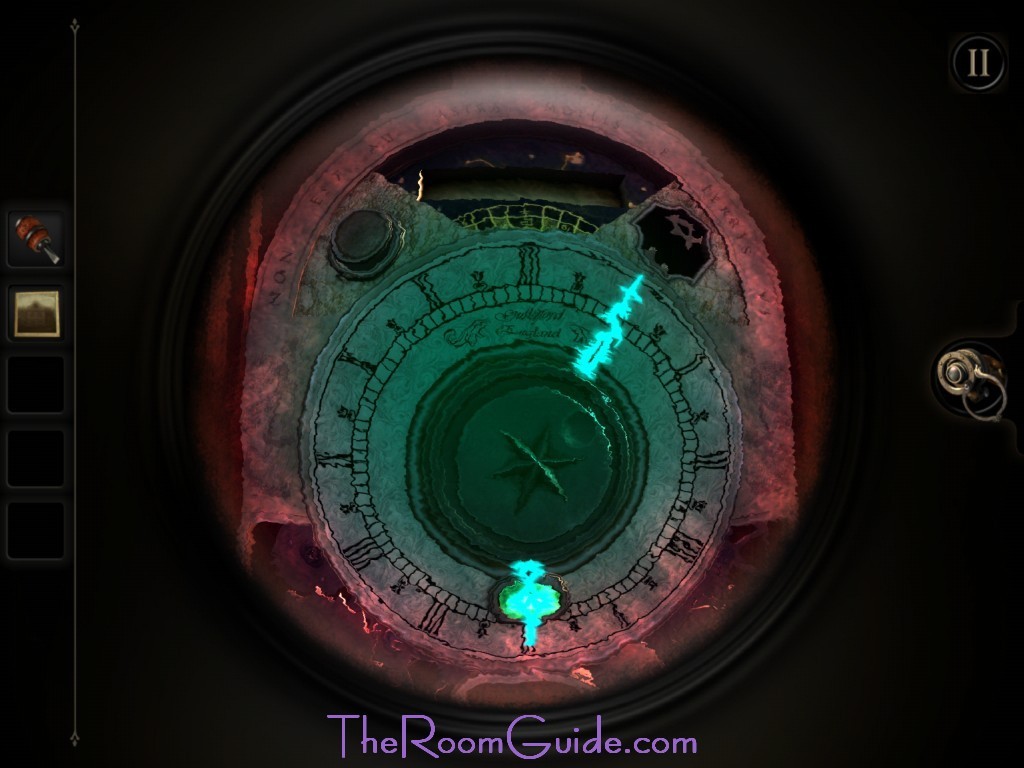
19. Gemstone: Go to the right side of the clock. Insert Some Kind of Small Key and turn. There is circle and an image with a symbol. Put on the eyepiece. Rotate the cylinder, block, and your view until the symbol on the image emerge. A mechanism will trigger. Reveal a shield. Grab the shield. Go to the top of the case. Go to the statue of the knight who is empty handed. Place the shield on him. The statue will turn. Grab the Oval Gemstone. Place the Oval Gemstone on the clock. Put on your eyepiece. Clock hands will reveal. Take a look behind the photograph. The time is 6:05. Turn the clock to 6:05. A mechanism will trigger. You have open the middle seal and open the case!


thank you!
On chapter 2 section 3 I only get one medium cog and not the small cog. I can’t go any further
You use the rubberband to connect the cogs.
Same for me too, no small cog.
Well it’s definitely not the game that’s broke, your doing something wrong.
nah, they updated the game since this guide came out. There’s only one button on the side of the clock now, and there’s no small cog, you attach the two small cogs with a rubber band. It’s neither the game being broken or the person doing anything wrong, the guide is just outdated.
you can take them off and put them back on
Why no small cog? The box above has two hole on the top. Mine only has one hole in the center. Is the game rigged or defective?
I figured it out people, the game is different. There is only one cog in the drawer. Put it in the middle, slide the switch to the right and crank backwards. Go get the one on the clockface.
I only have one button where it shows two on here for the gears?
I have the cross-shaped folding key in the right shape. How do I pick it up and put it into place on the box?
Chapter 2 #14 Pic 4 has two items in it & in my game I only received i item so that probably why I haven’t been able to advance further….
Read Linda’s comment a few before you
Awesome Game. A real head scratcher for sure. I love this game.
I can’t figure out the cylinder shape thingy help!
Nvm
New to this wonderful game. I just wish I would have known about it sooner. Very tricky but very fun. Thanks for the help. Developers, keep up the fantastic work!