Section 2: Top Seal
A mechanism will trigger and expel a long wooden box.
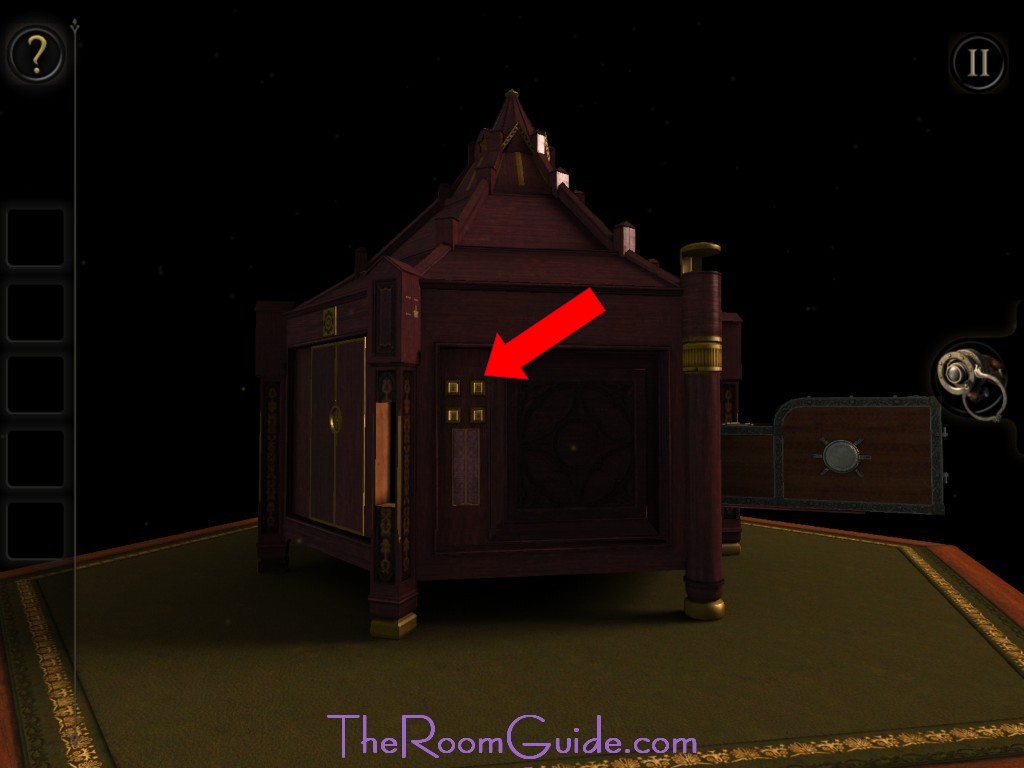
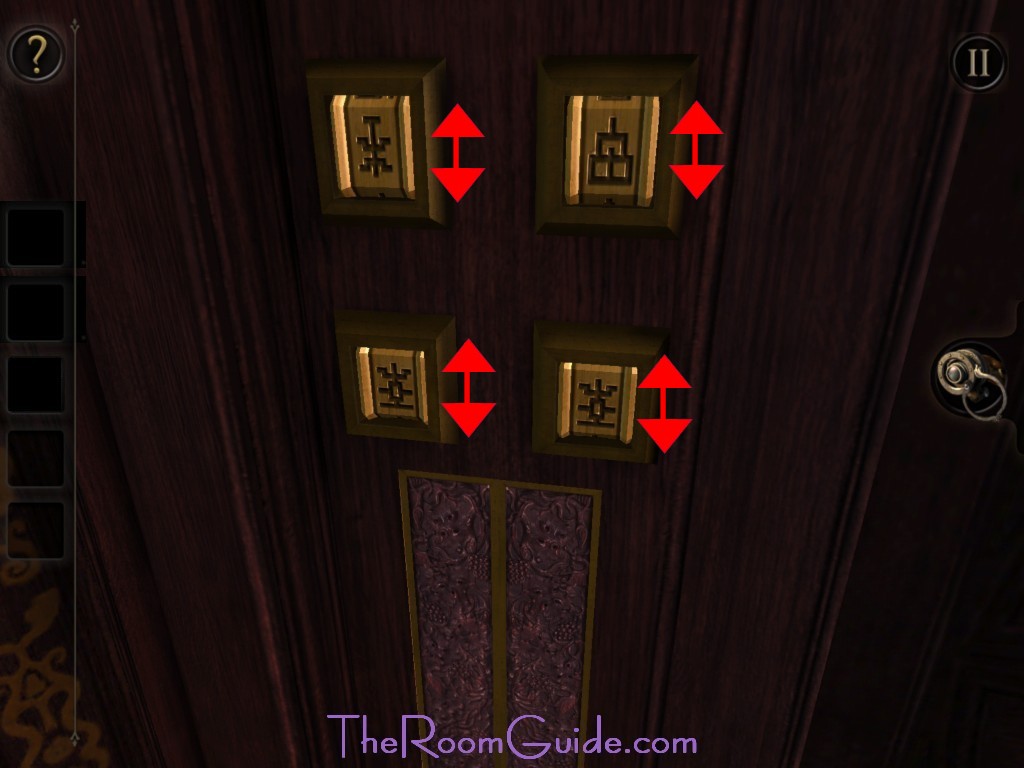
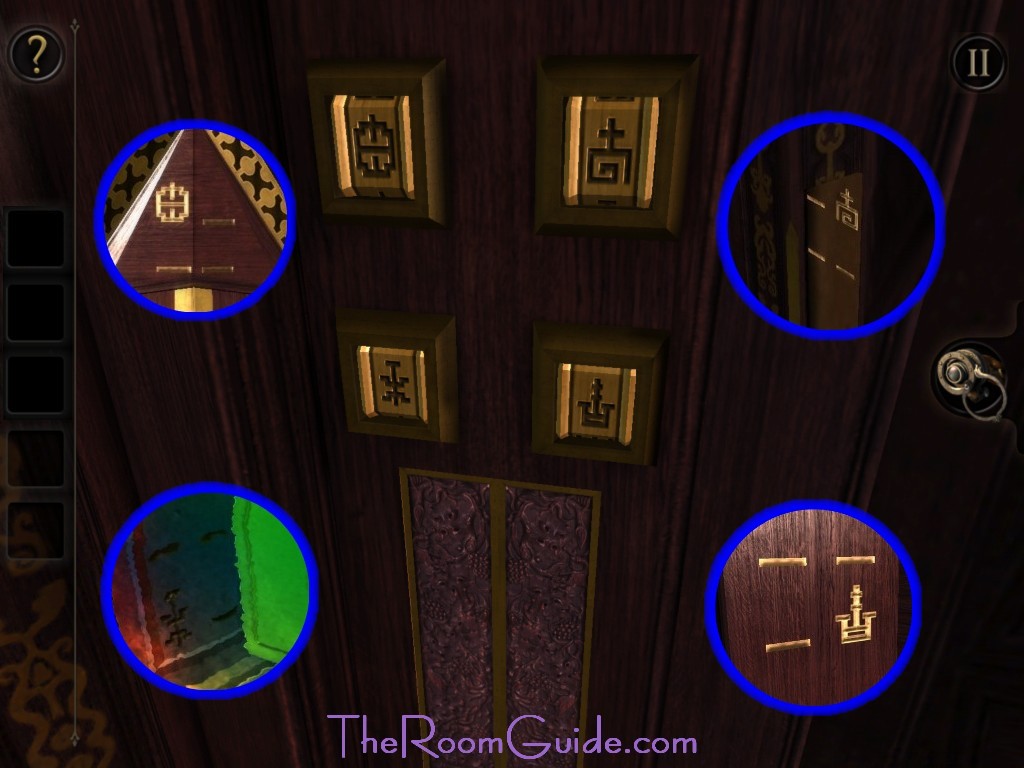
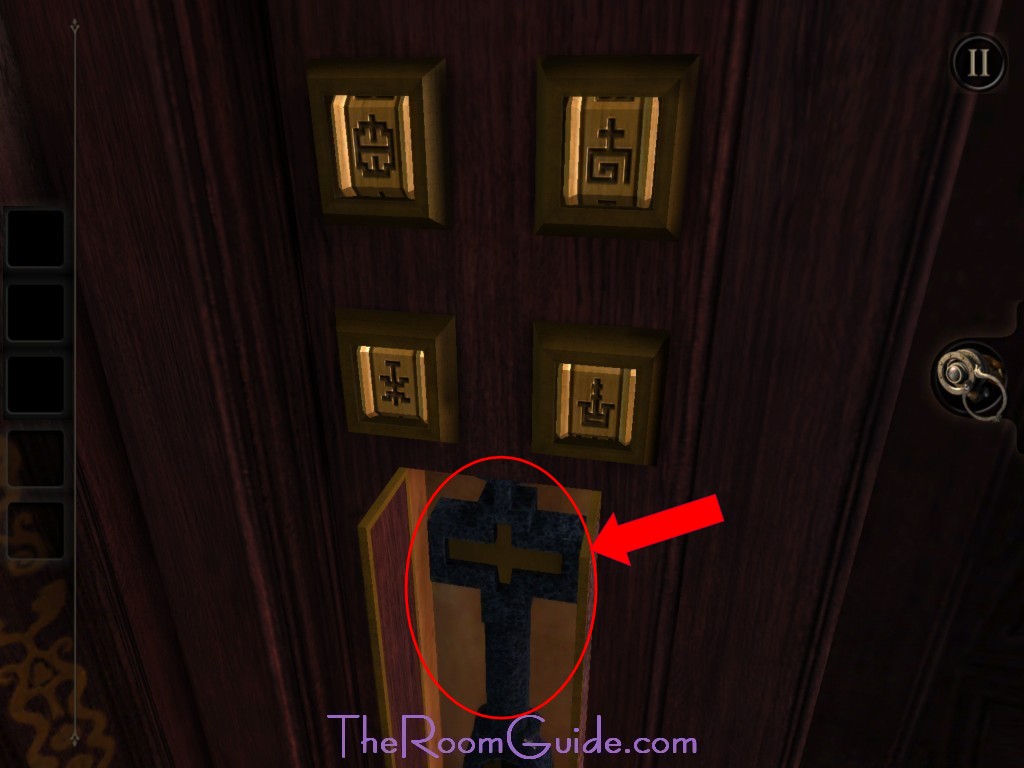
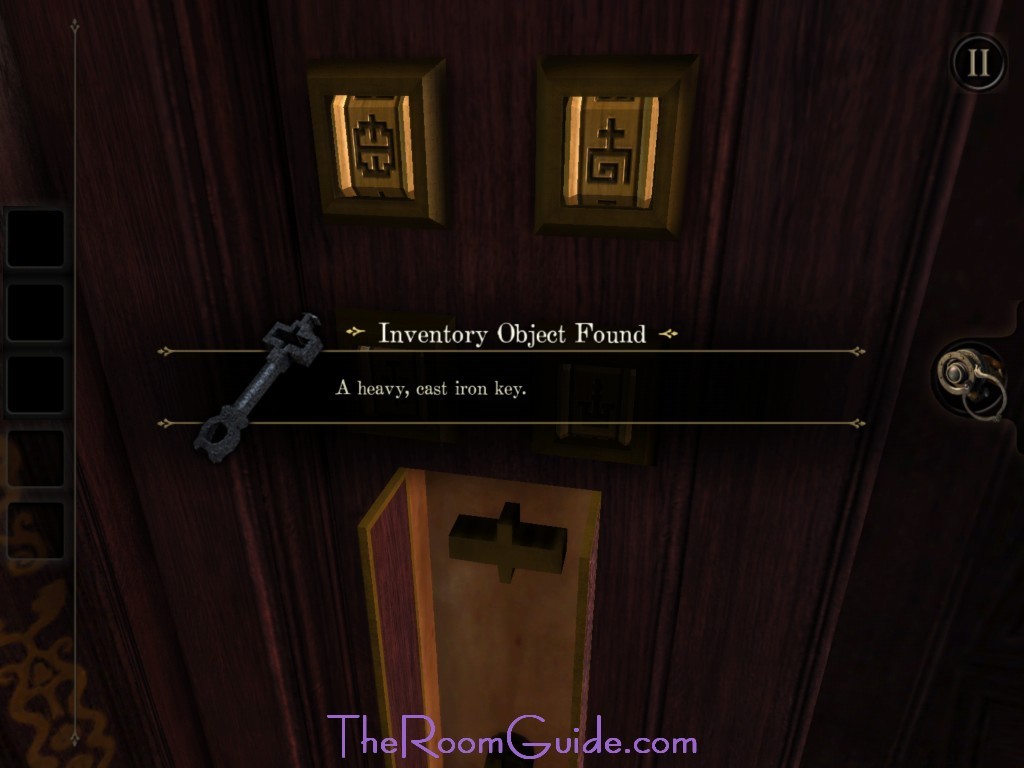
7. Cast-Iron Key: This lock has four slots. Look throughout the case for clues. See images below for clue locations. Enter the passcode. Retrieve the Heavy, Cast Iron Key from secret compartment.
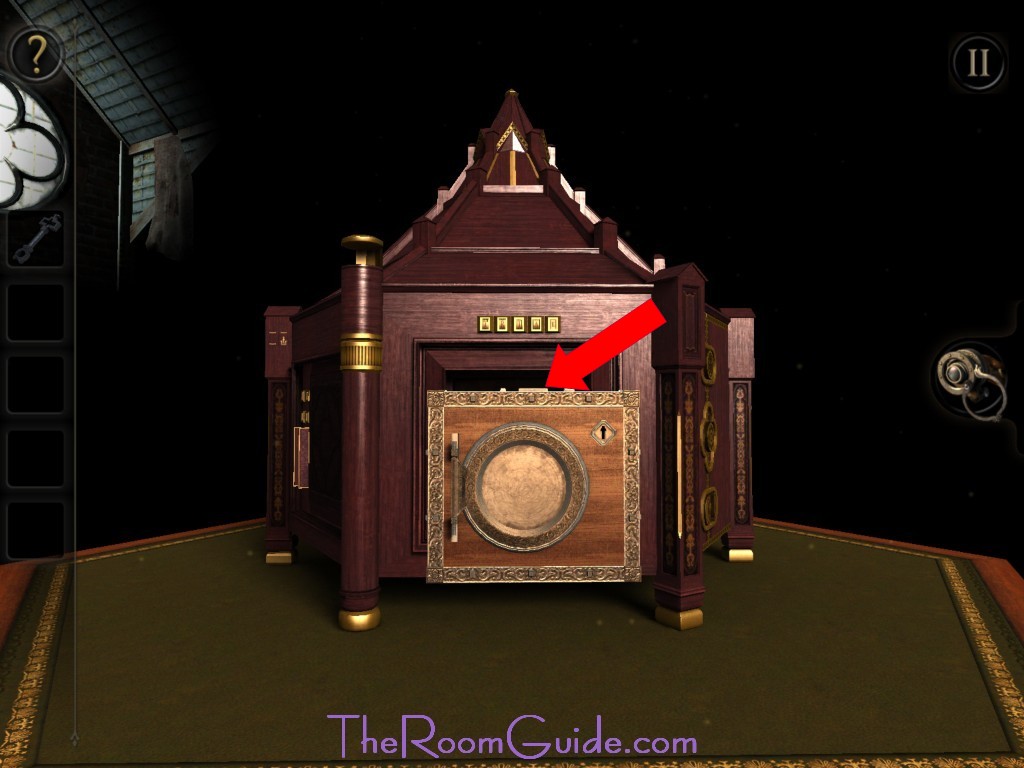
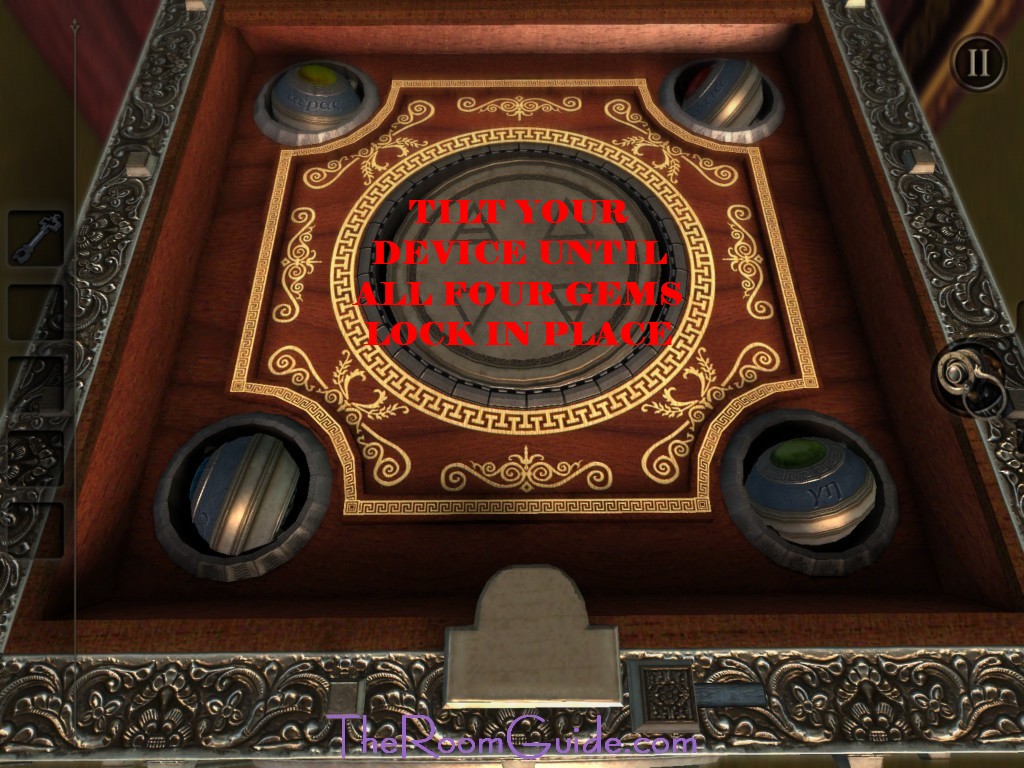
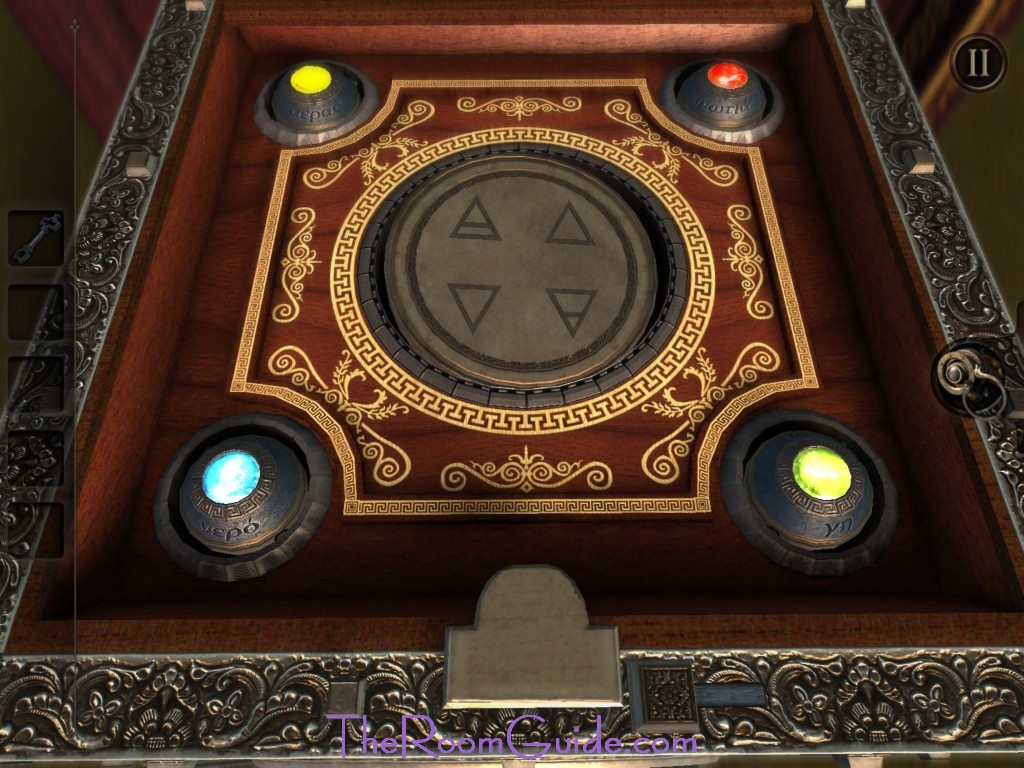
8. Rotating Gems: Turn the switch on top of the box. Underneath is board with a circle in the middle and four gems at each corner. Each gem can be rotated. Tilt your device (Your Ipad or Iphone) until all of them lock in place. This will trigger a mechanism.

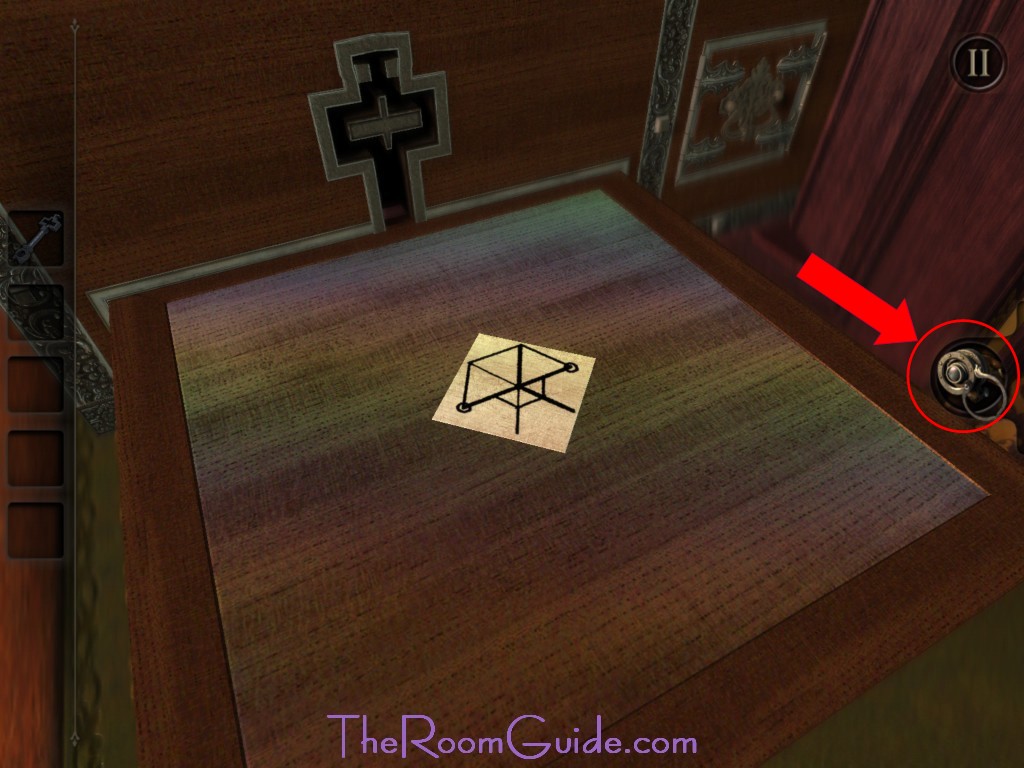
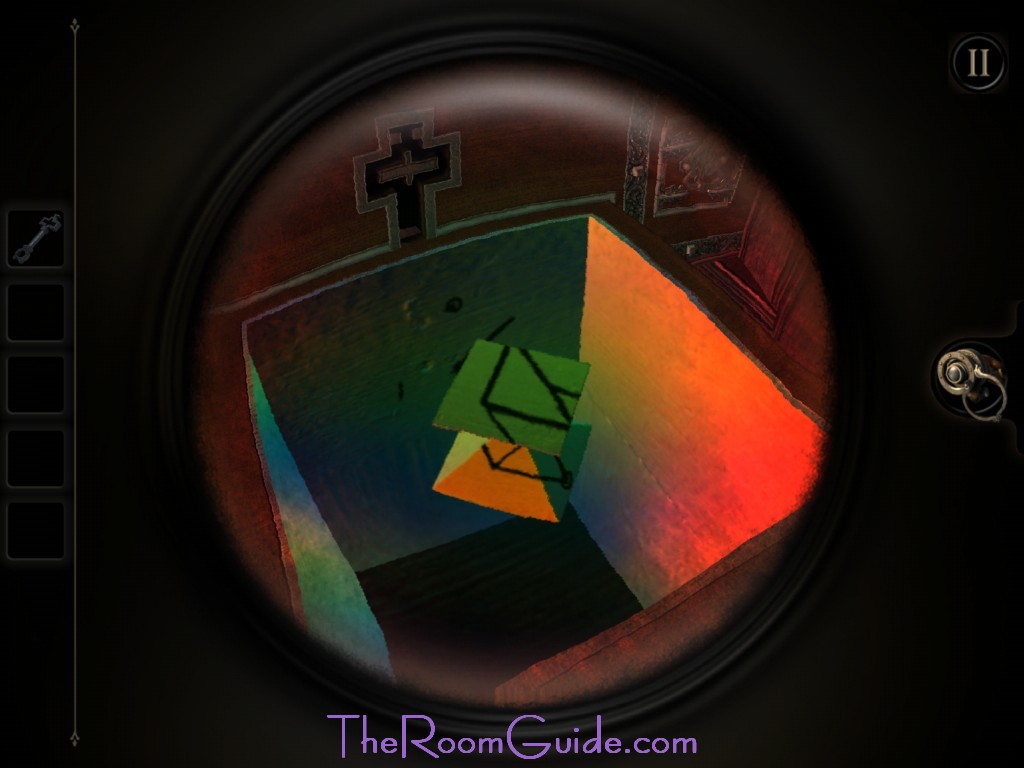
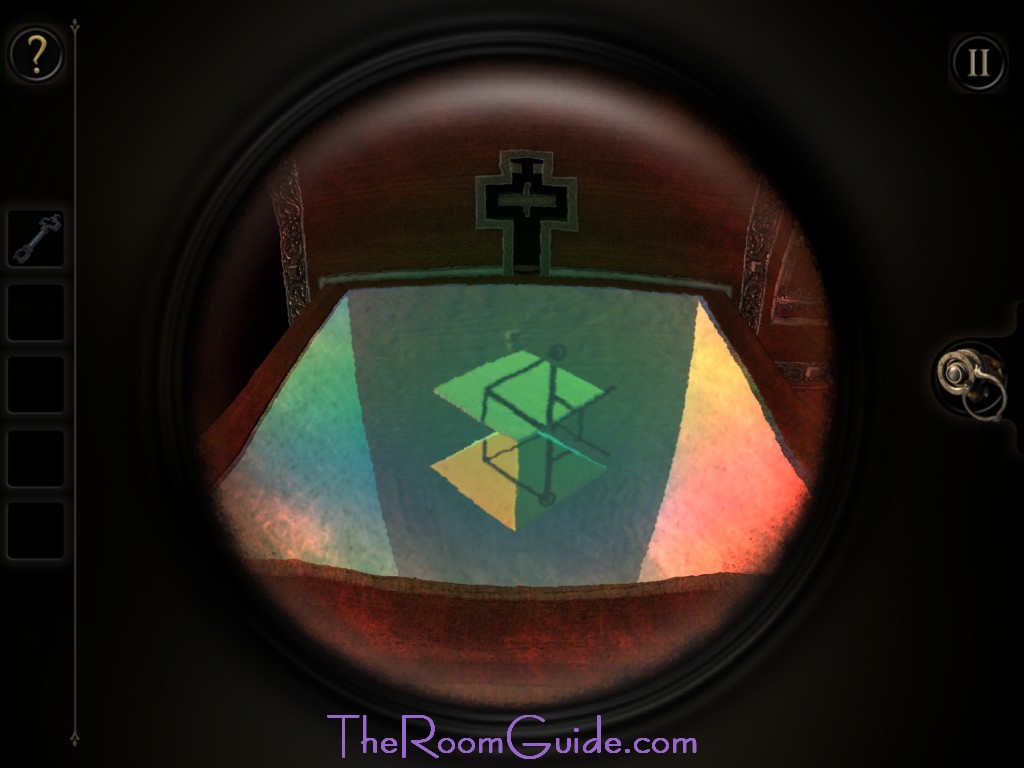
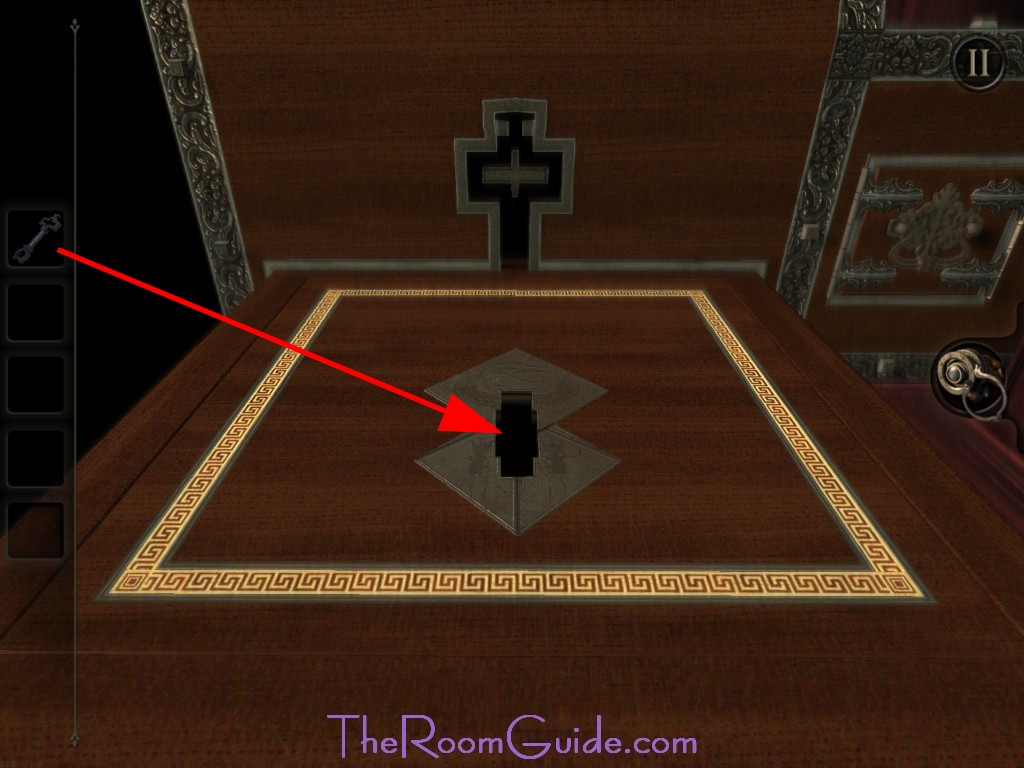
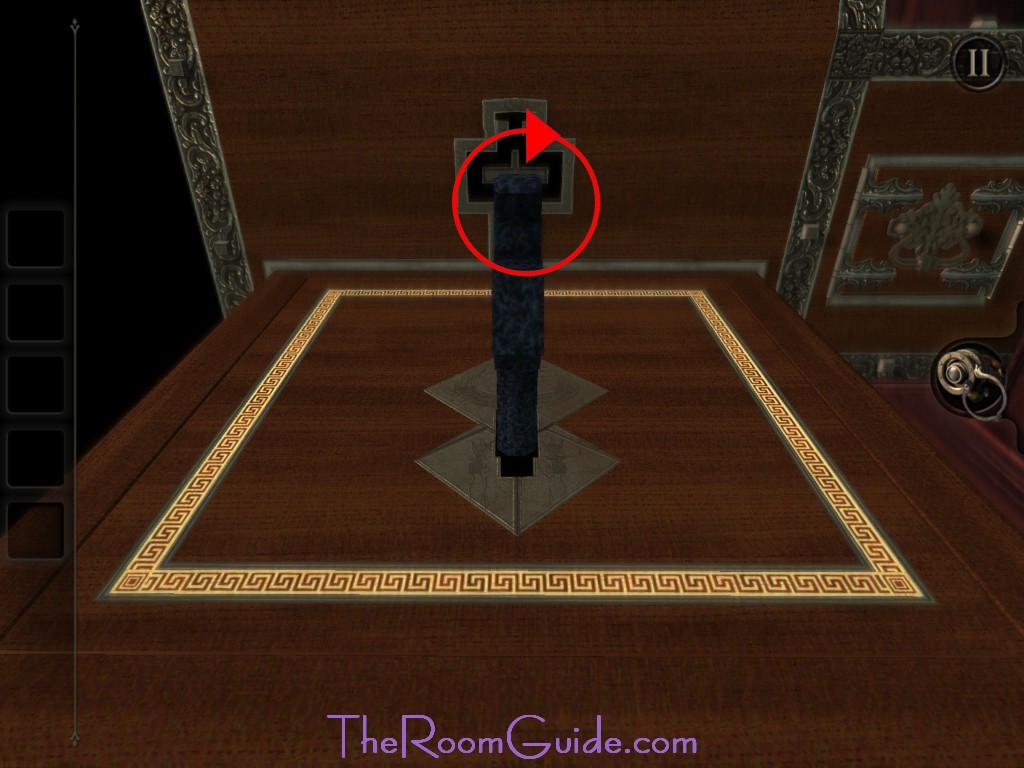
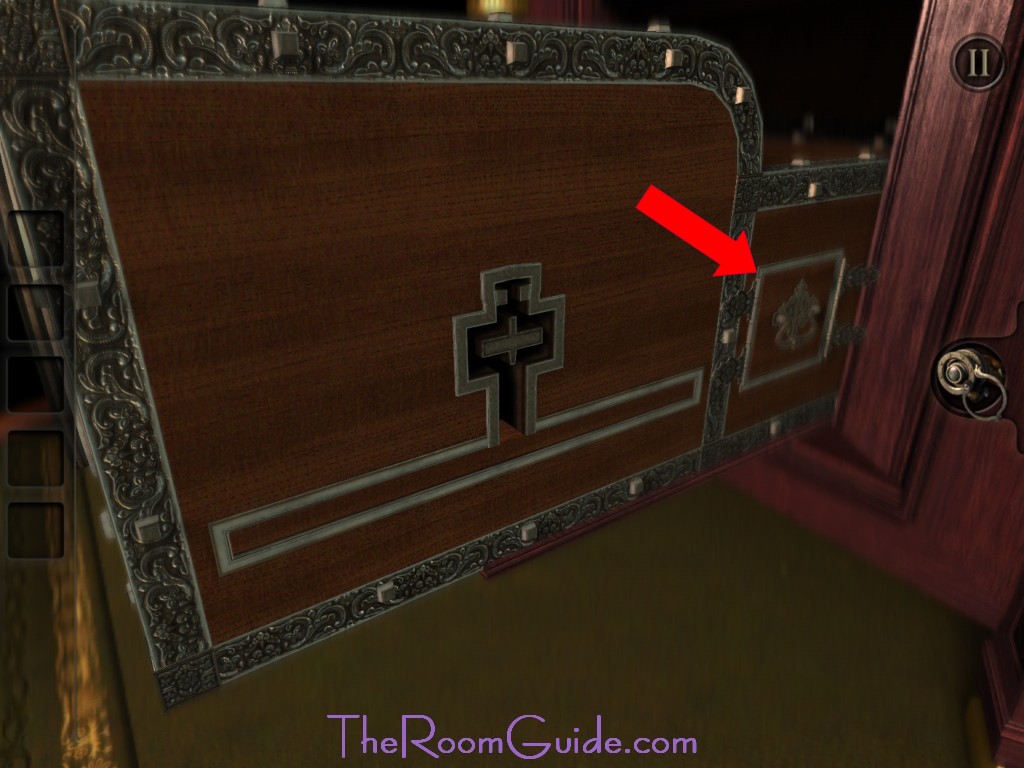
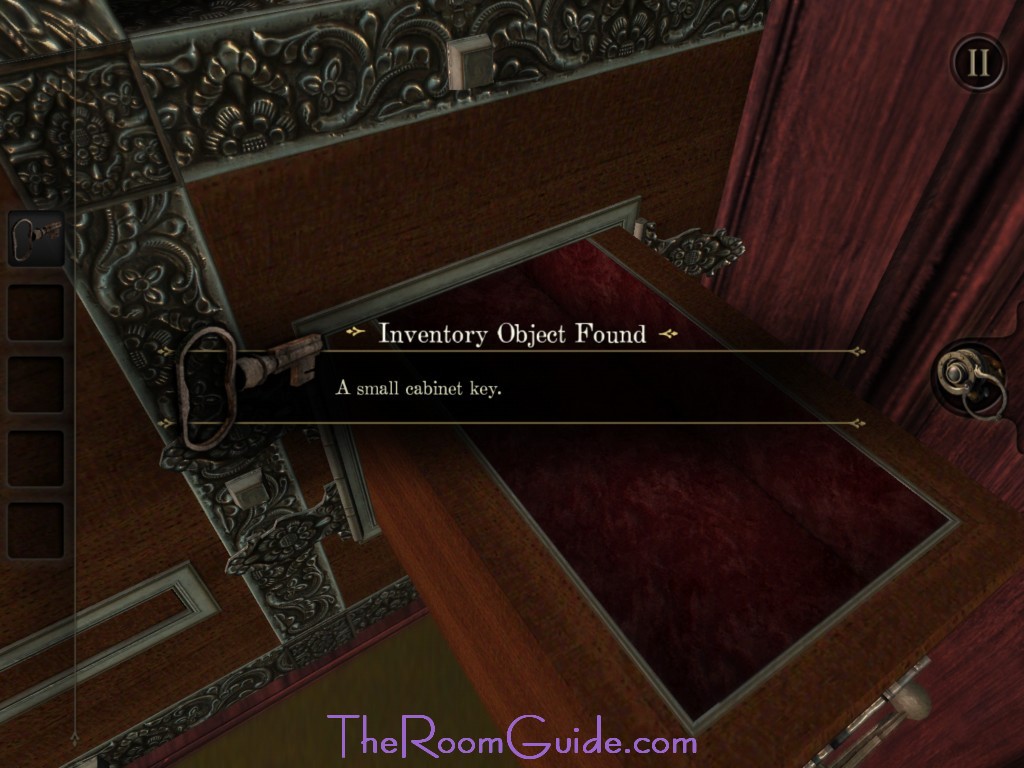
9. Board: A board will eject at the bottom with a image on the right side of the box. Put on your eyepiece. Rotate your view until you align the two pyramids to resemble the image. A keyhole will emerge. Insert and turn the Heavy, Cast Iron Key. A mechanism will trigger and unlock the drawer on the right. Open the drawer and grab the Small Cabinet Key.


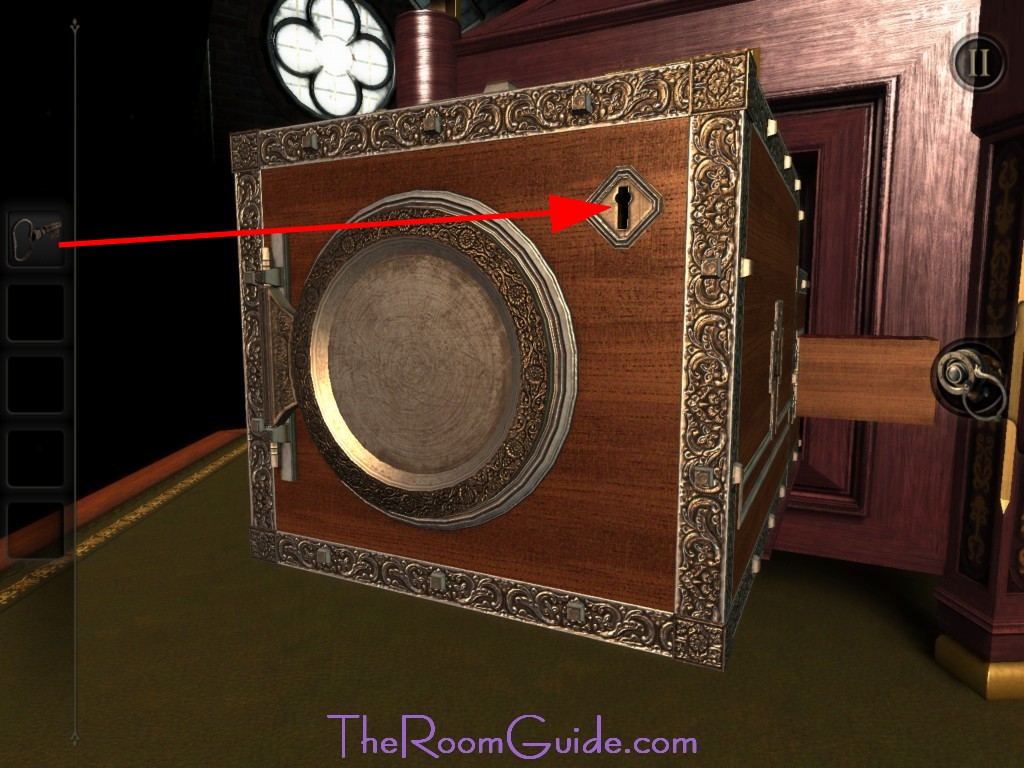
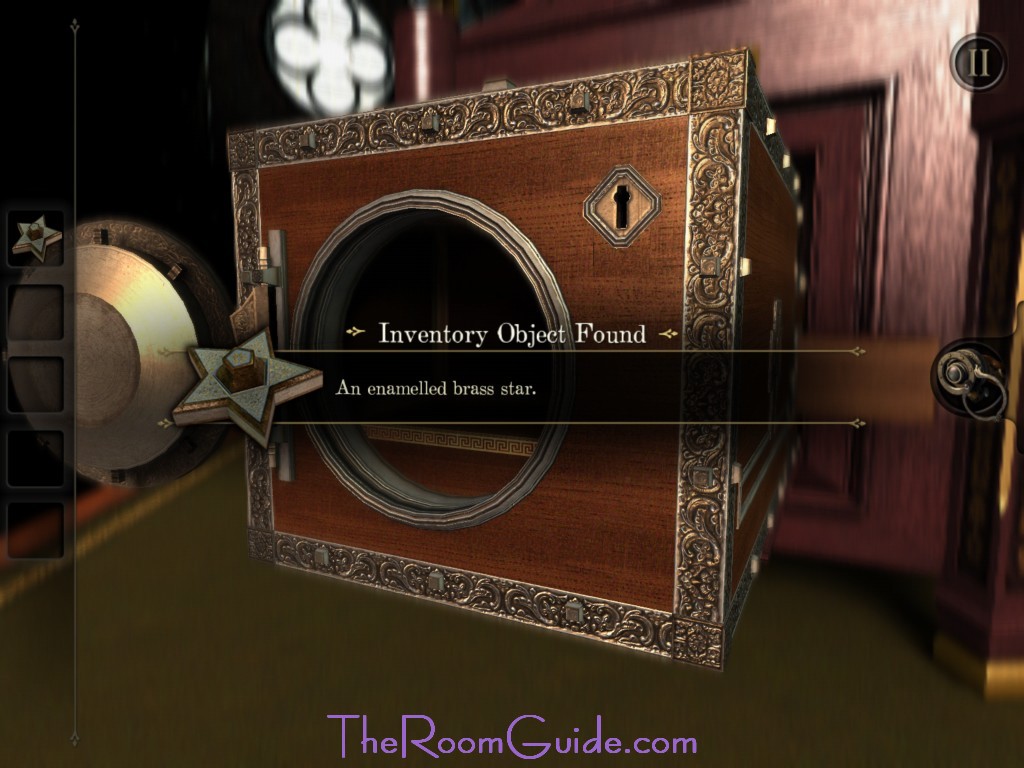
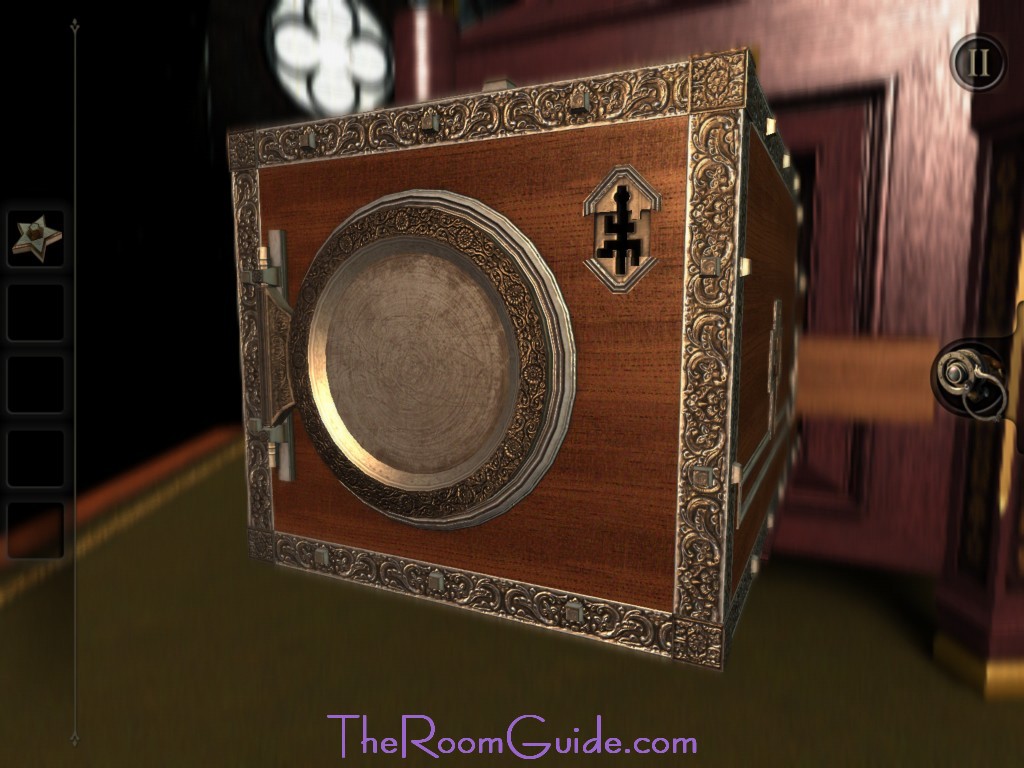
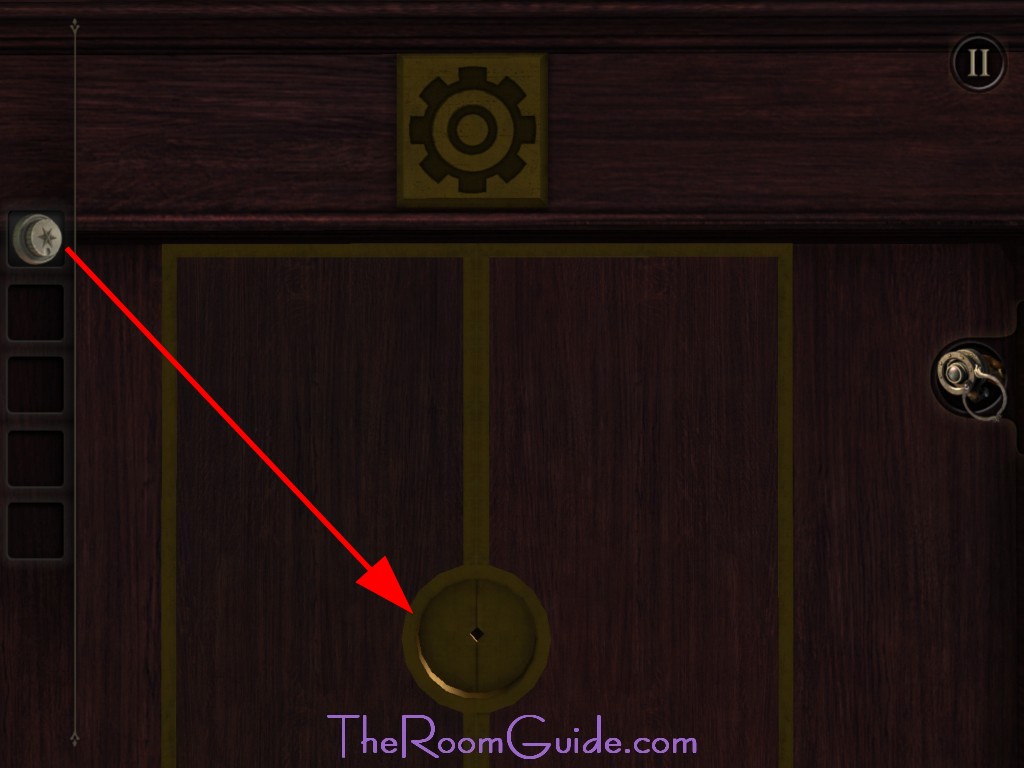
10. Cabinet: Go to the front of the box. Insert the Small Cabinet Key into the keyhole and turn. The circular door will open. Grab the Enamelled Brass Star. The door will close and keyhole will change shape.


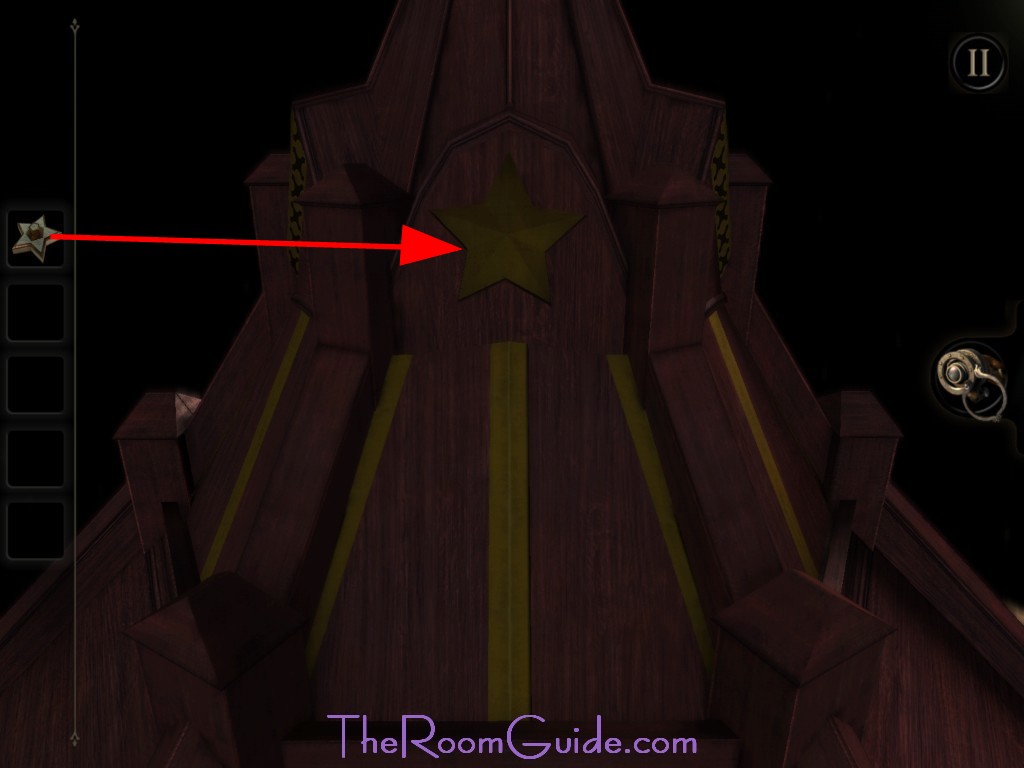
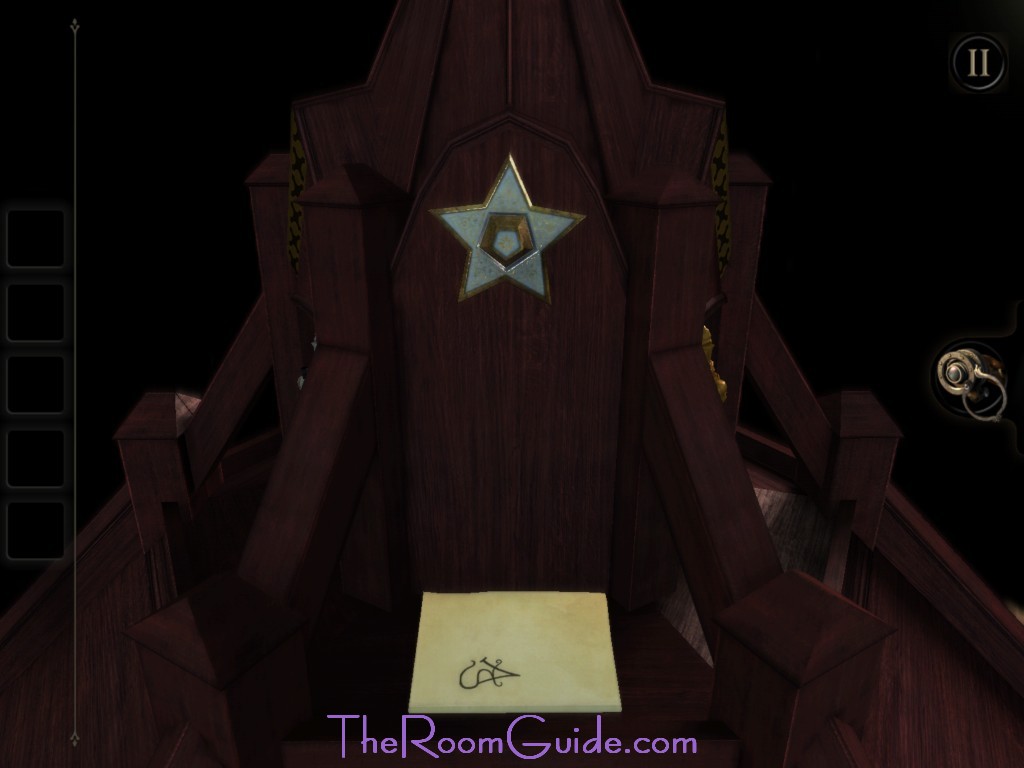
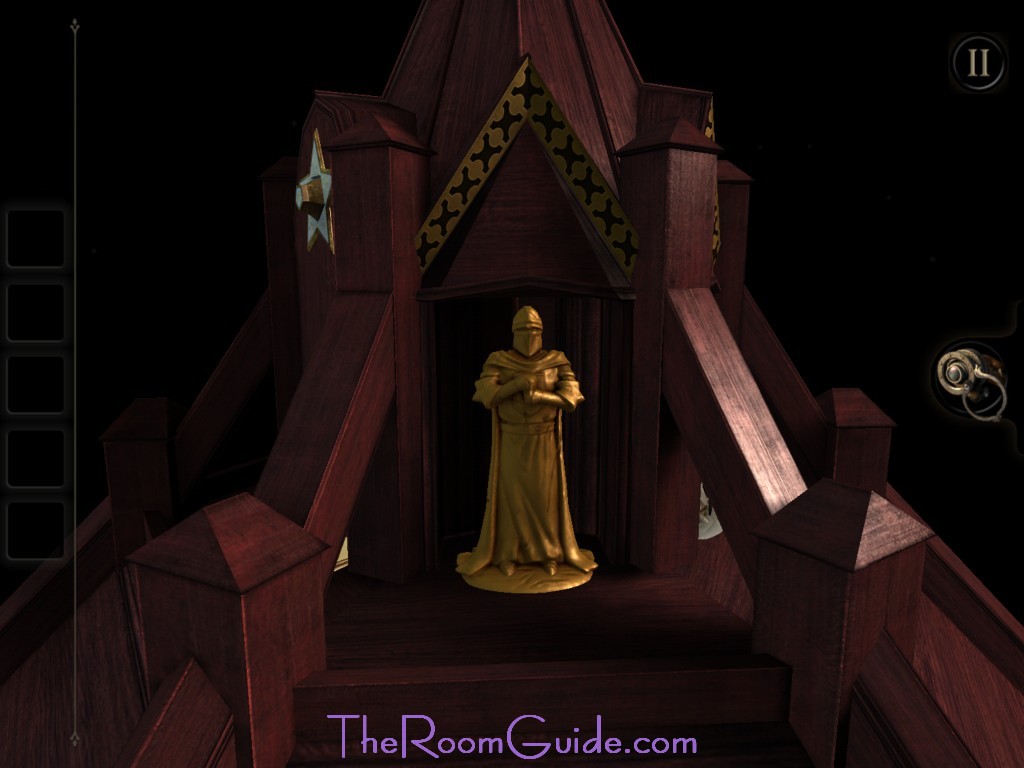
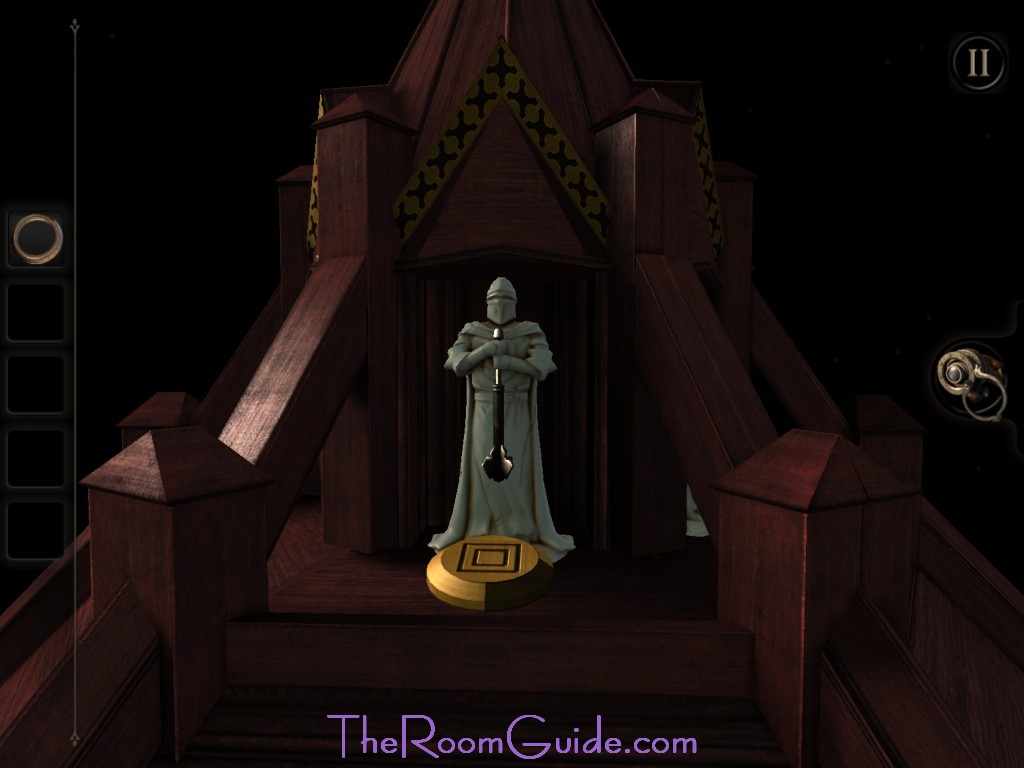
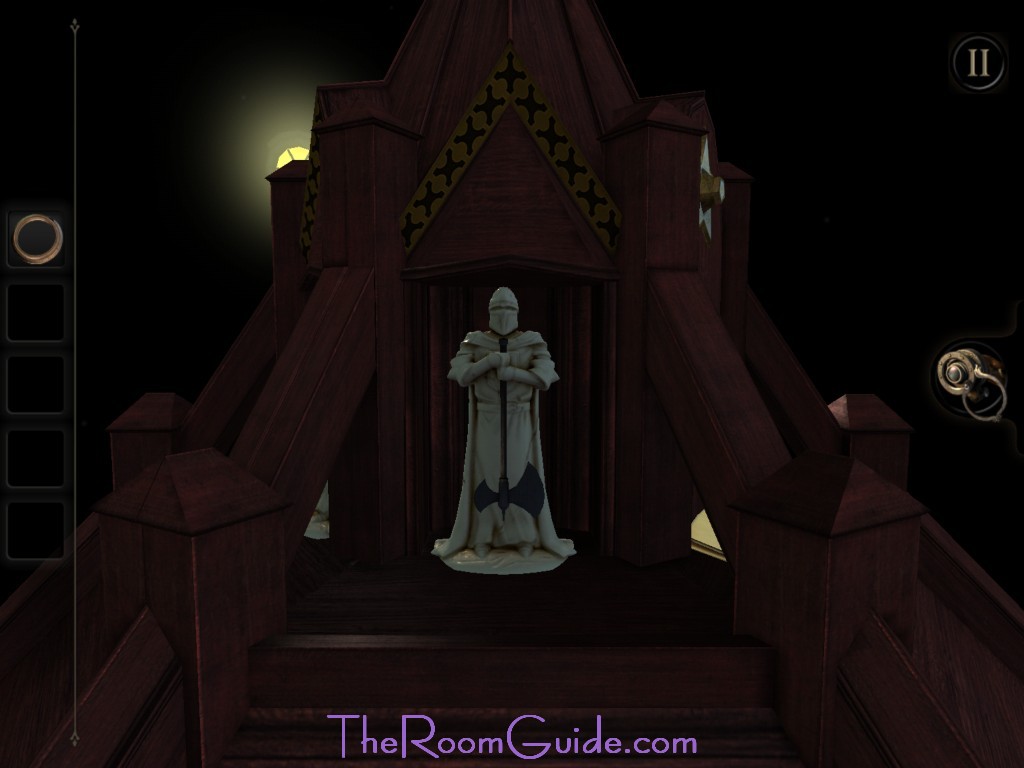
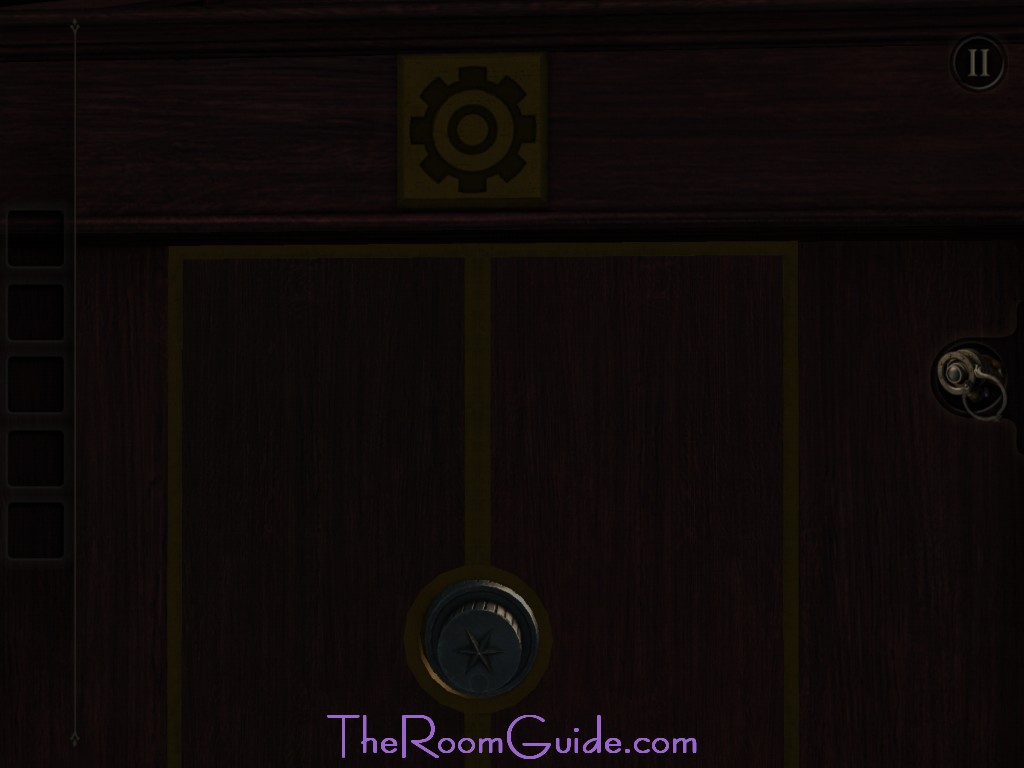
11. Top: Go to the top of the case. Insert the Enamelled Brass Star in a star-shaped hole. The panels around will open revealing a page of journal, three figurines, and a brass ring with markings around the edge. Grab the Brass Ring with Markings Around the Edge.


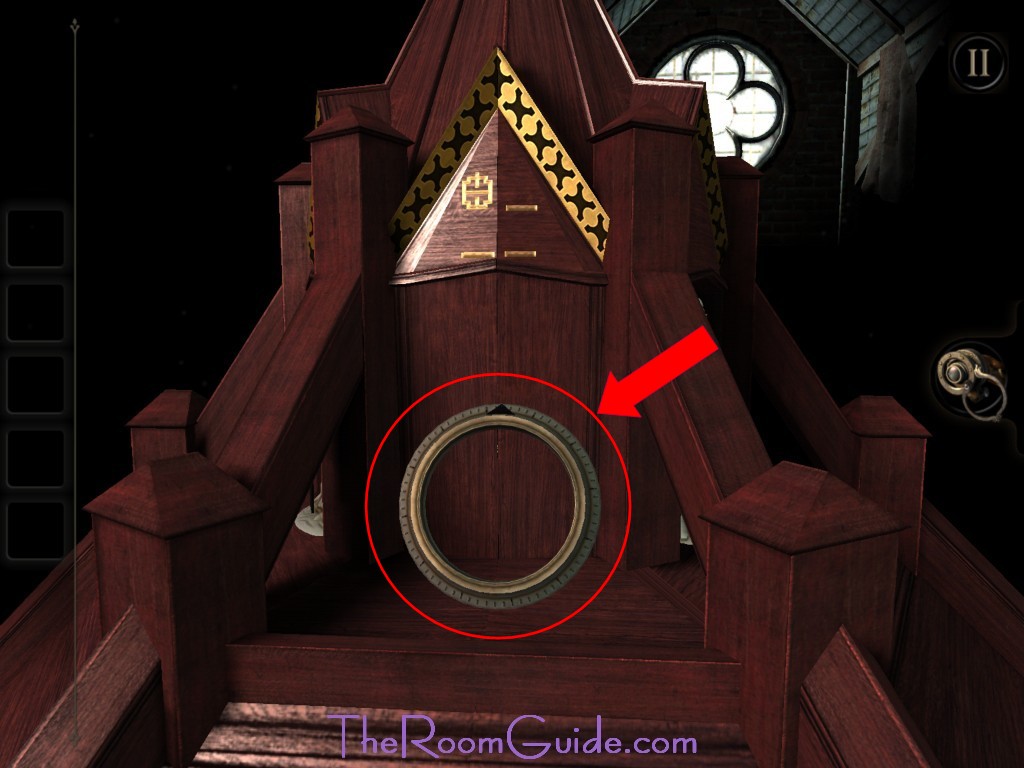

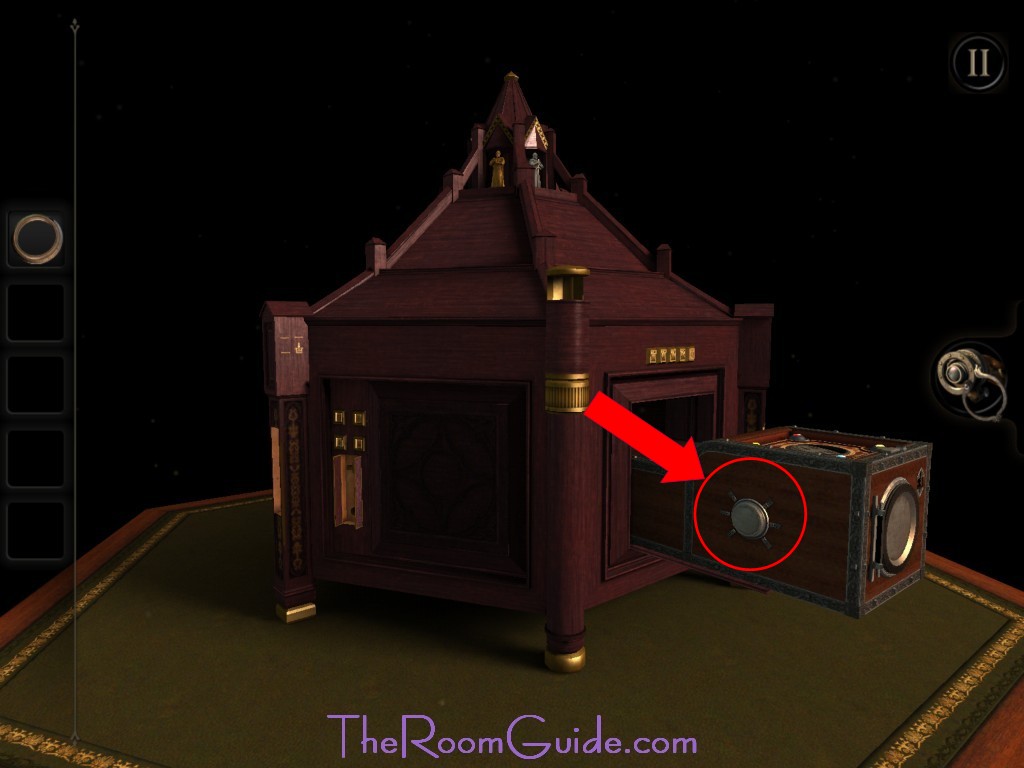
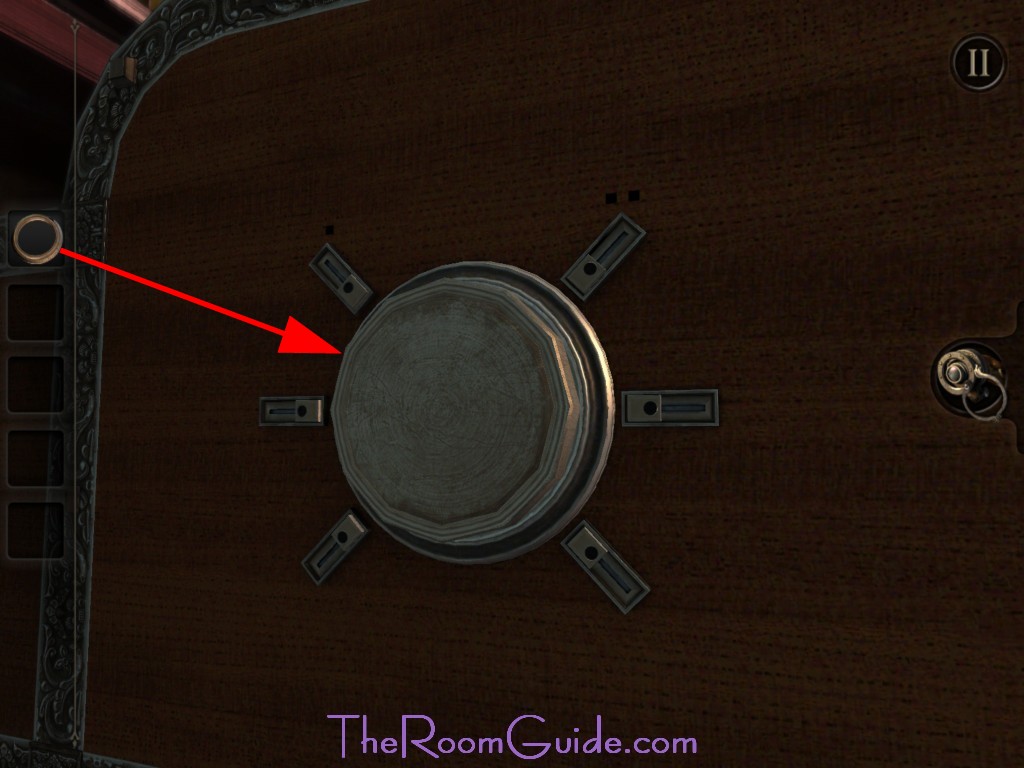
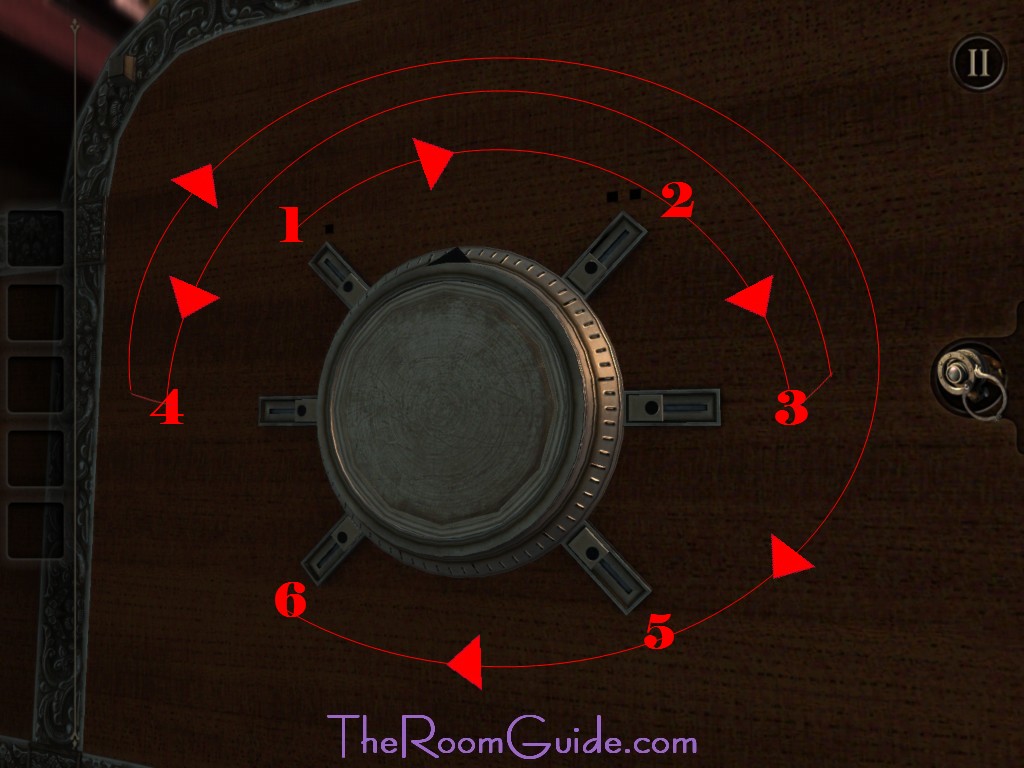
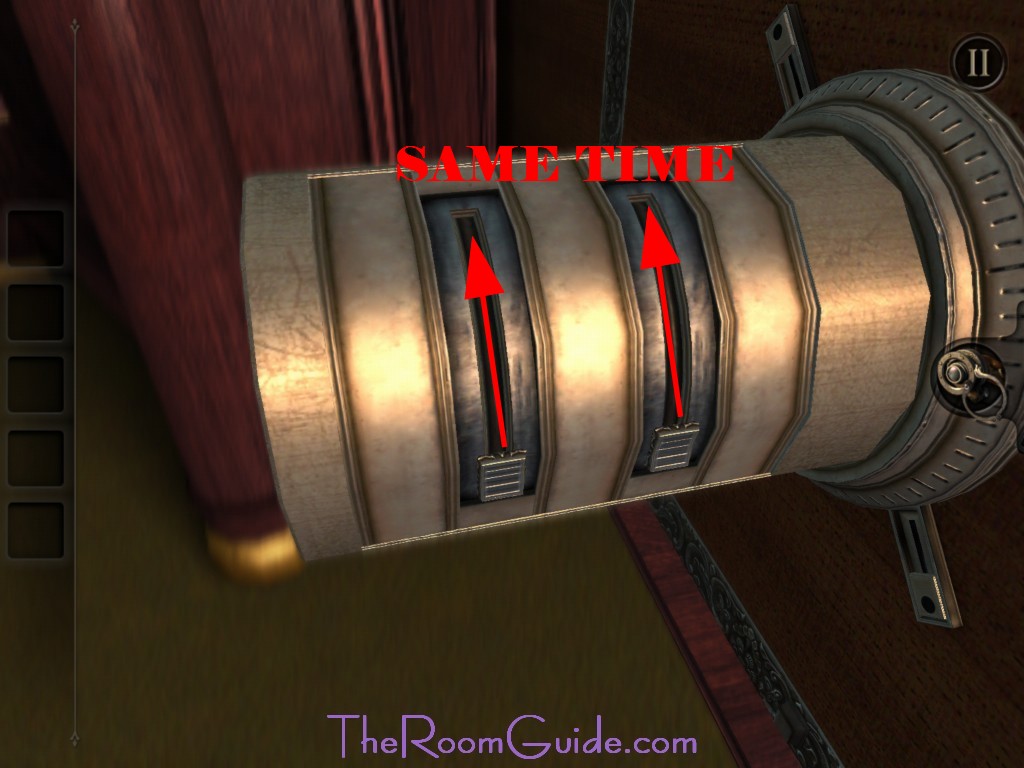
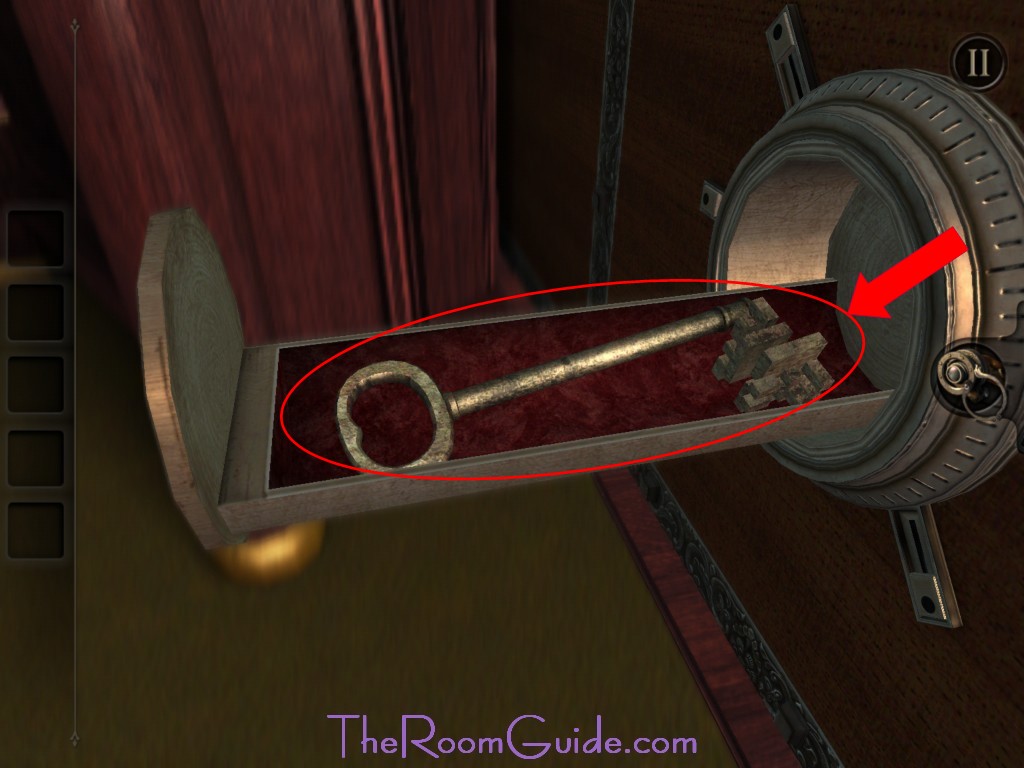
12. Switches: Go to the left side of the box. Place the Brass Ring with Markings at the center. The switches need to be turn on at certain order. Following the order in the image below. When all the switches are turned on, the center will eject. Two more switches are revealed. Turn both at the same time with your fingers. A compartment will open with a Large, Oddly Shaped Key inside.
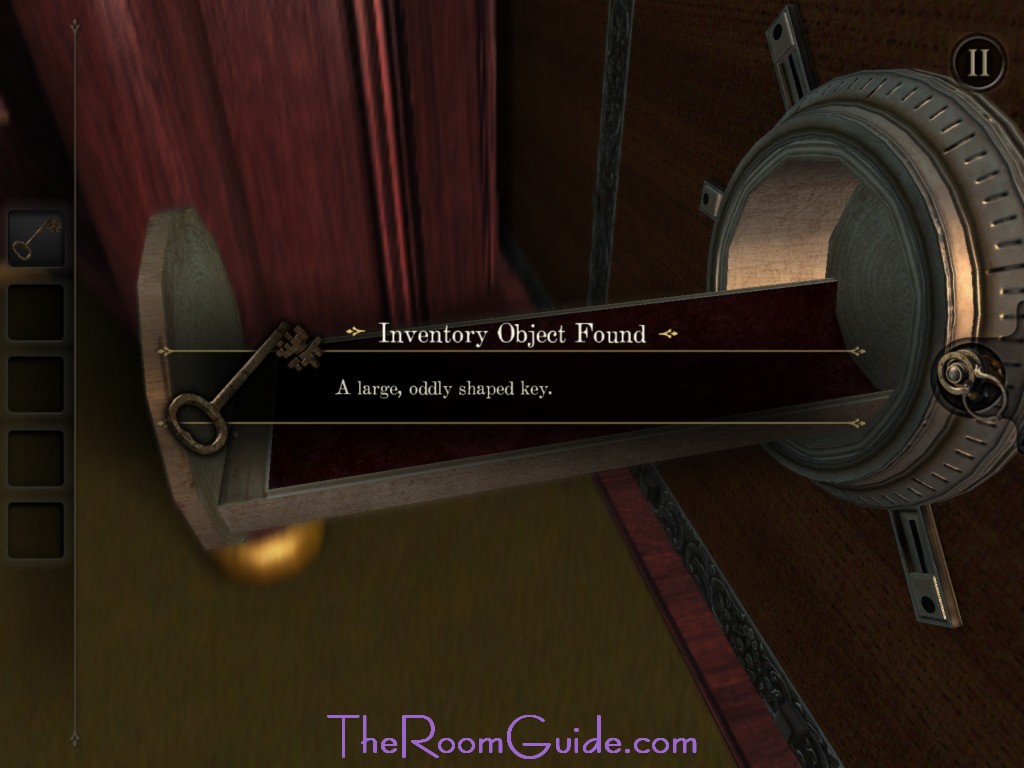
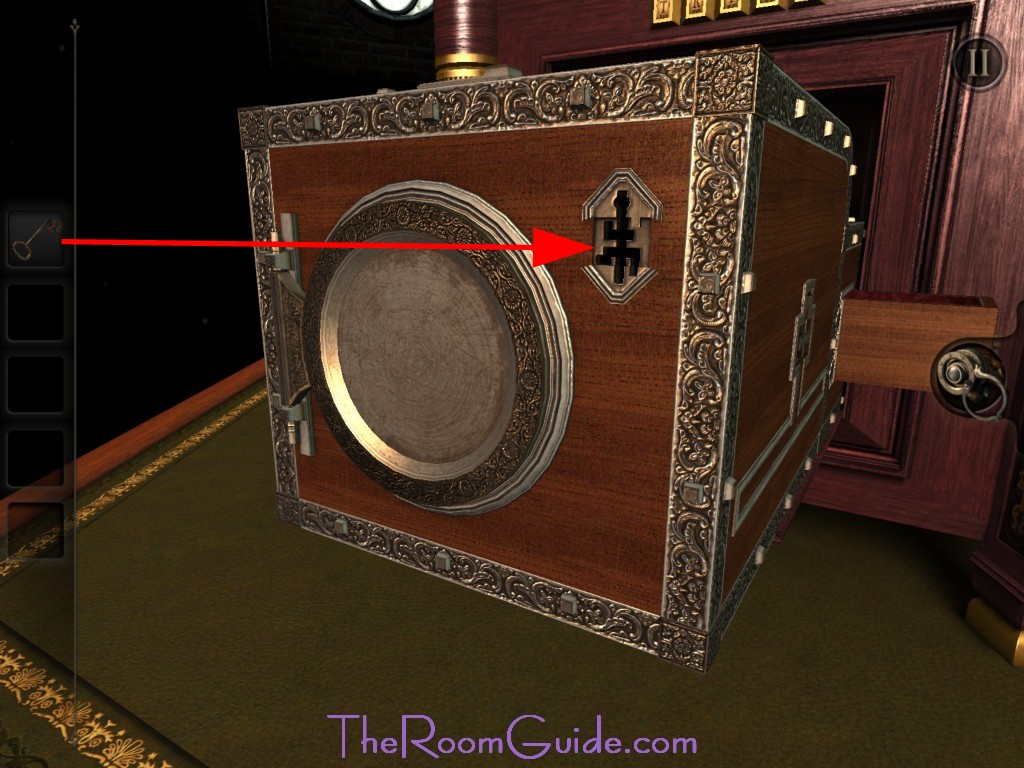
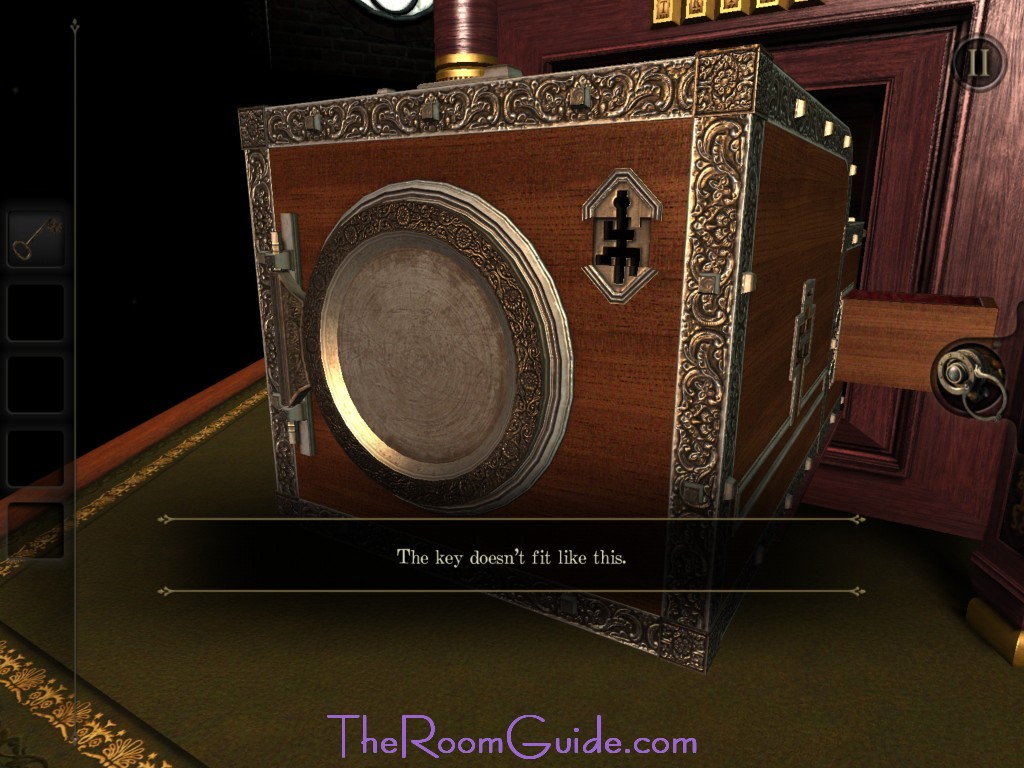
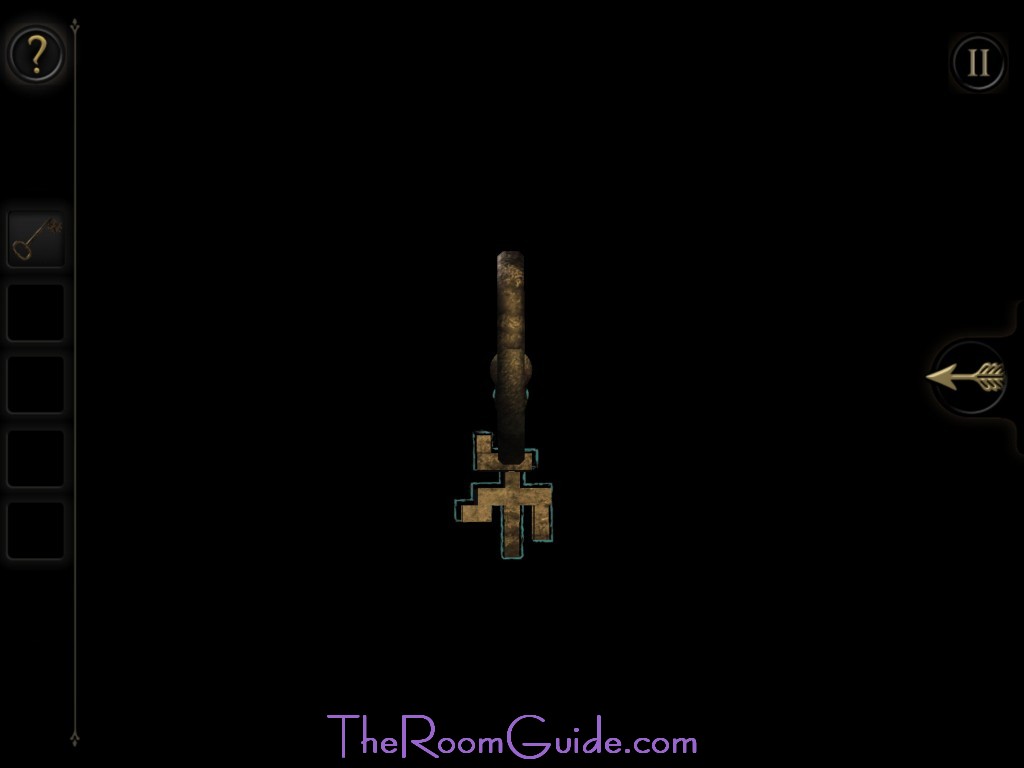
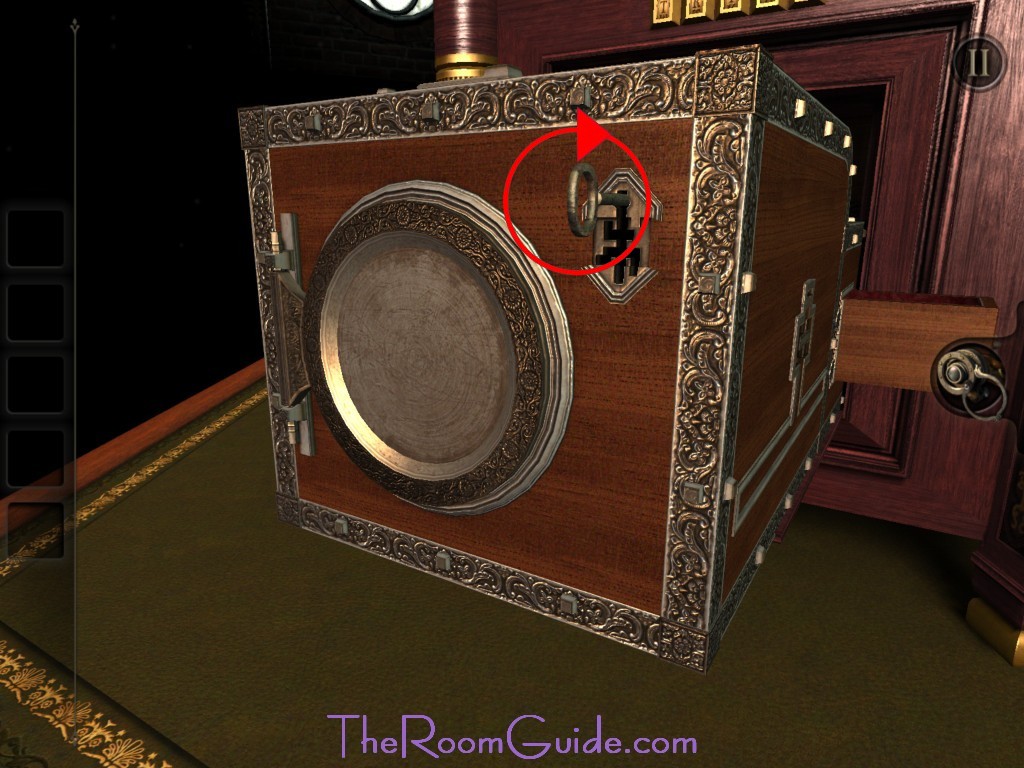
13. Oddly Shaped Key: Go to the front of the box. Try insert the key. Then look at the key closely. A pattern will appear showing you how to rearrange the key. Rotate your view can make the task easier. Once key are rearranged. Insert the key again and turn. Collect the Circular Plate with a Star Emblem.


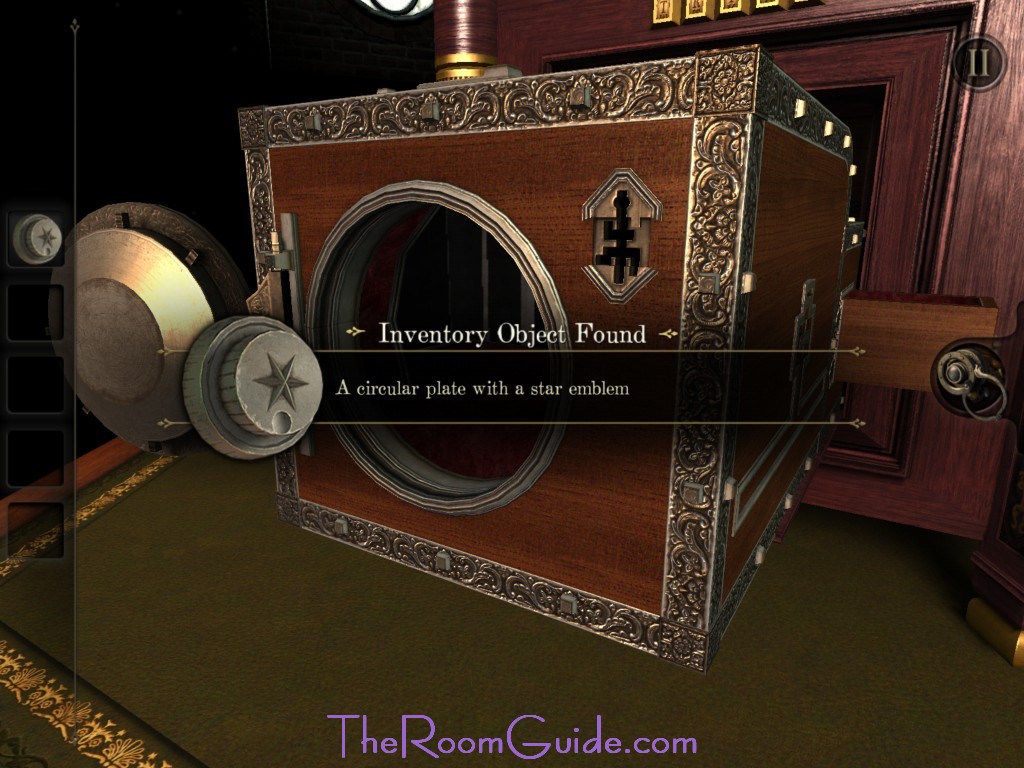
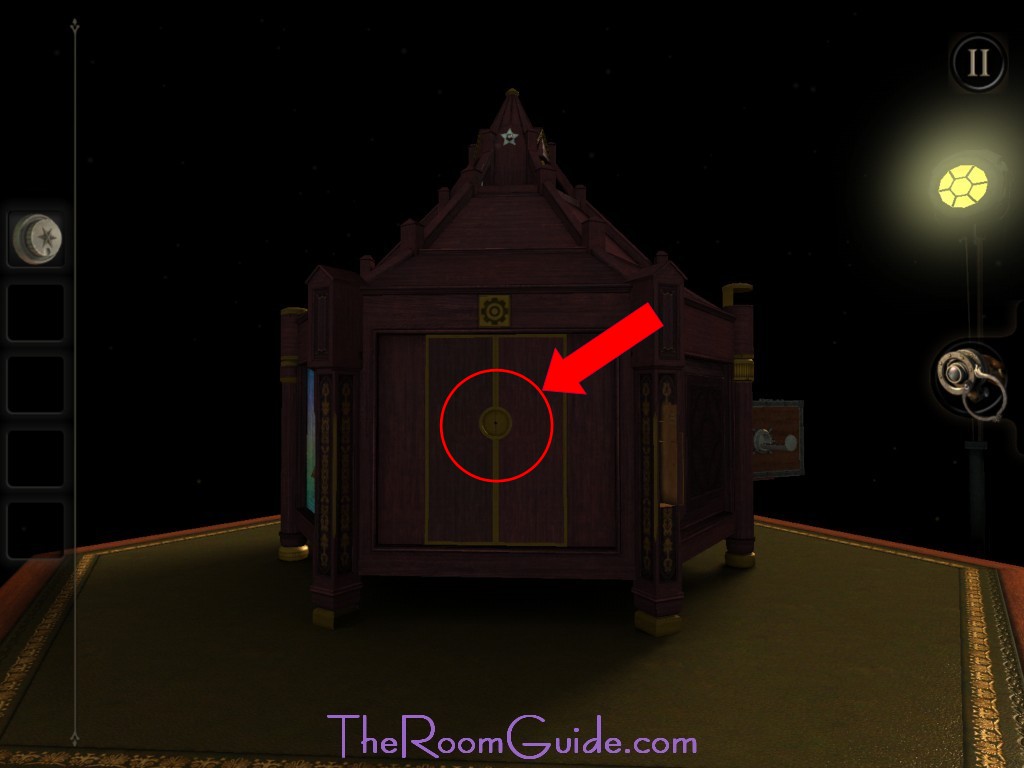
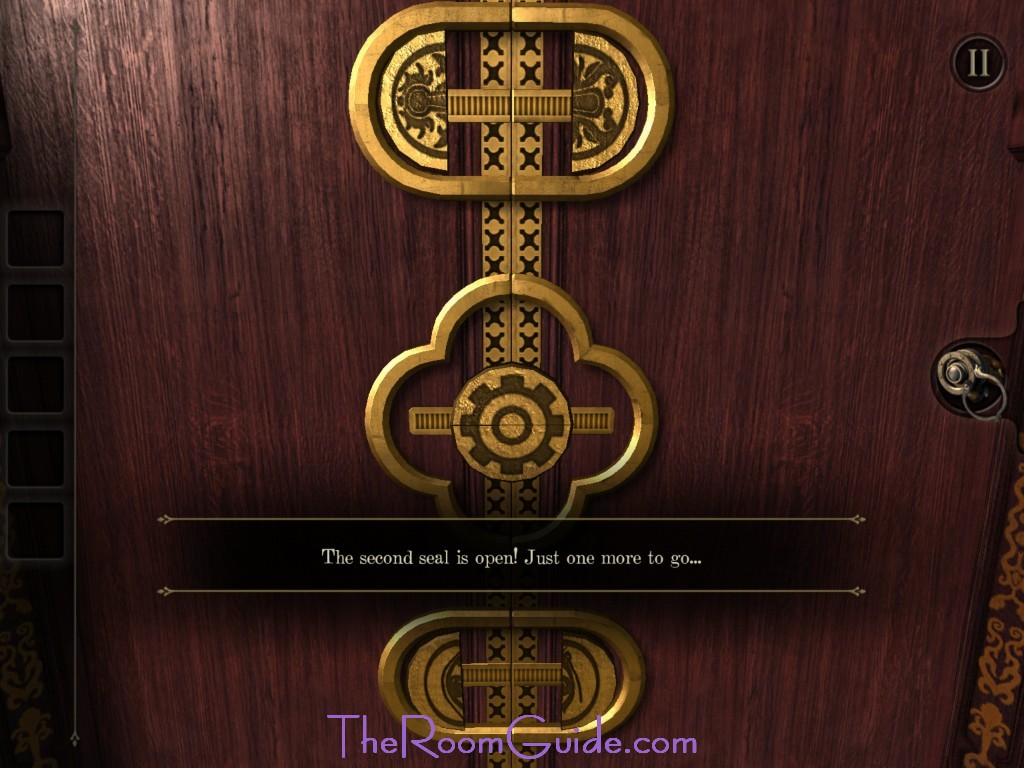
14. Circular Plate with a Star Emblem: Go to the side of the case with a gear icon. Insert circular plate and turn. This will trigger a mechanism. You have open the top seal!
Good
Clues keep referring g to “orbs”… WHAT orbs????? There are no orbs!
I am playing on a computer. How do I move both switches at the same time with a mouse?
I’m also playing in a pc and I just put one up at a time then right clicked to back up and it opened
turn on the lens and two number clues become visible
The orbs on my game (Chapter 2, step 8) do not move at all. They do nothing when I tilt my Android device. I’m stuck here.
I have a switch and I can’t lift the two things up at the same time on the cylinder
I am playing on the switch, handheld, and I cannot move the two switches at the same time. Please help.
Number 12. Image 4. Another solution: Put on your eyepiece. Rotate that “drawer”, yo will see on the left side a number, and on the upper side another number. Those are the numbers you have to align that circular swith.