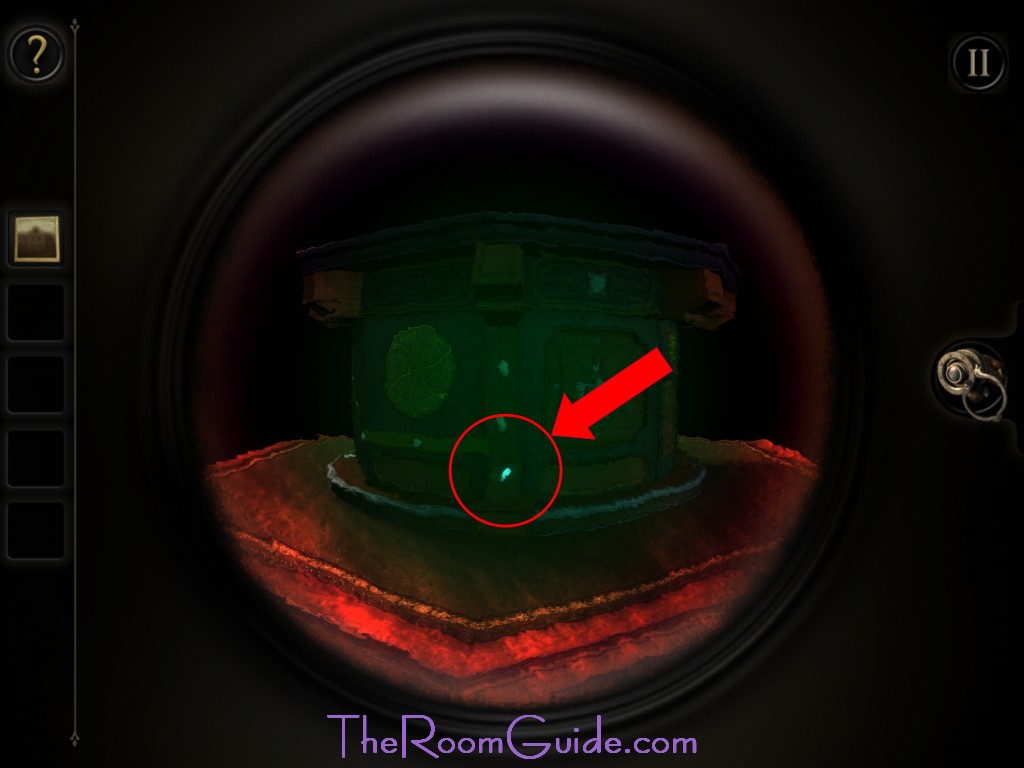
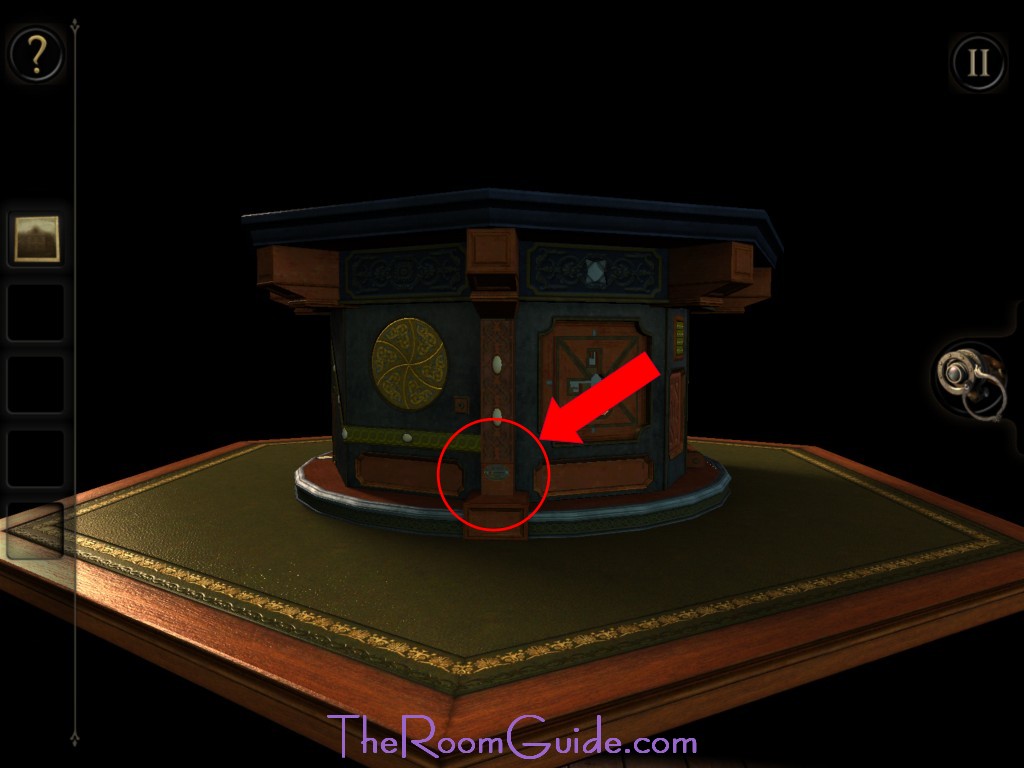
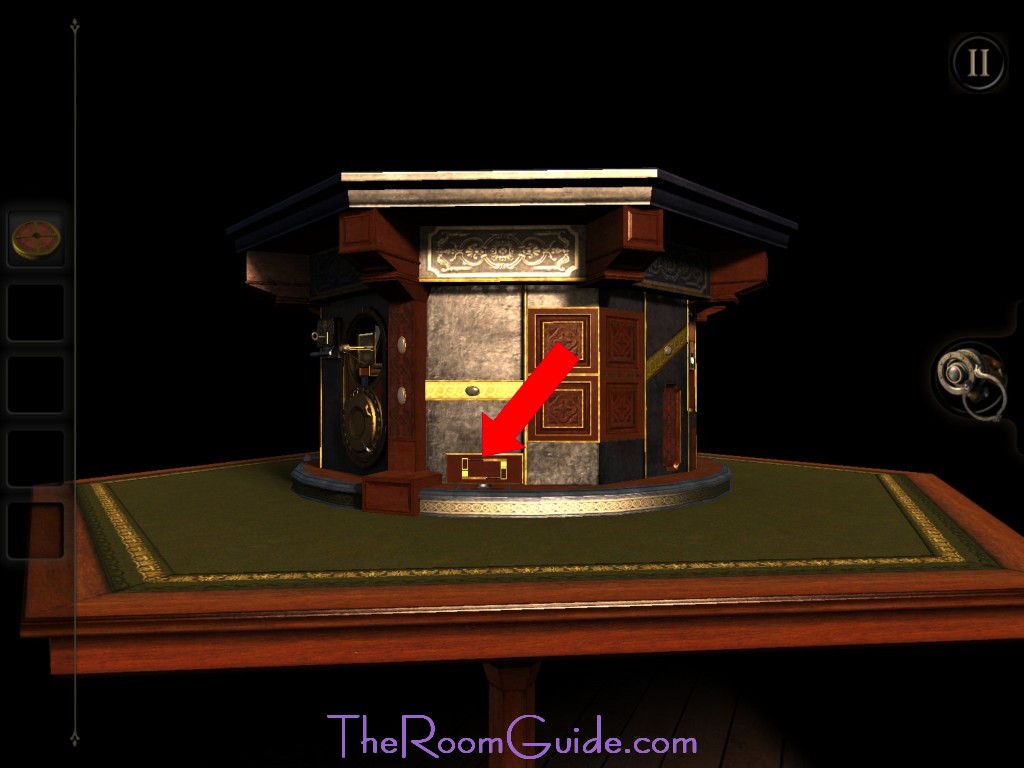
This is a complete walk through for The Room Chapter 3 by Fireproof Games. You are examining this box with some kind of celestial map on top that you obtain from Chapter 2. In this chapter, you need to examine the sides of the box.
We have divided this guide into two separate sections.
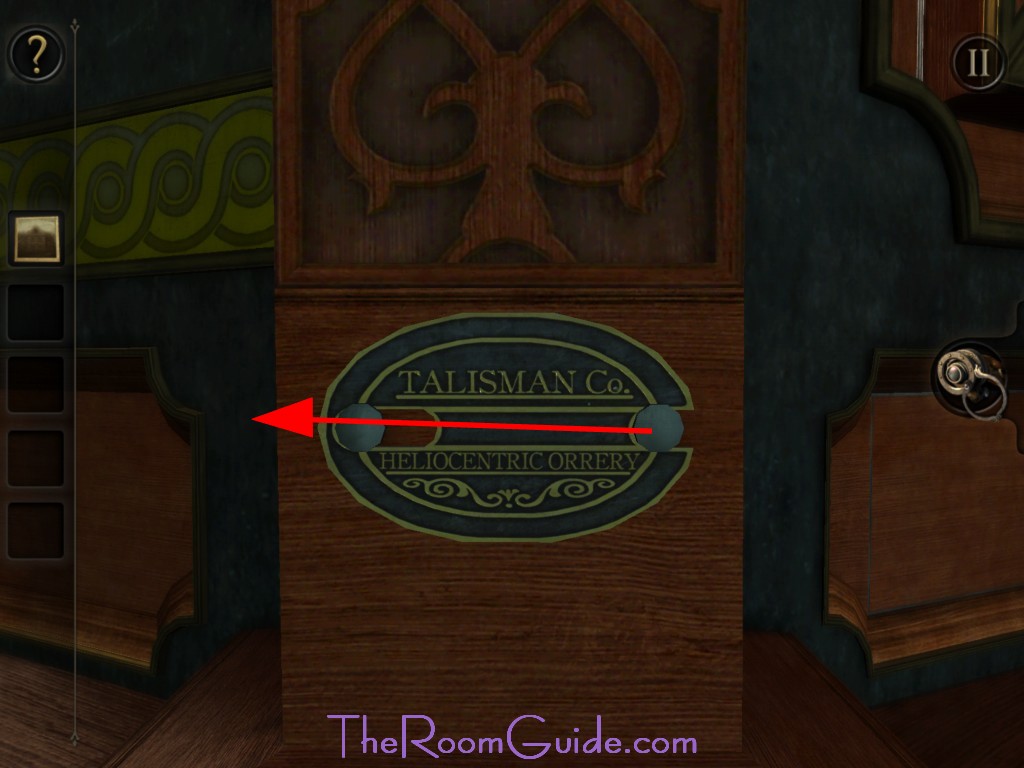
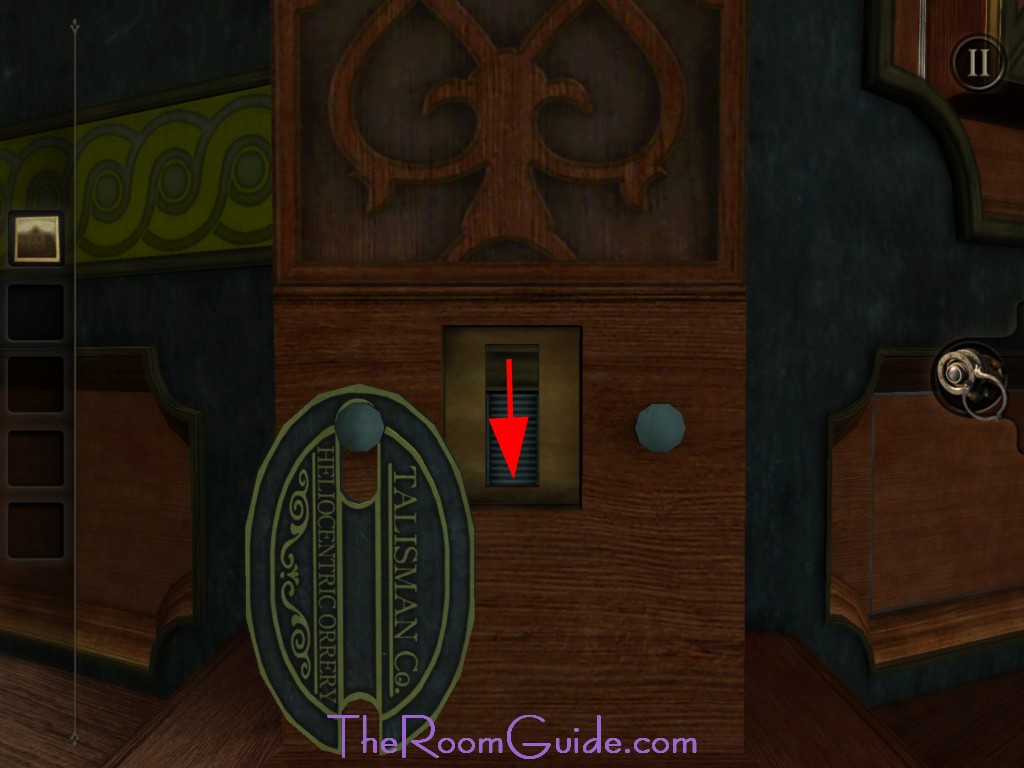
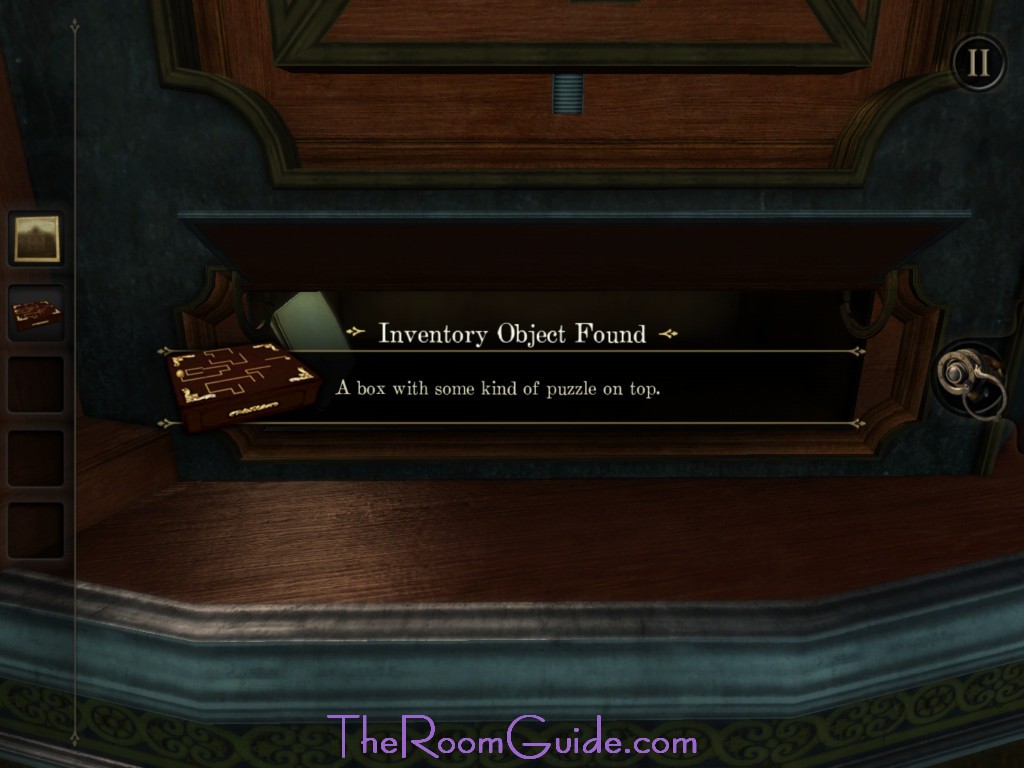
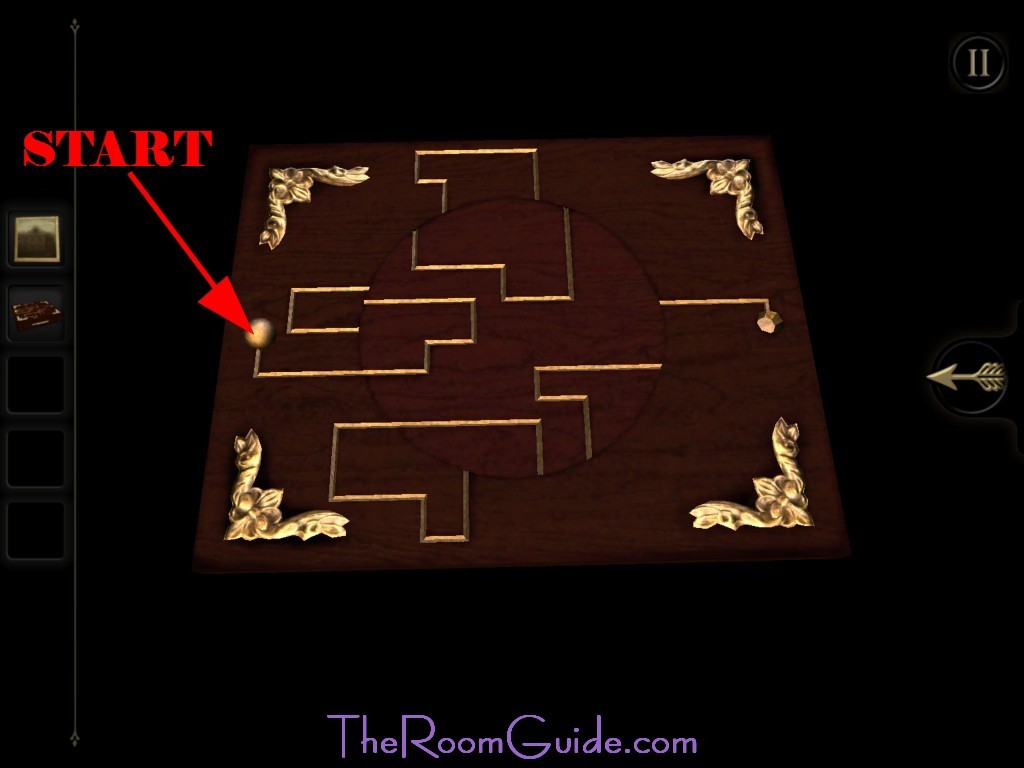
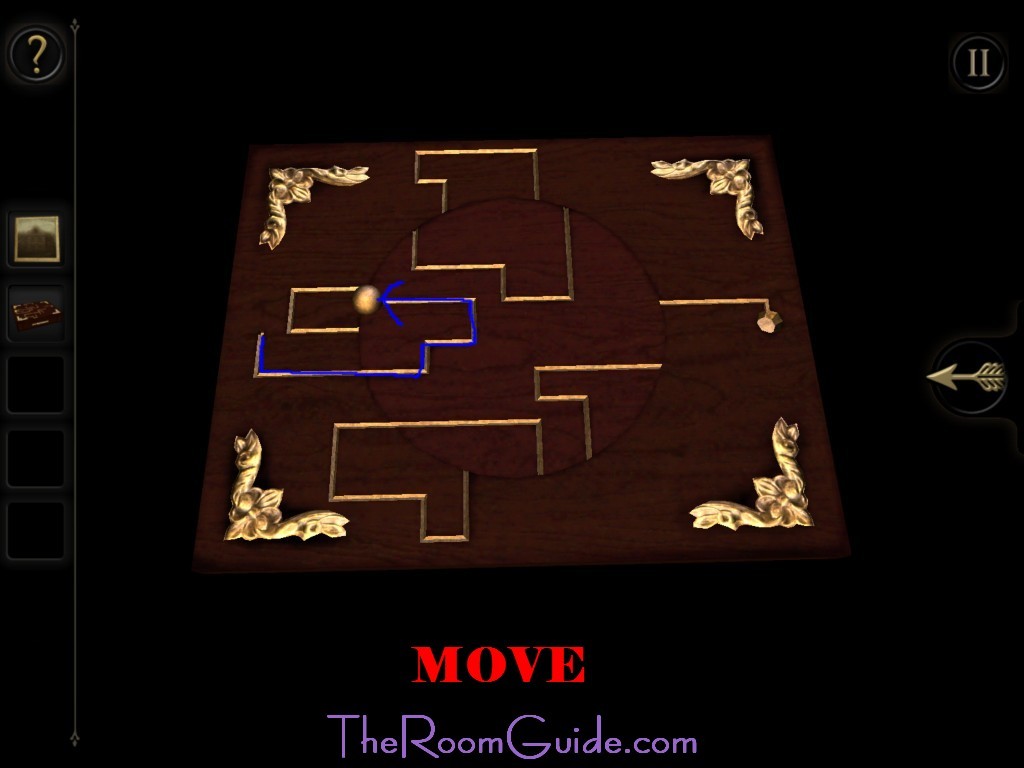
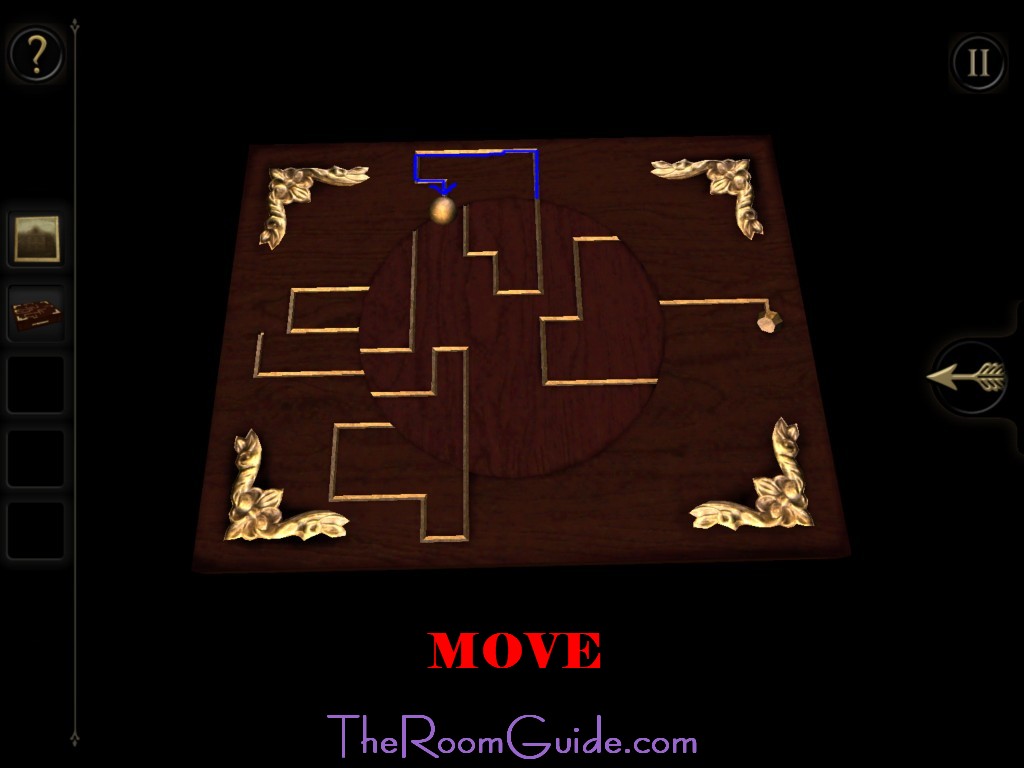
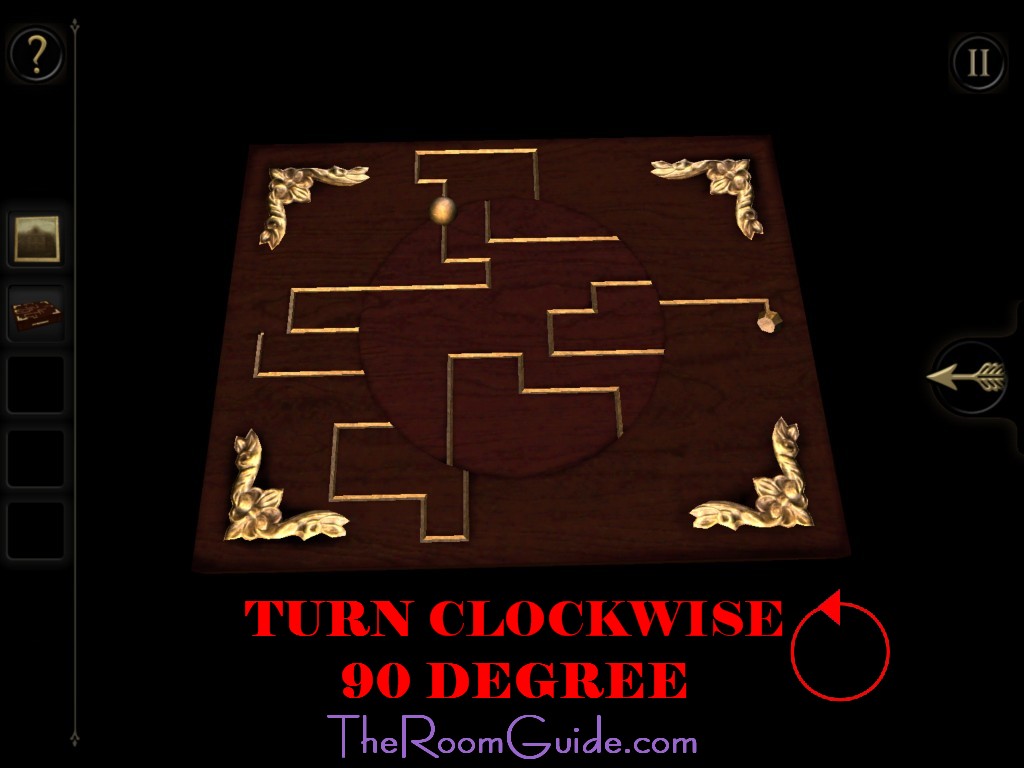
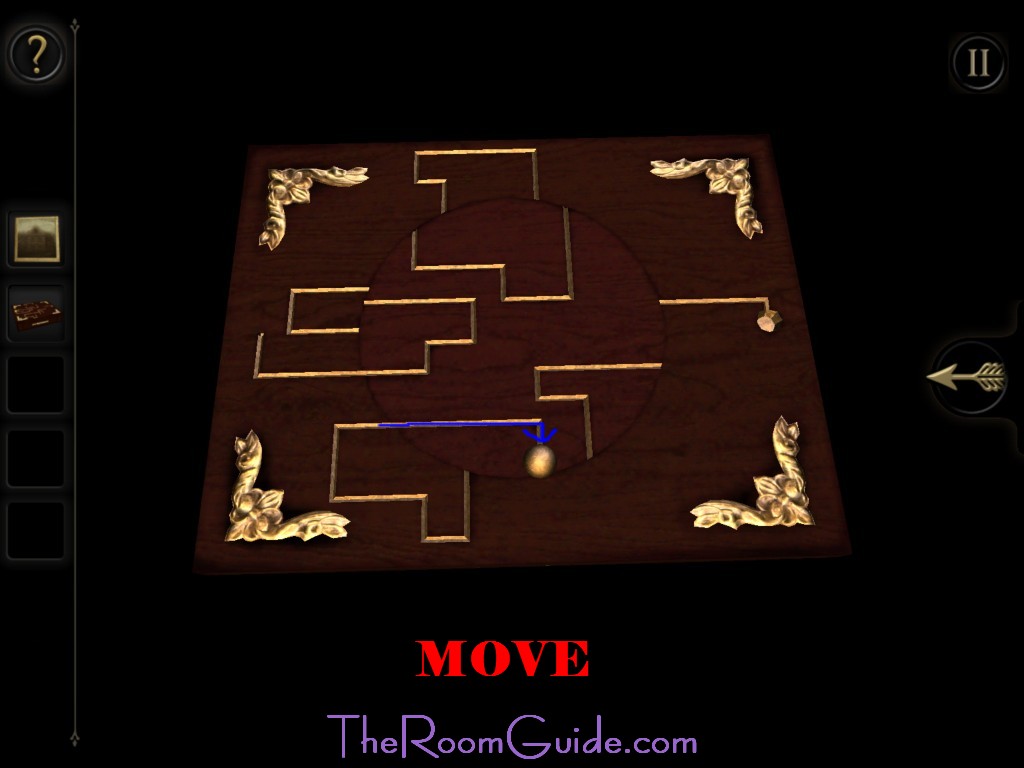
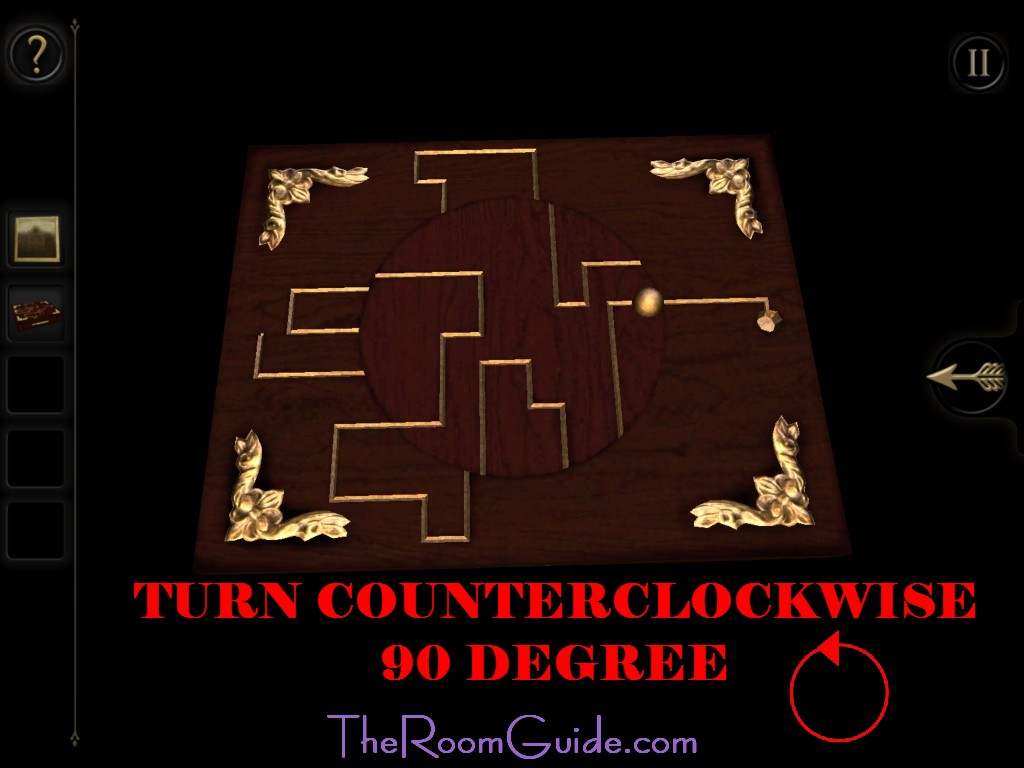
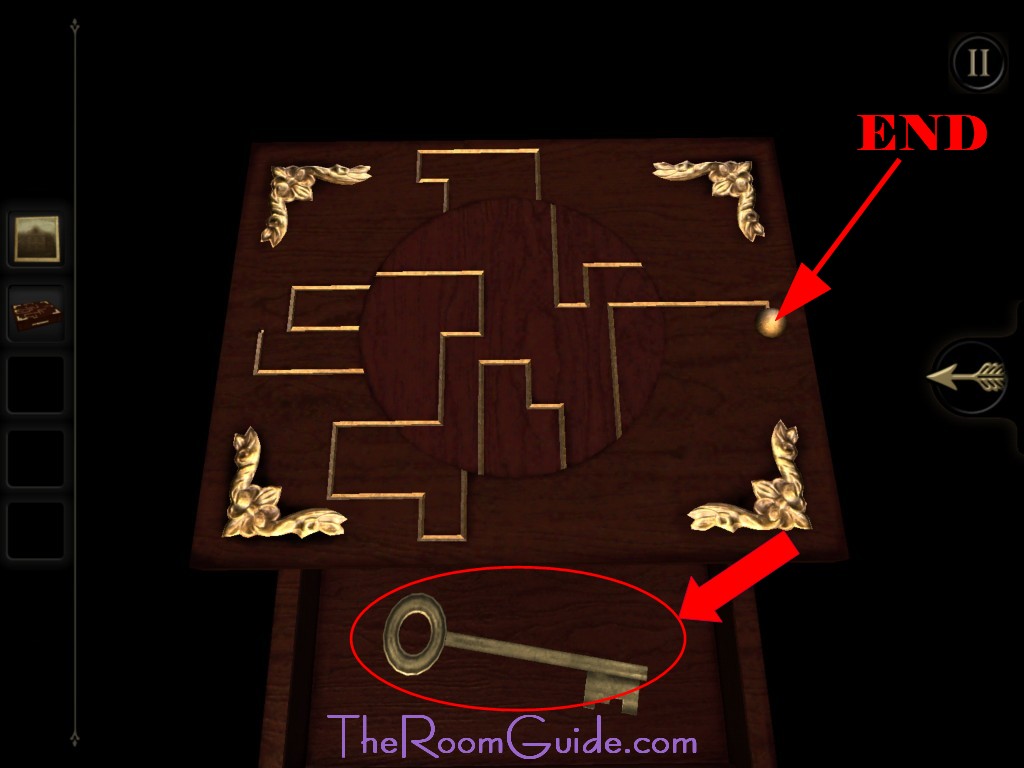
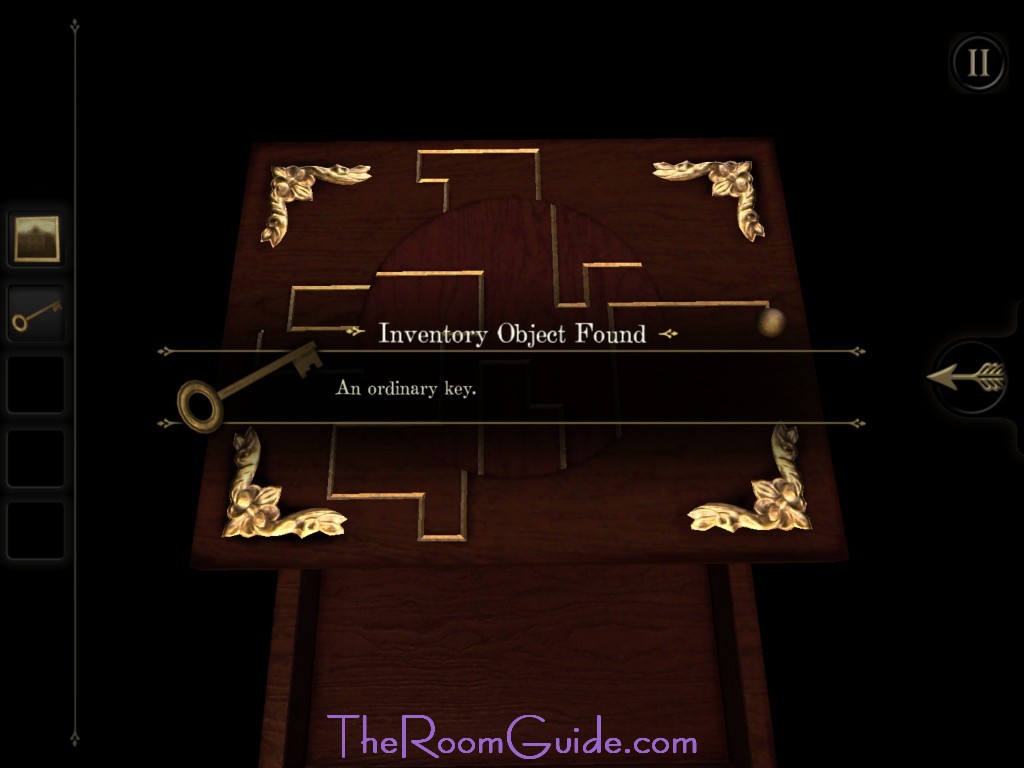
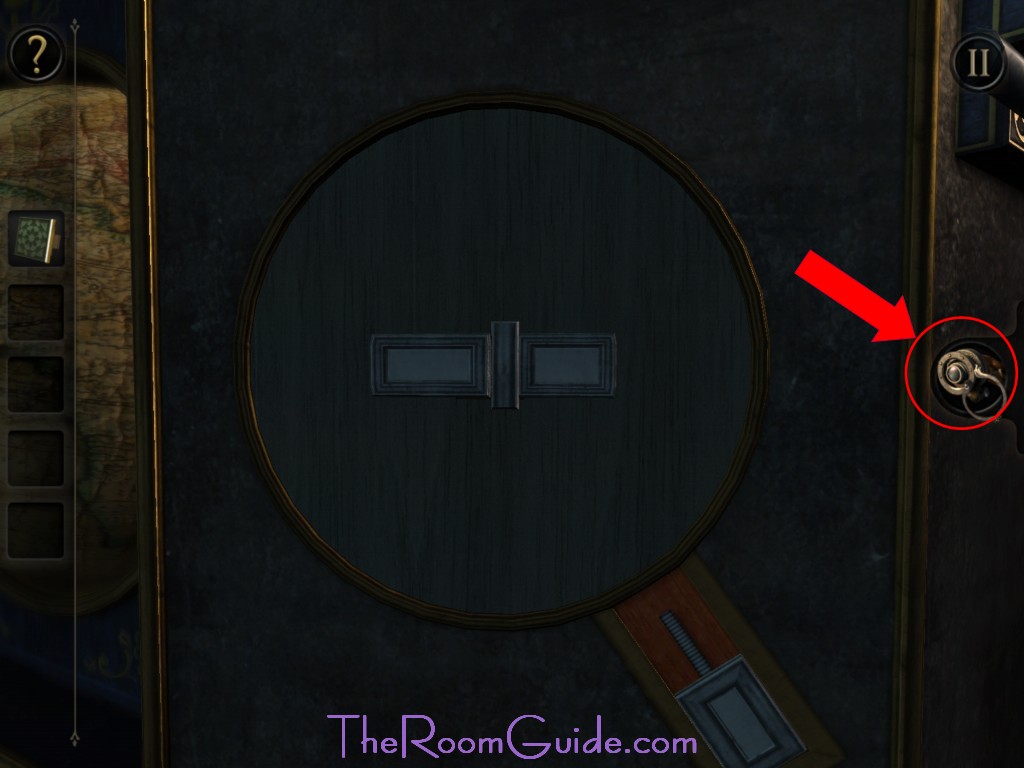
1. Ordinary Key: Put on eyepiece. Locate Talisman logo with a fingerprint. Slide to the left. Turn the switch. A secret compartment will reveal. Grab the Box with Some Kind of Puzzle on Top. Look closely at the box. Solve the puzzle. See images below for solution. Get the Ordinary Key inside.
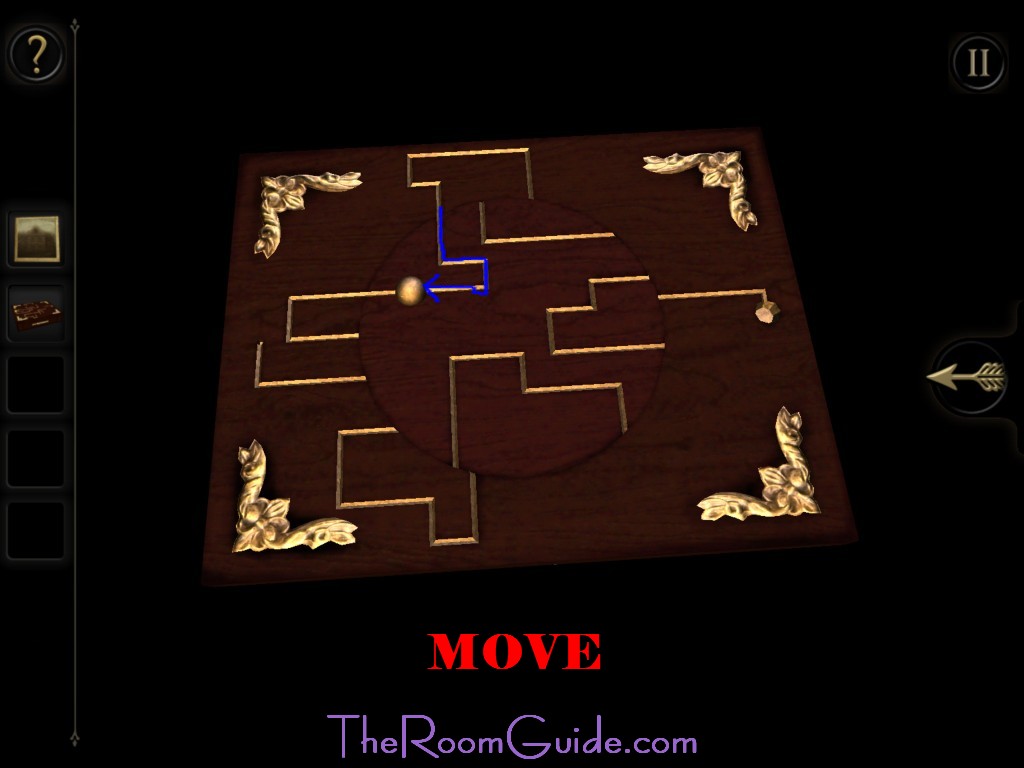
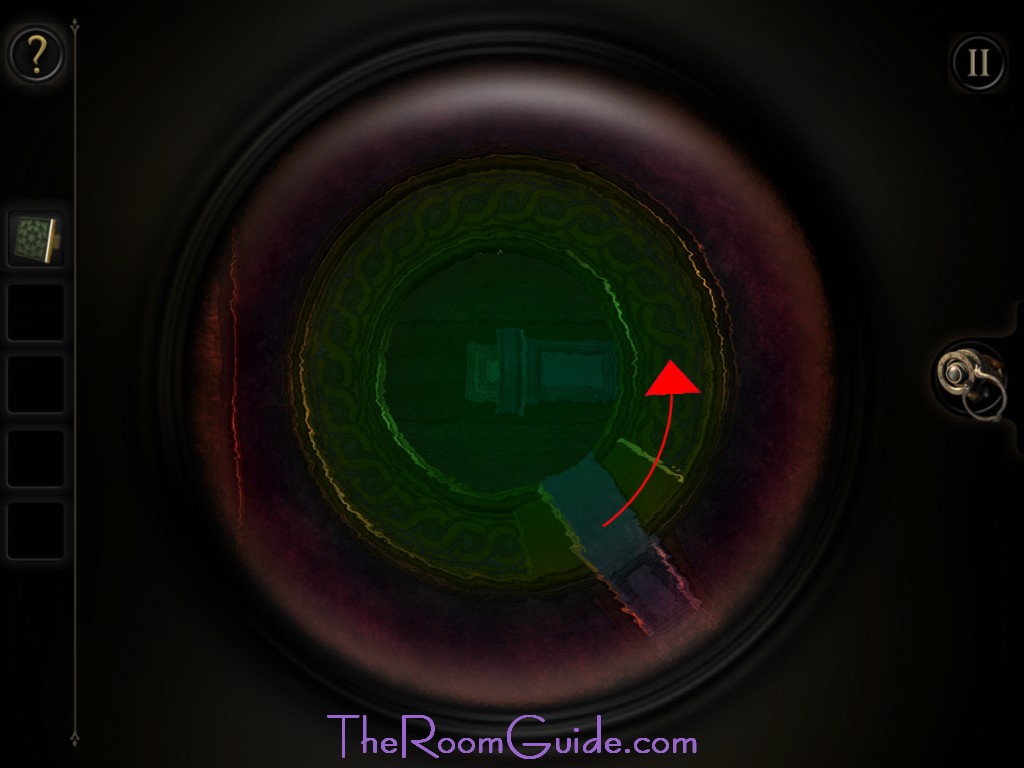
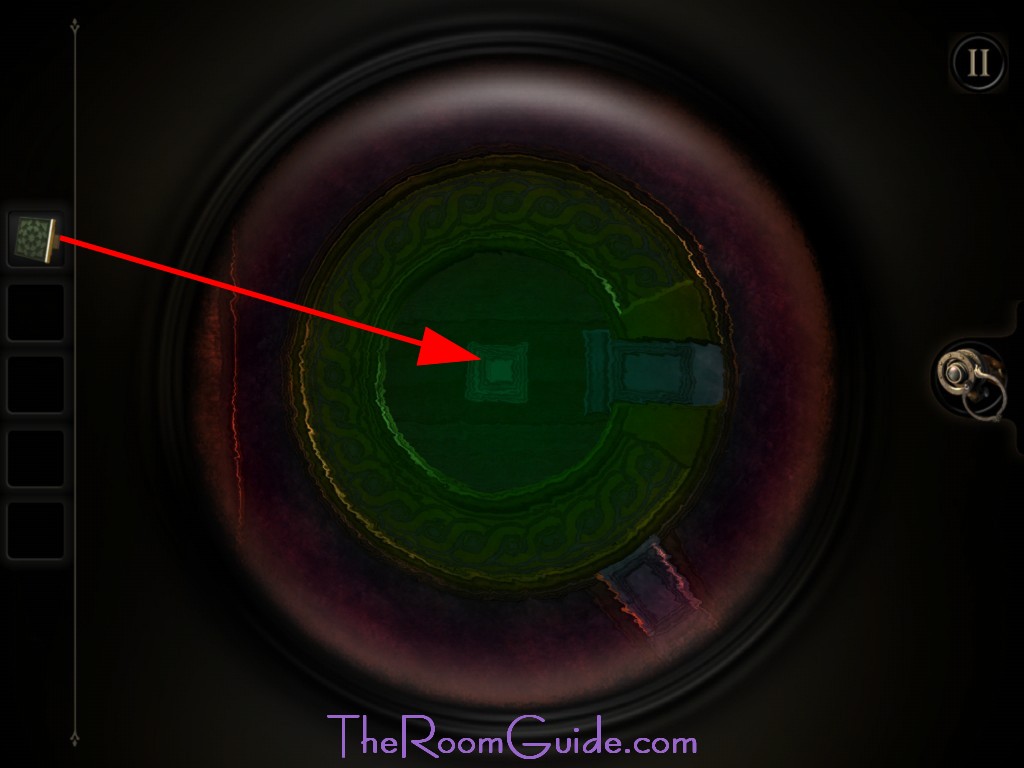
-Move to the circle; Turn clockwise once.
-Move to the box; Turn clockwise once.
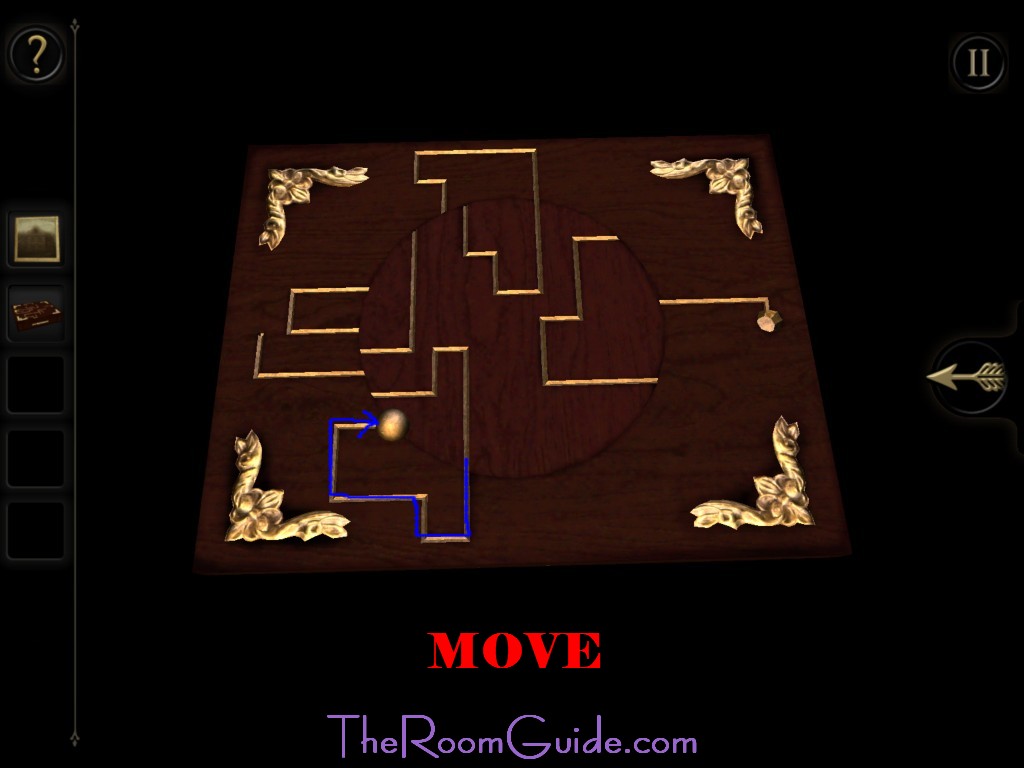
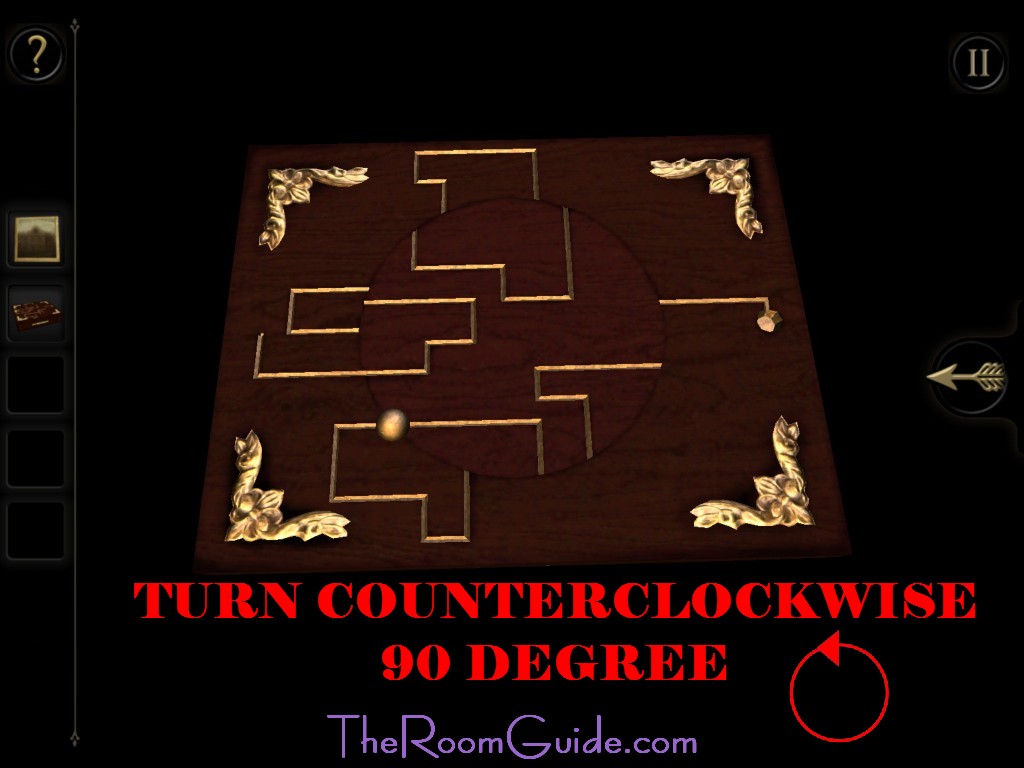
-Move to the circle; Turn counterclockwise once.
-Move to the box; Turn counterclockwise once.
-Move to the circle; Turn counterclockwise once.
-Move to the box; You have arrived.


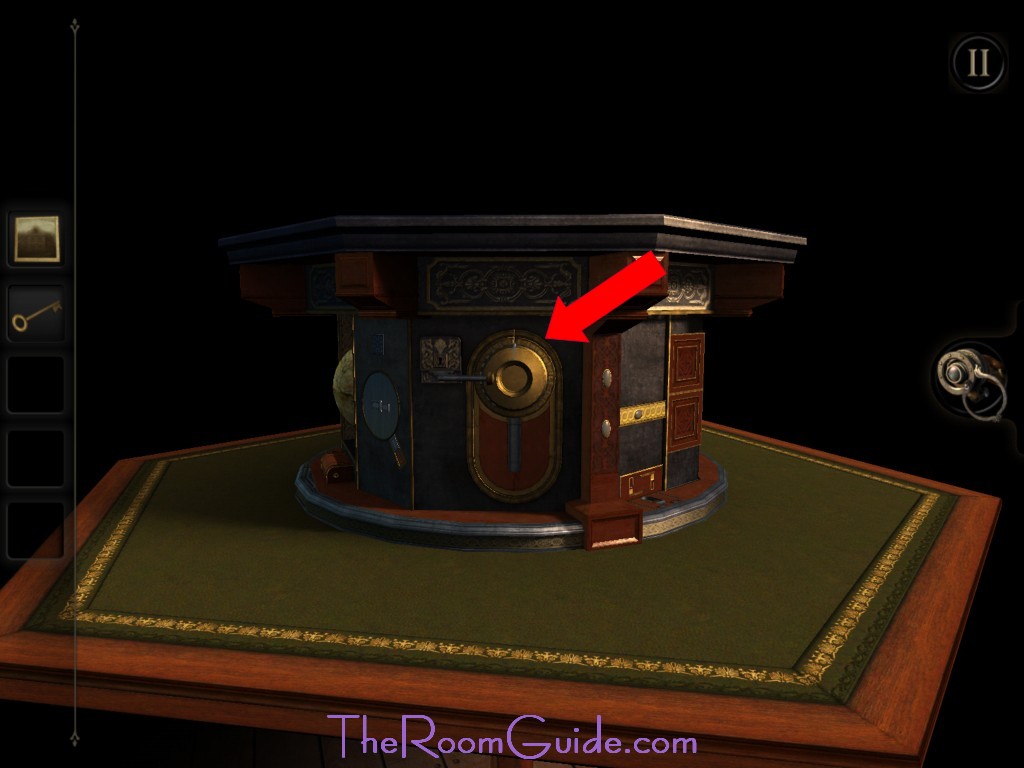
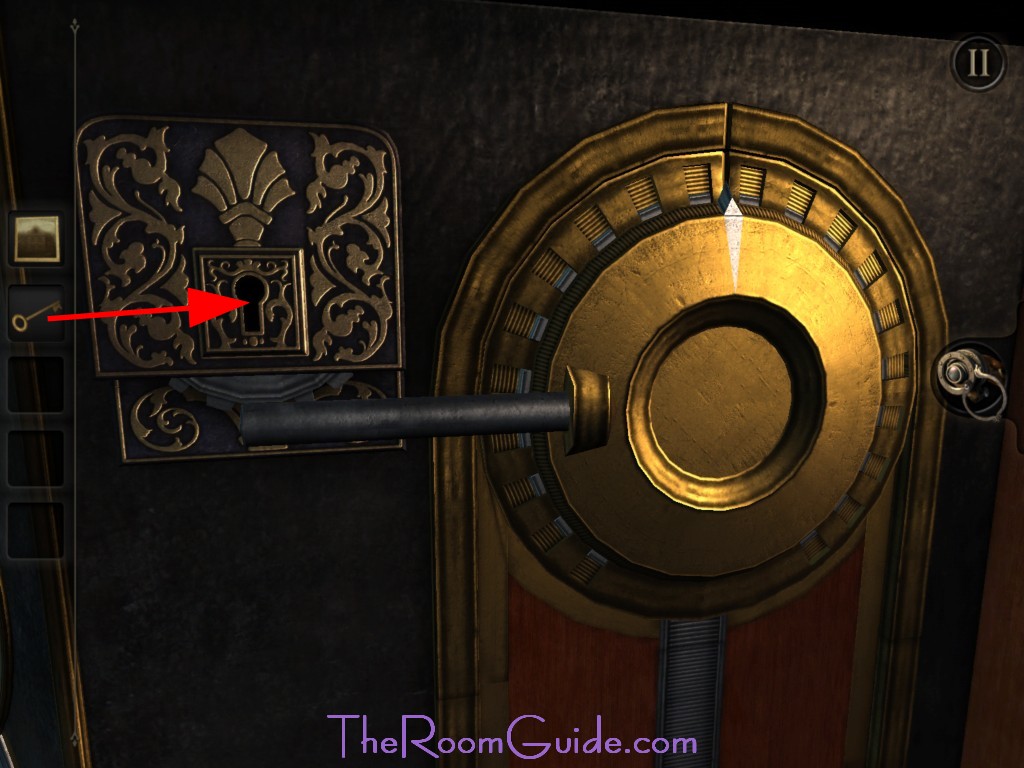
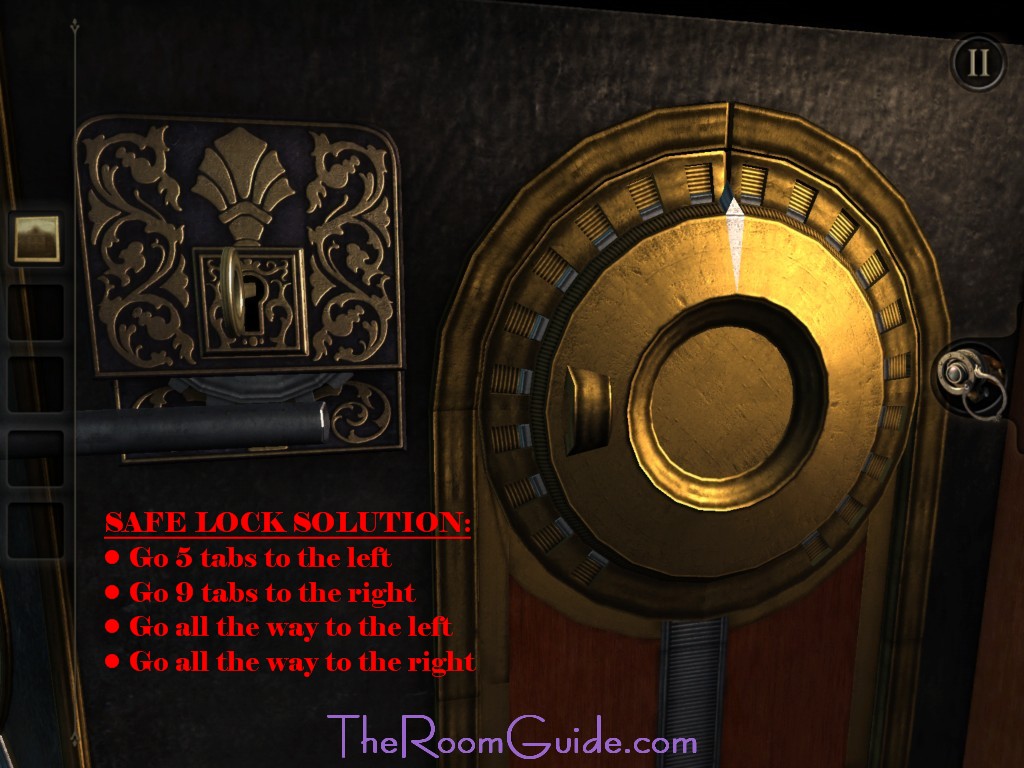
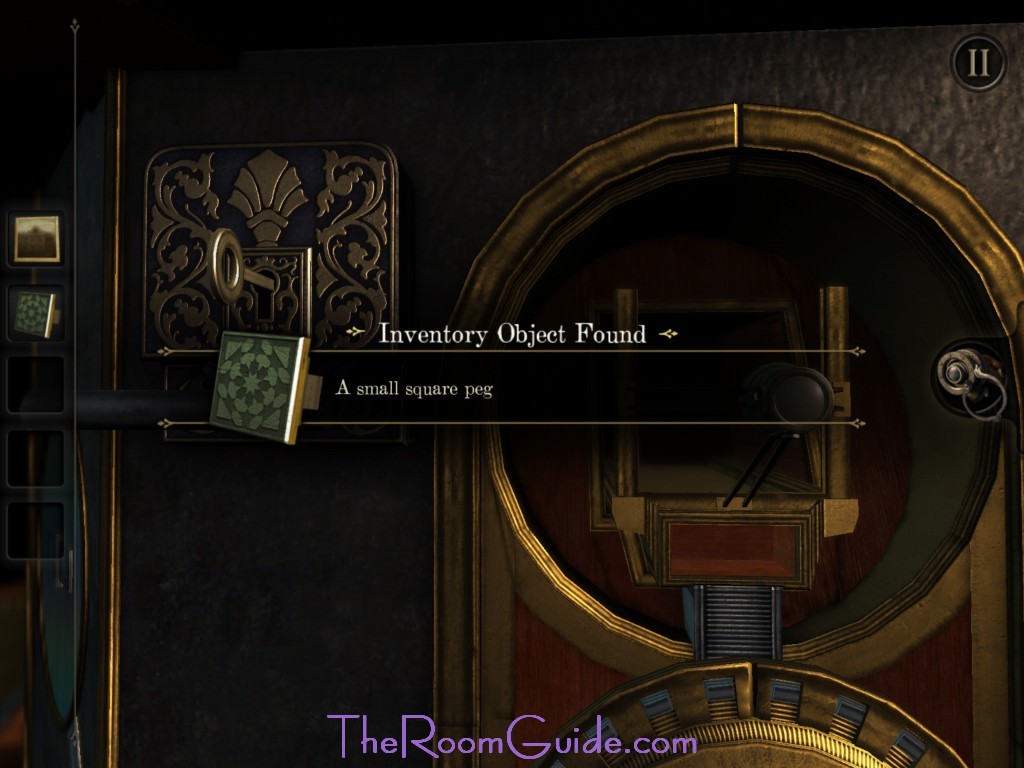
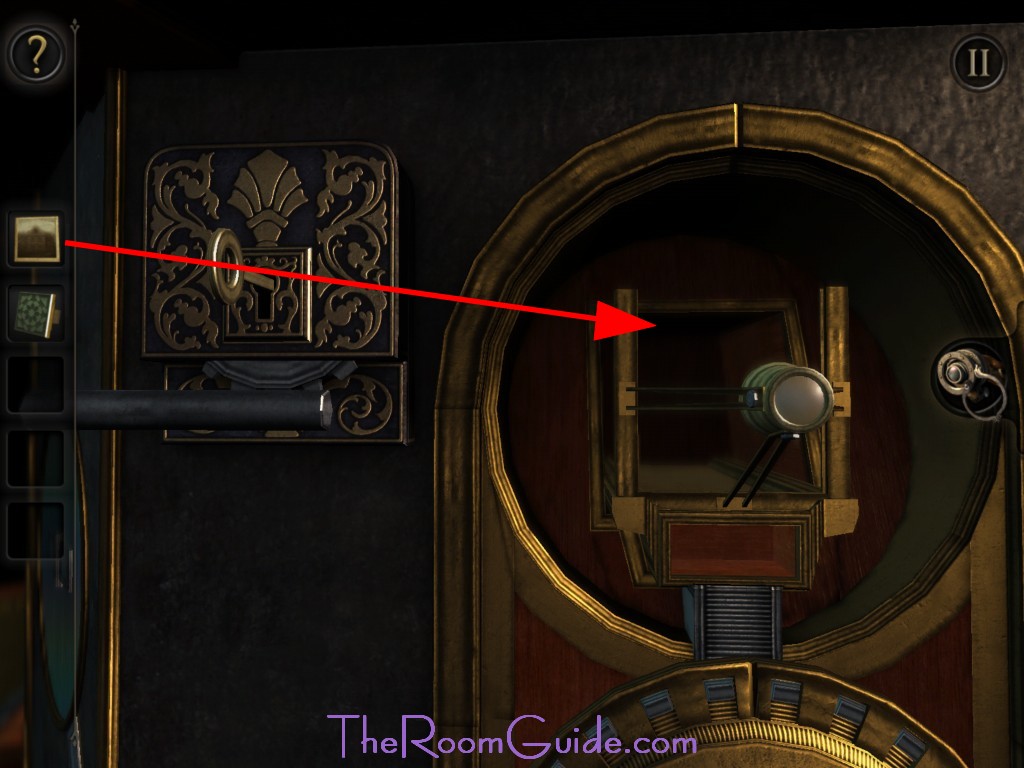
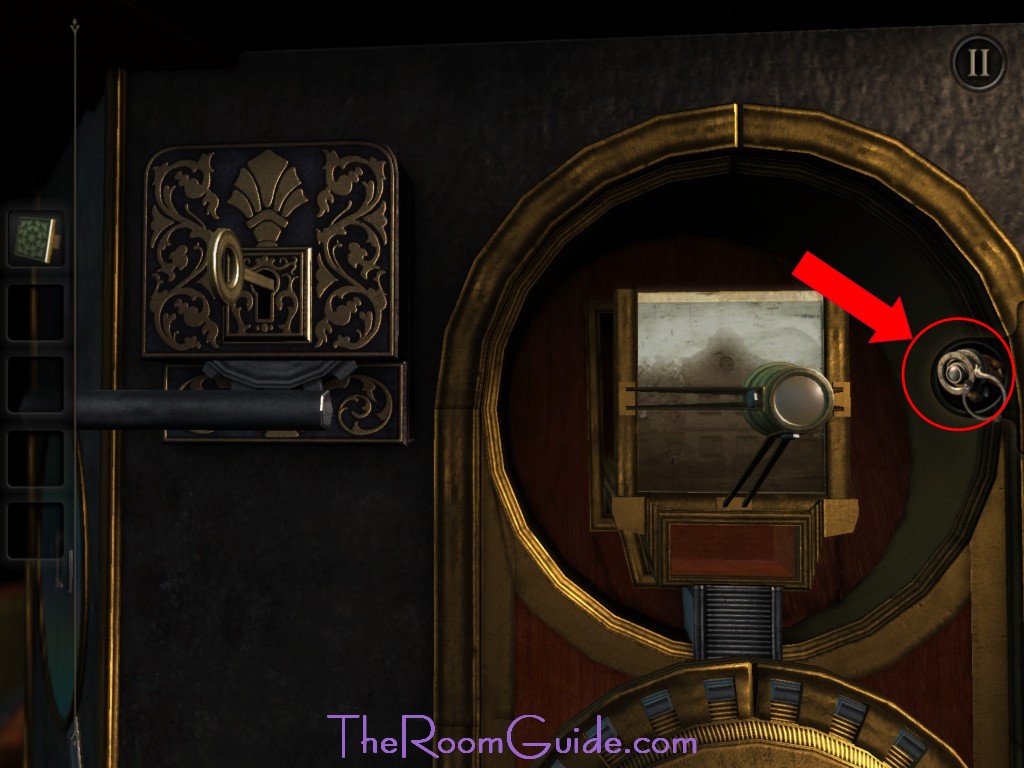
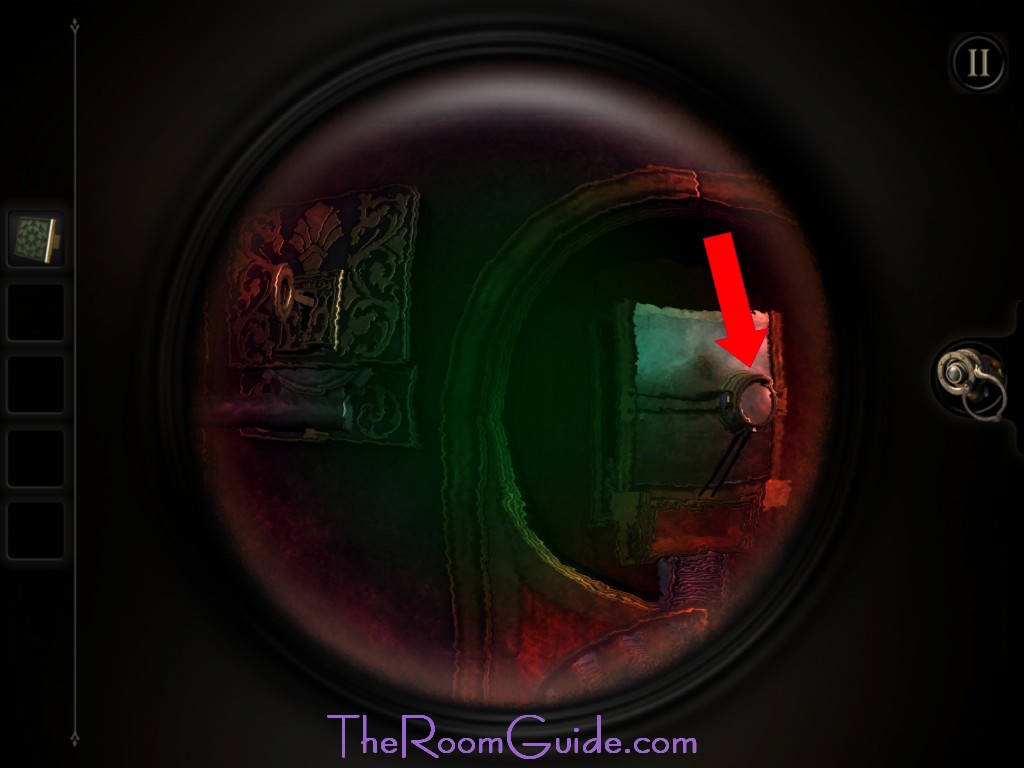
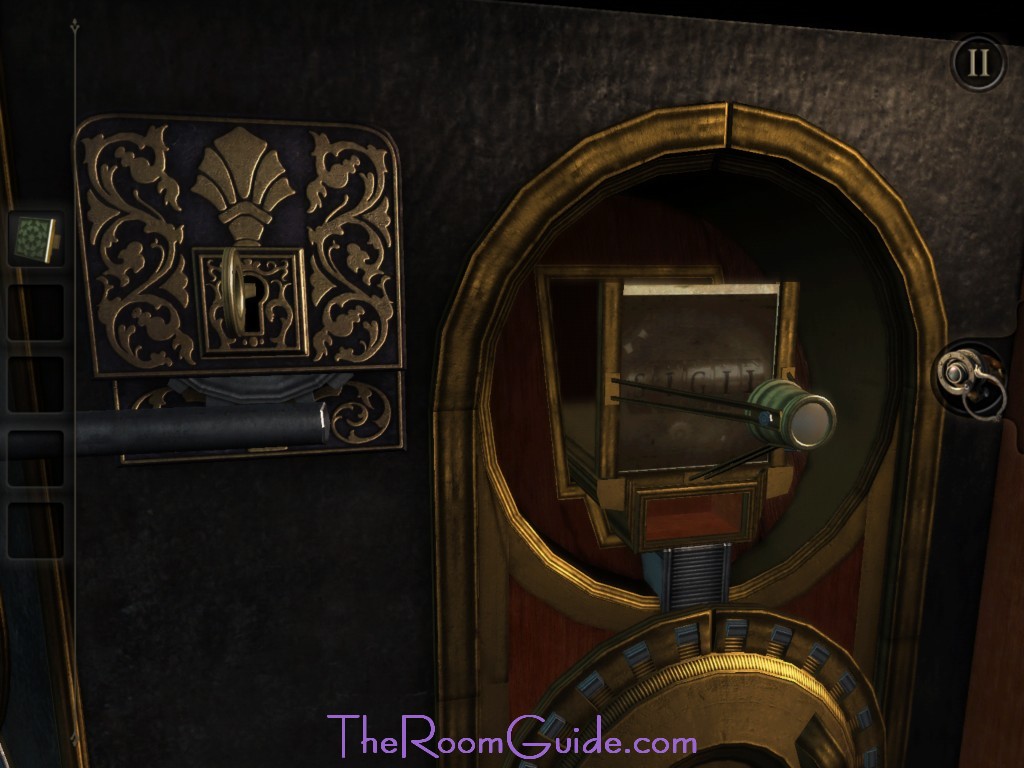
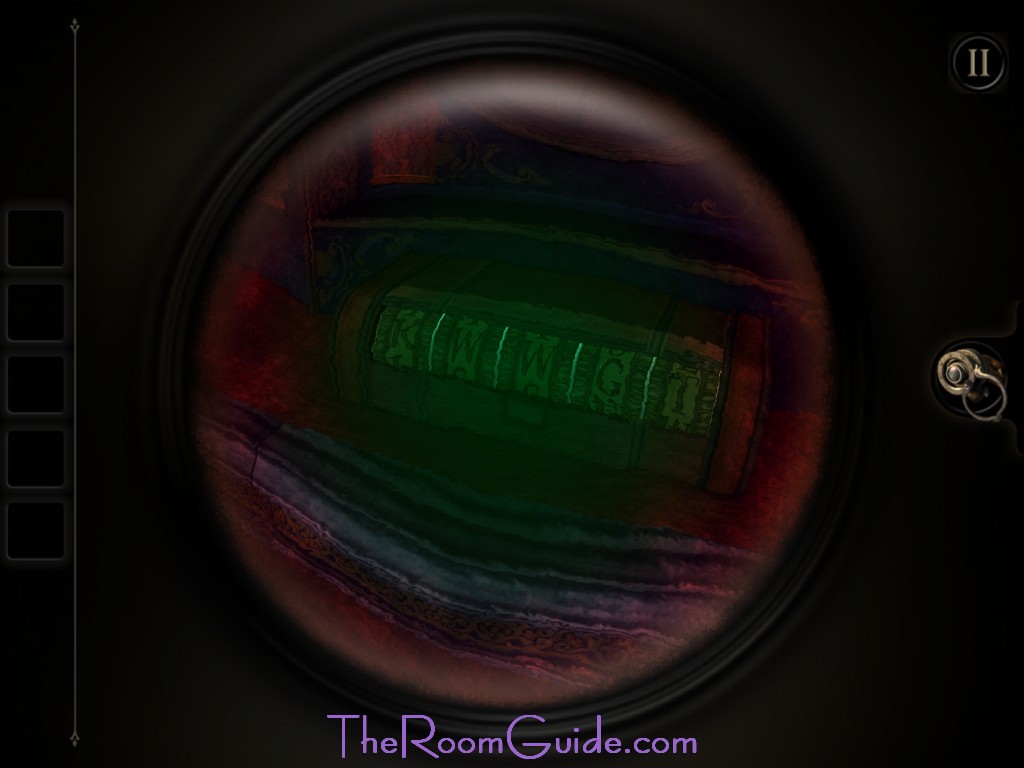
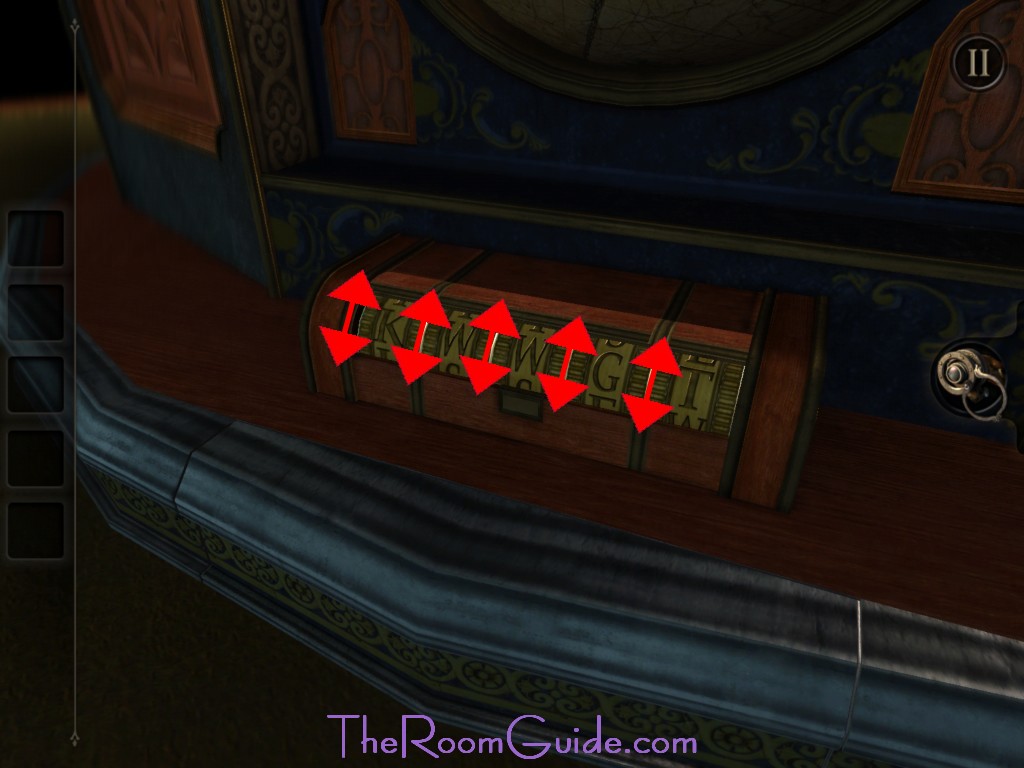
2. Safe: Go over to the safe. Insert and turn the Ordinary key. The metal bar underneath will slide. Unlock the safe lock. See image below for solution. Get the Small Square Peg. Put the Old Photograph in front of the lens. Put on eyepiece. Look into the lens. Obtain password: SIGIL.
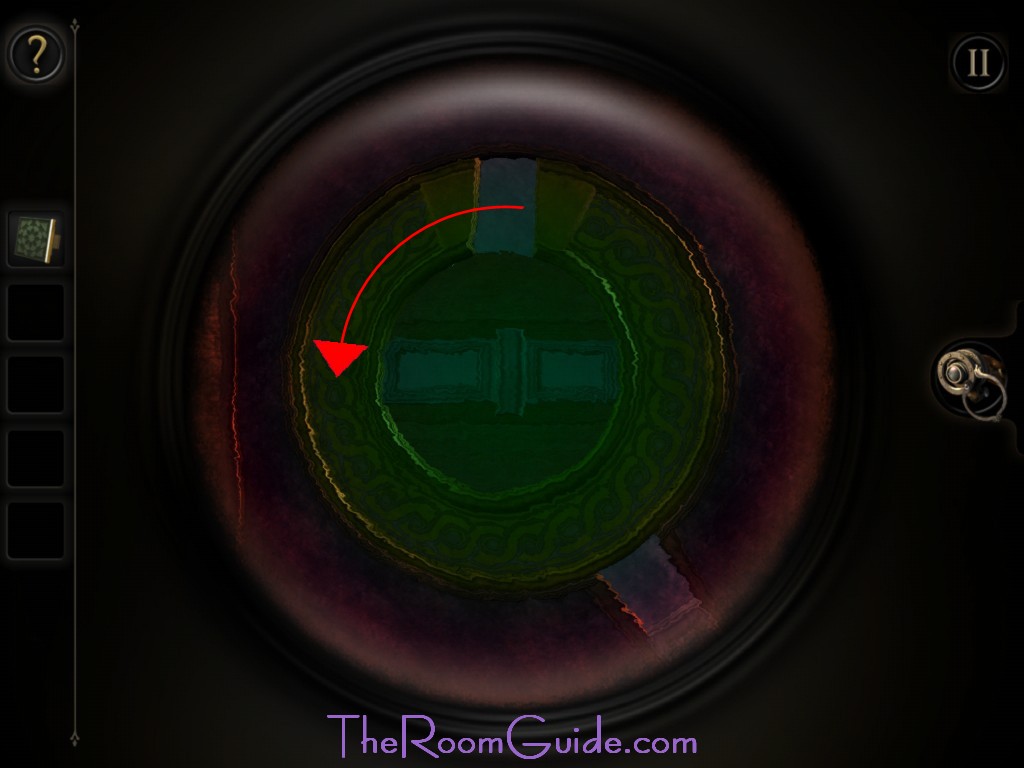
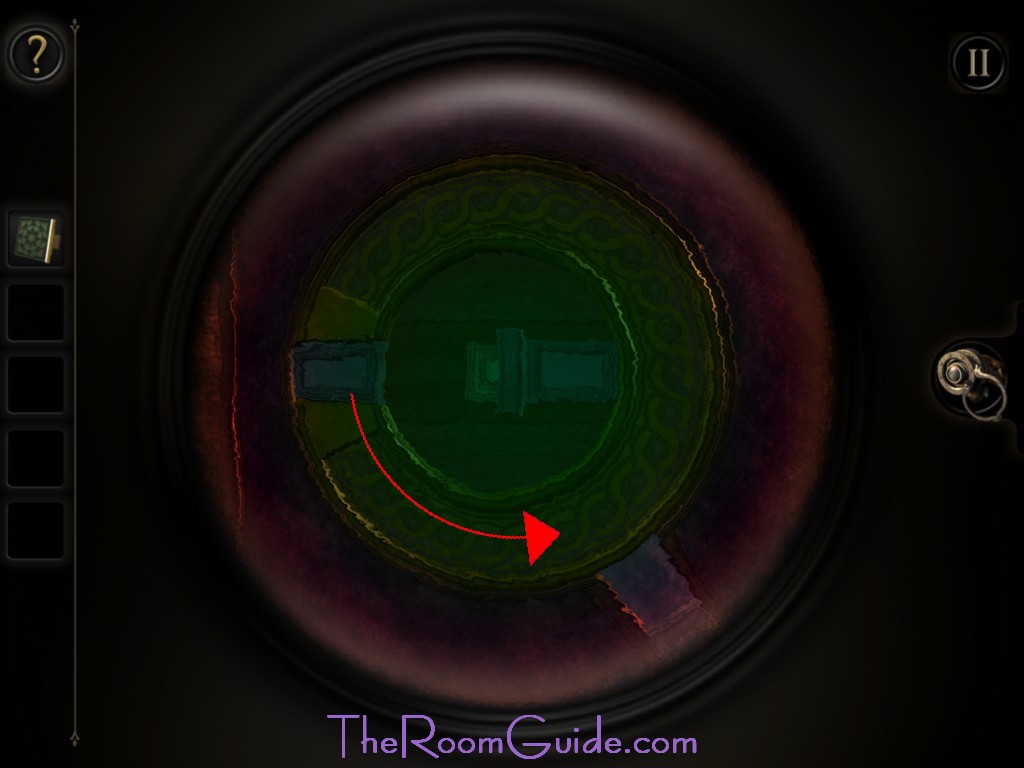
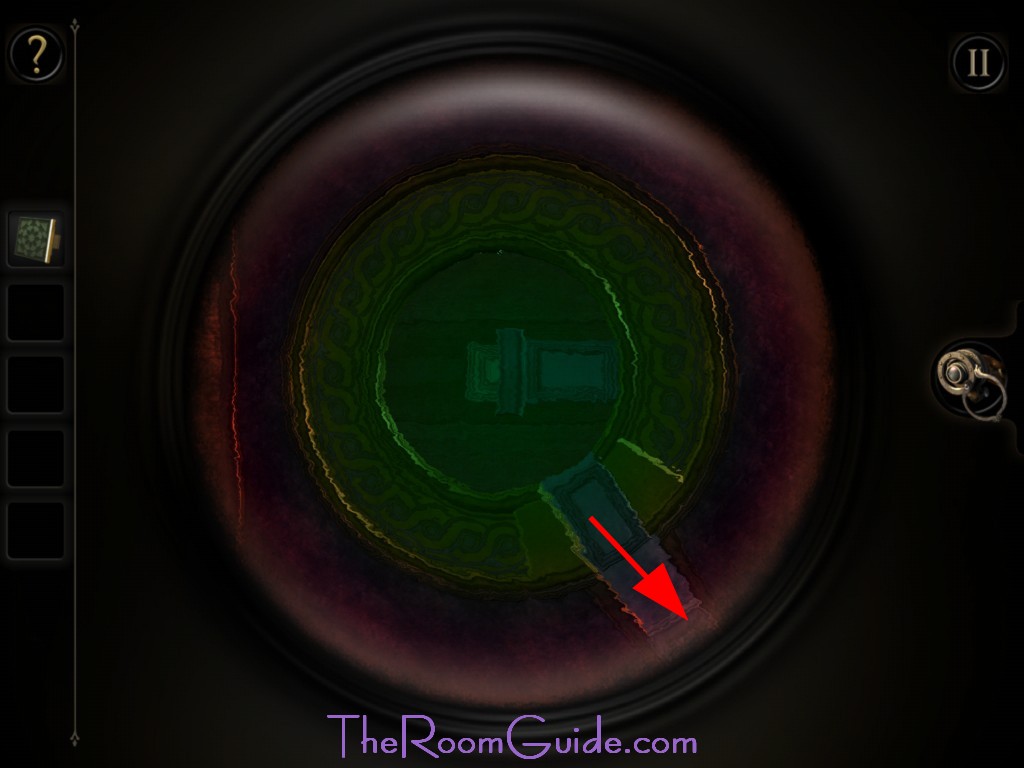
-Go 5 tabs to the left
-Go 9 tabs to the right
-Go all the way to the left
-Go all the way to the right


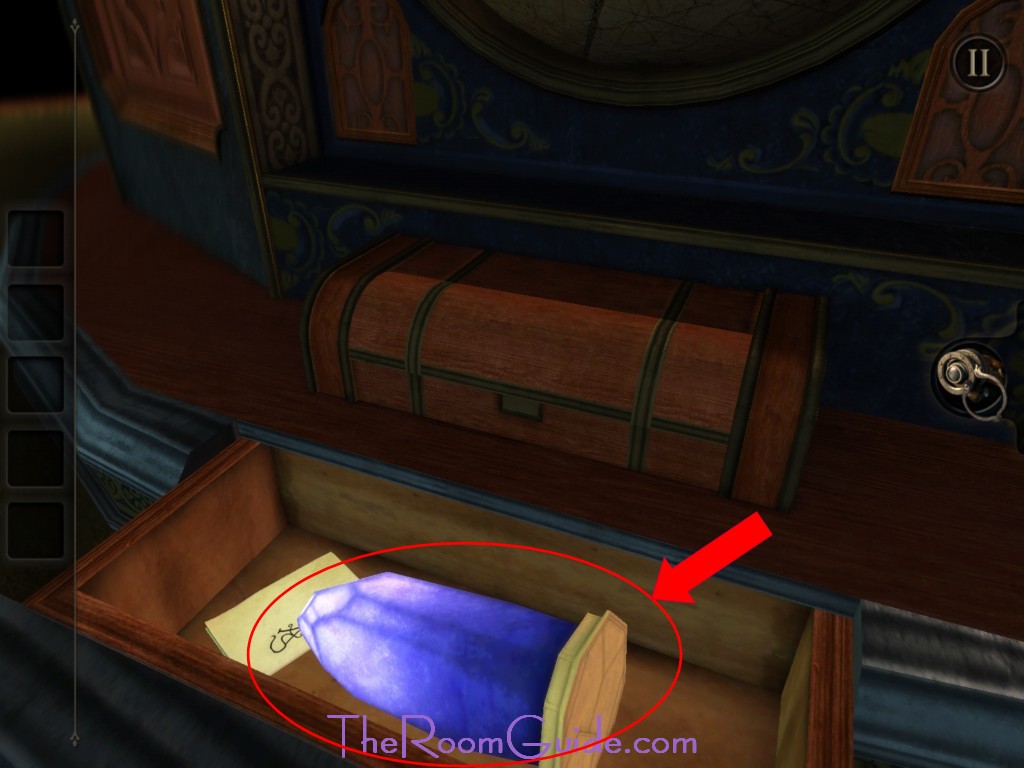
3. Q Shaped Panel: Go to the Q shaped panel. Follow the steps below. A mechanism will trigger revealing a combination lock. Take off eyepiece. Enter password: SIGIL. Grab the Bright, Blue Crystal Emanating a Strange Light.
Turn the switch. Put on eyepiece.
-Align top opening with left rectangle
-Move the left rectangle from center to the opening
-Turn the left rectangle to the Q-tip
-Move the left rectangle to the Q-tip
-Align opening with right rectangle
-Move the right rectangle from the center to the opening
-Insert Small Square Peg in the center


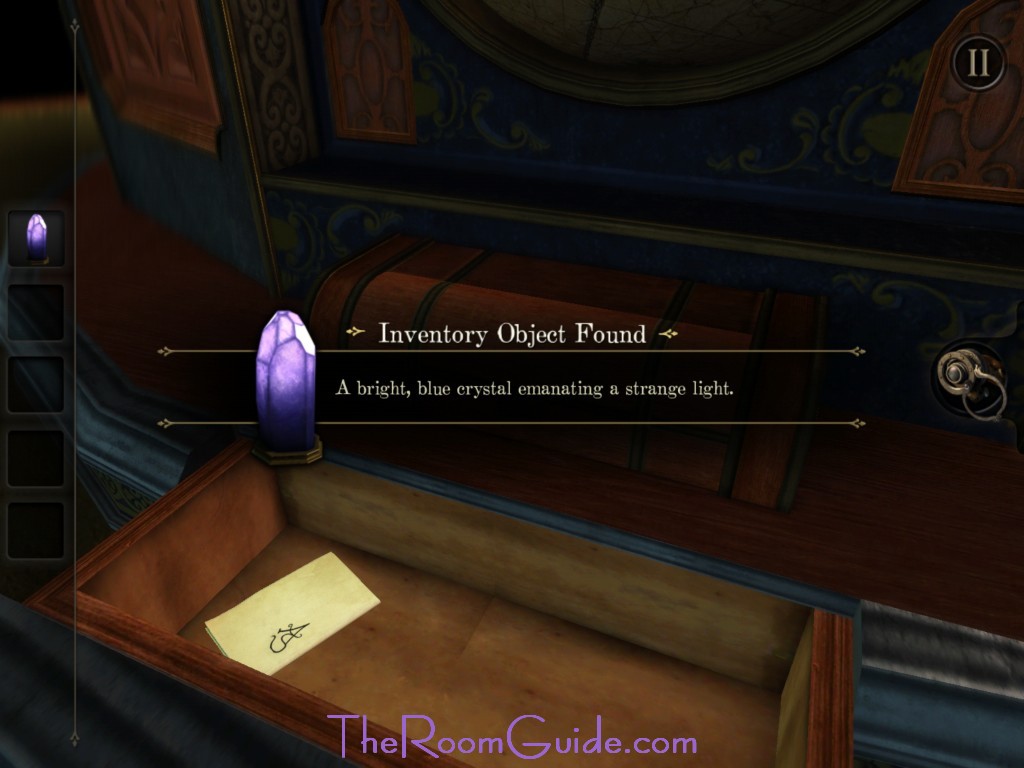
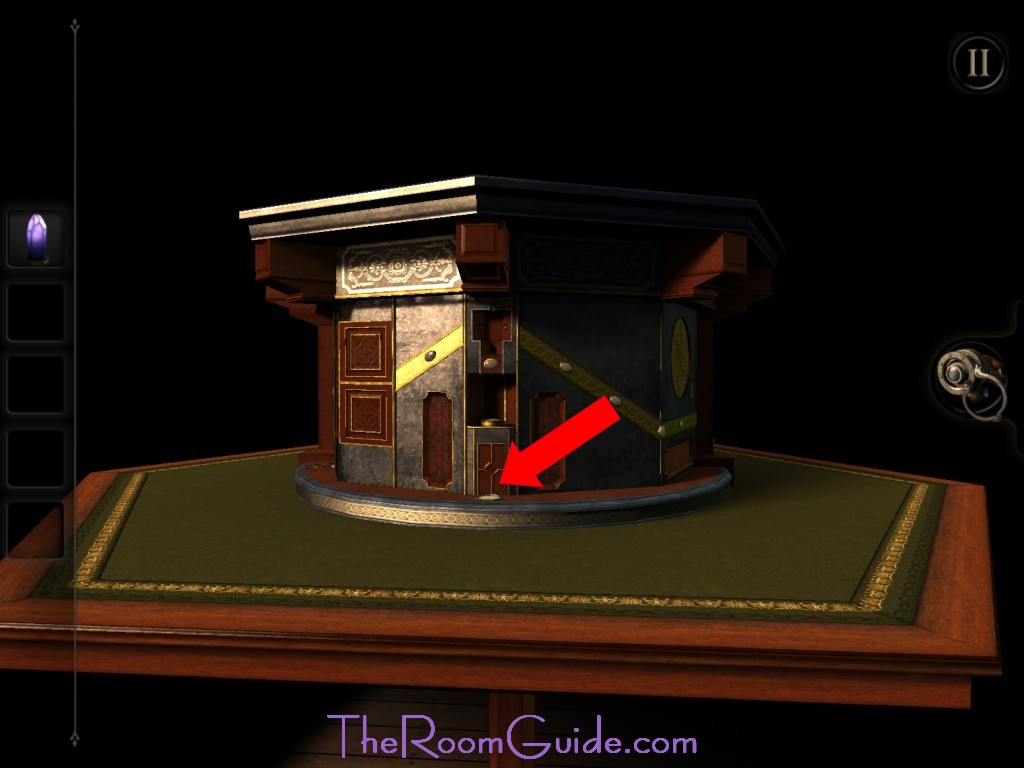
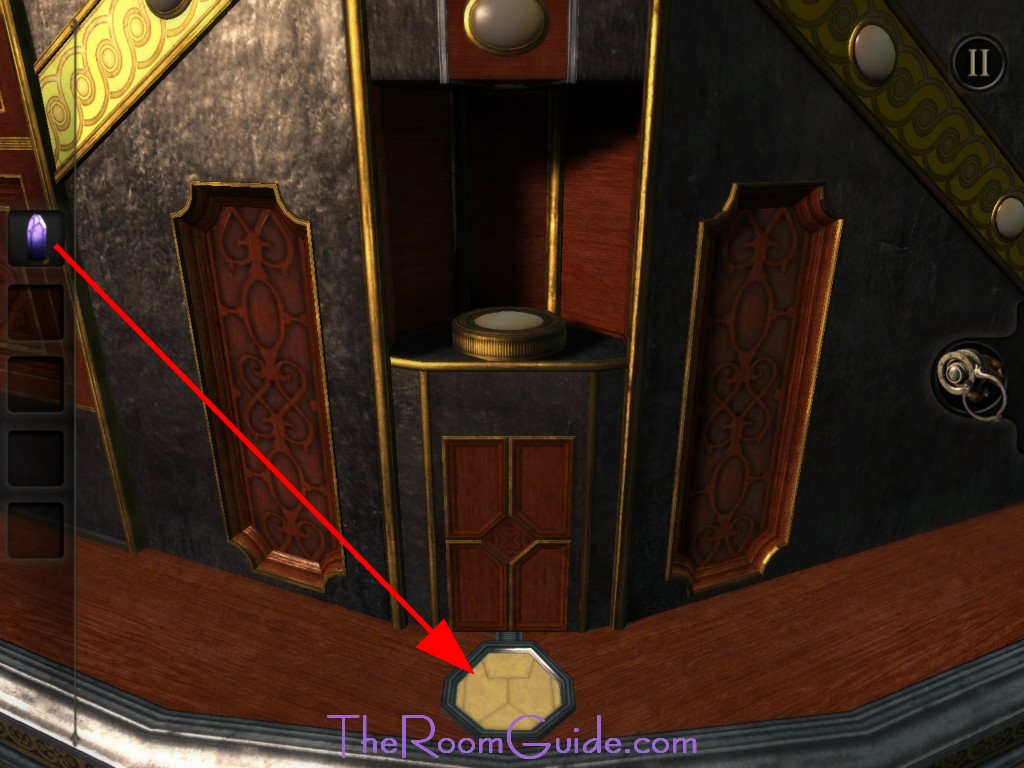
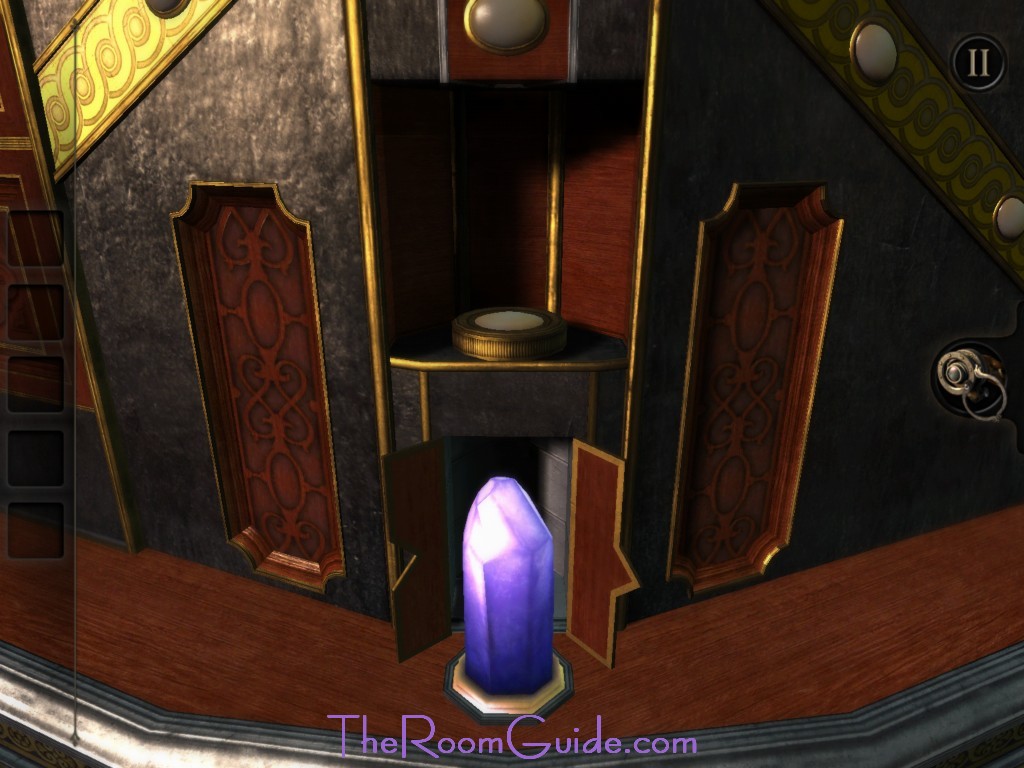
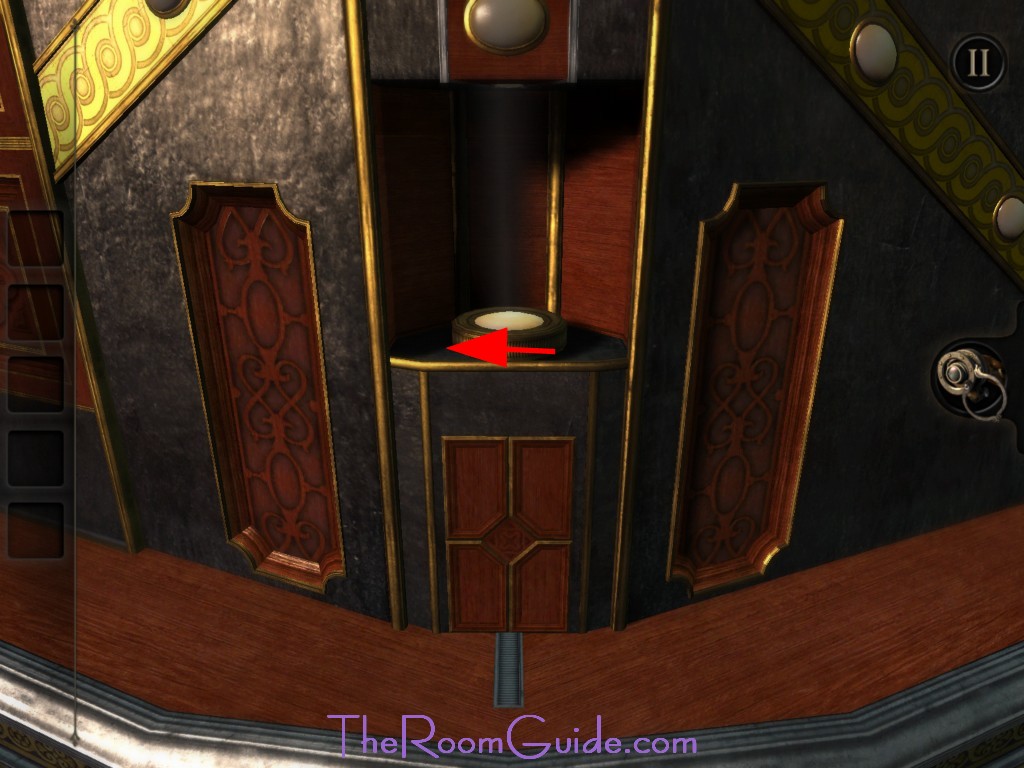
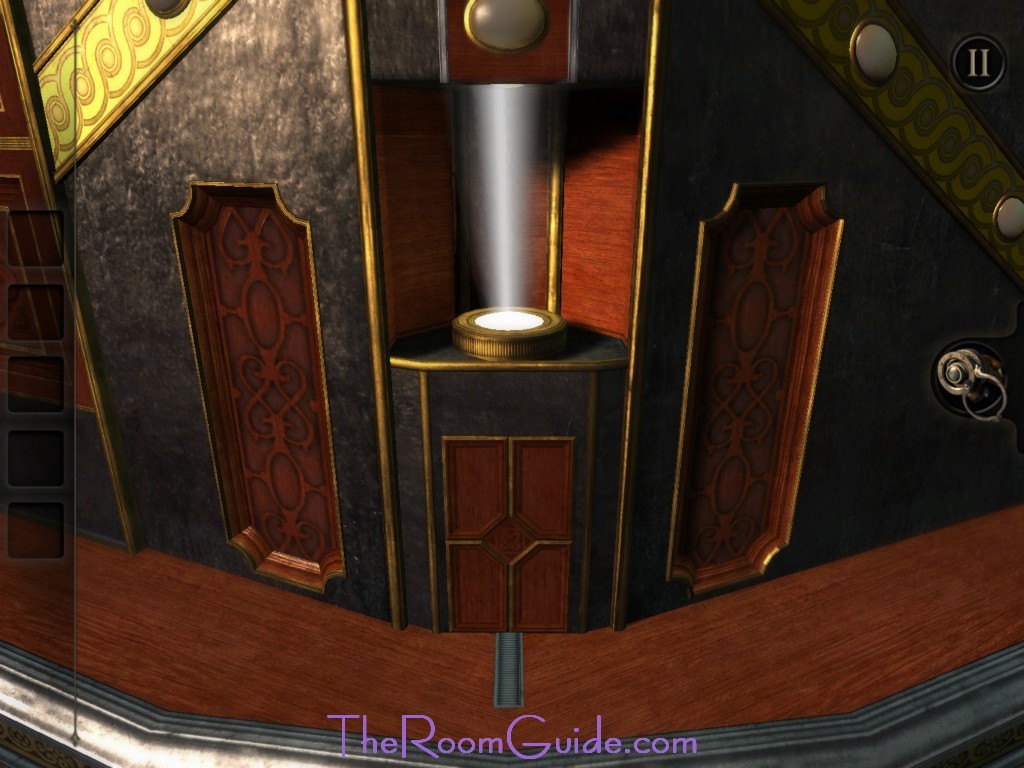
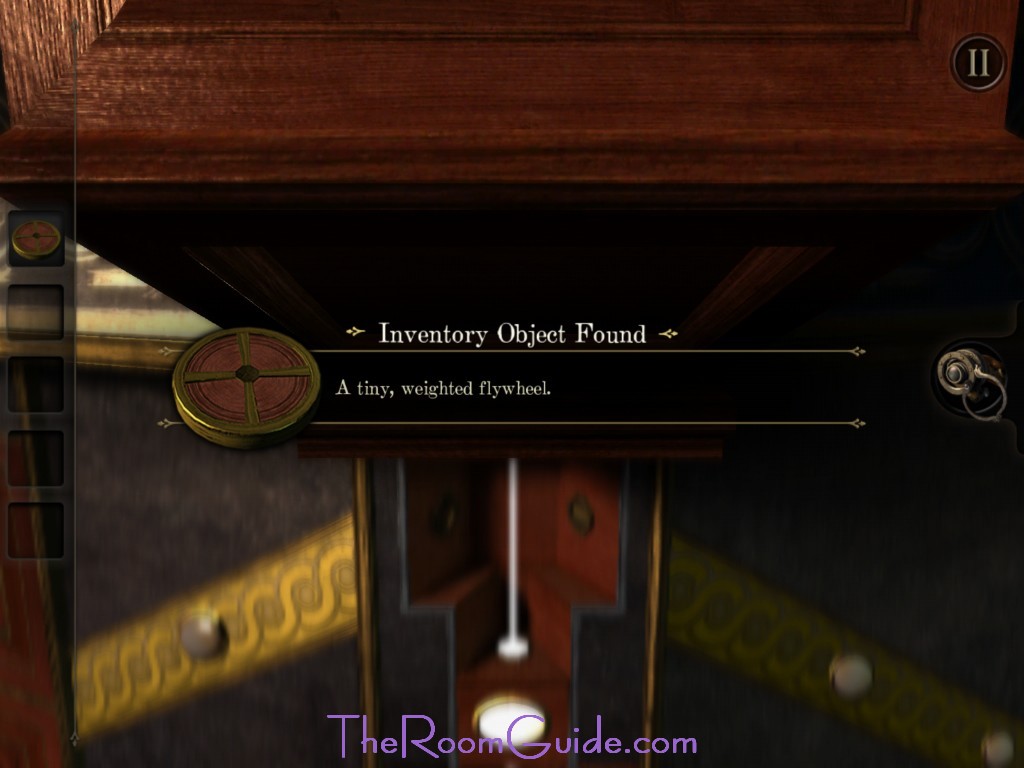
4. Crystal: Insert the Bright, Blue Crystal Emanating a Strange Light in the hexagon shape hole. A mechanism will trigger. Crystal will slide in place and light path will illuminate. Use the dial to focus the light beam. A mechanism will activate. Get the Tiny, Weighted Flywheel.
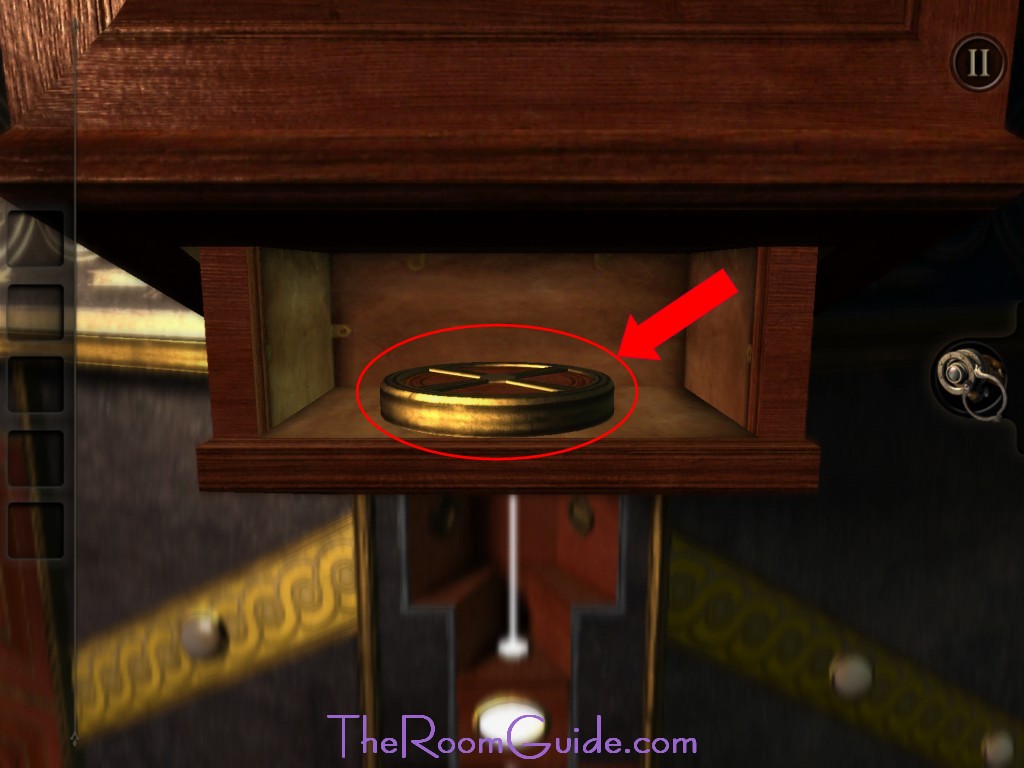
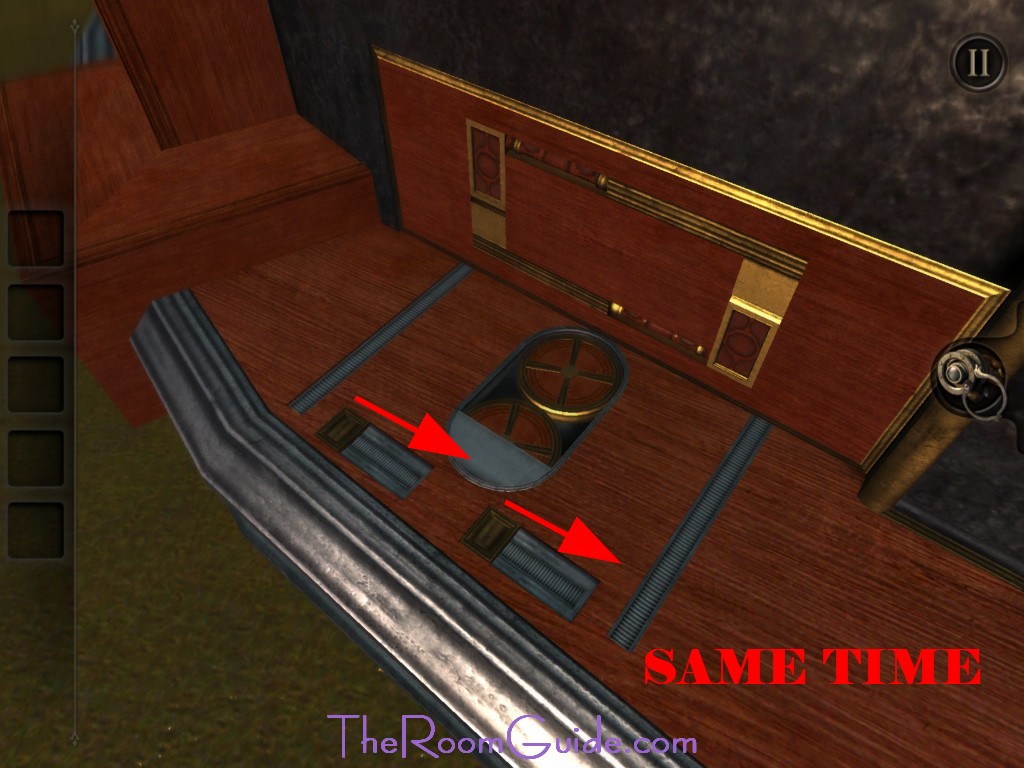
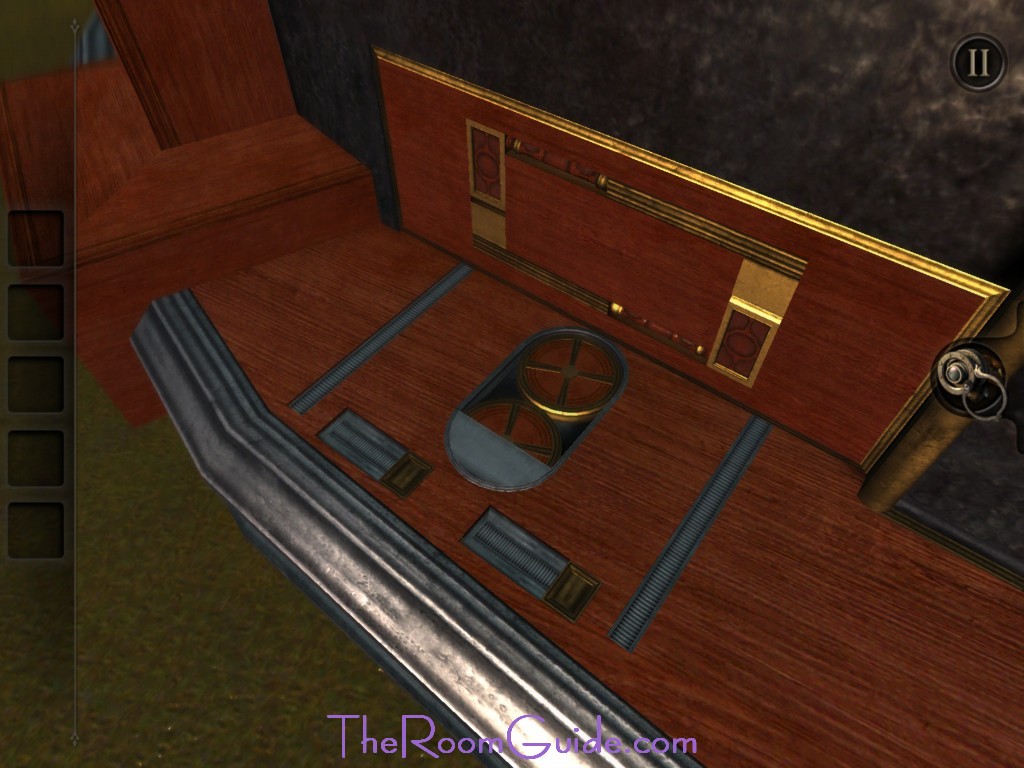
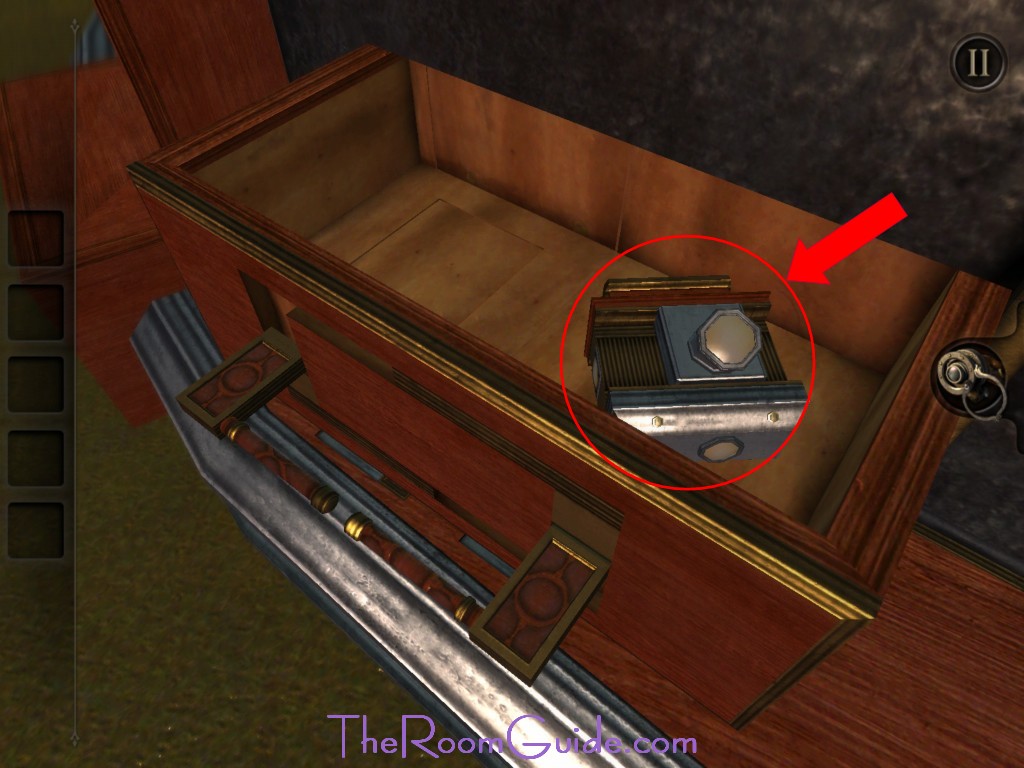
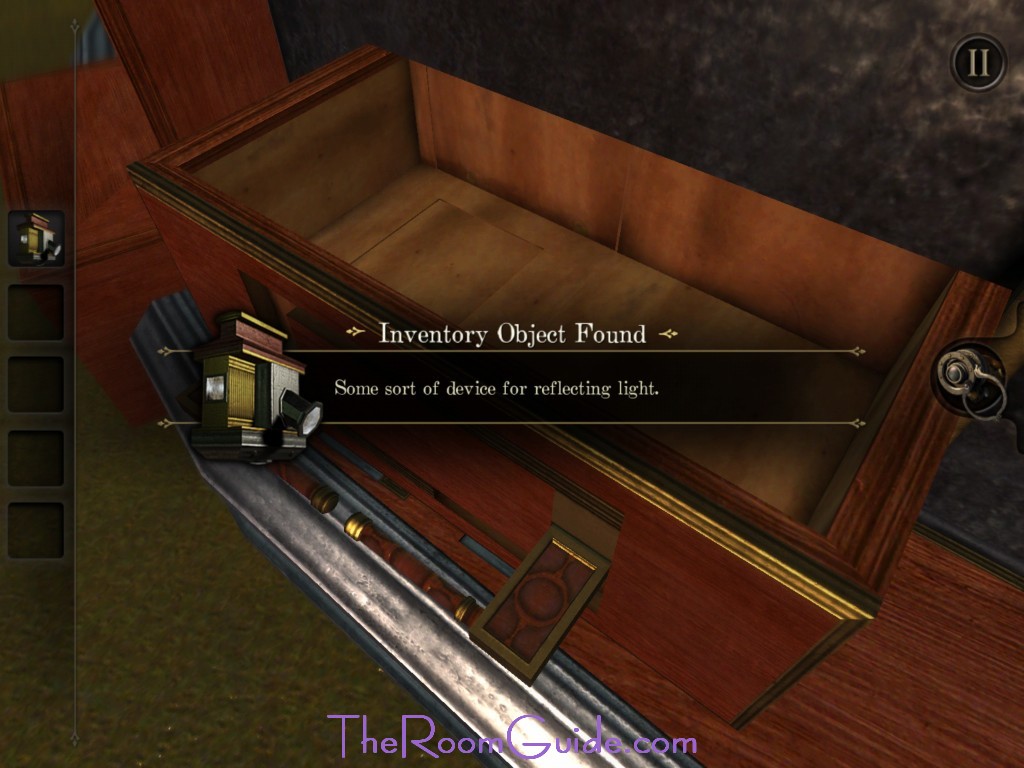
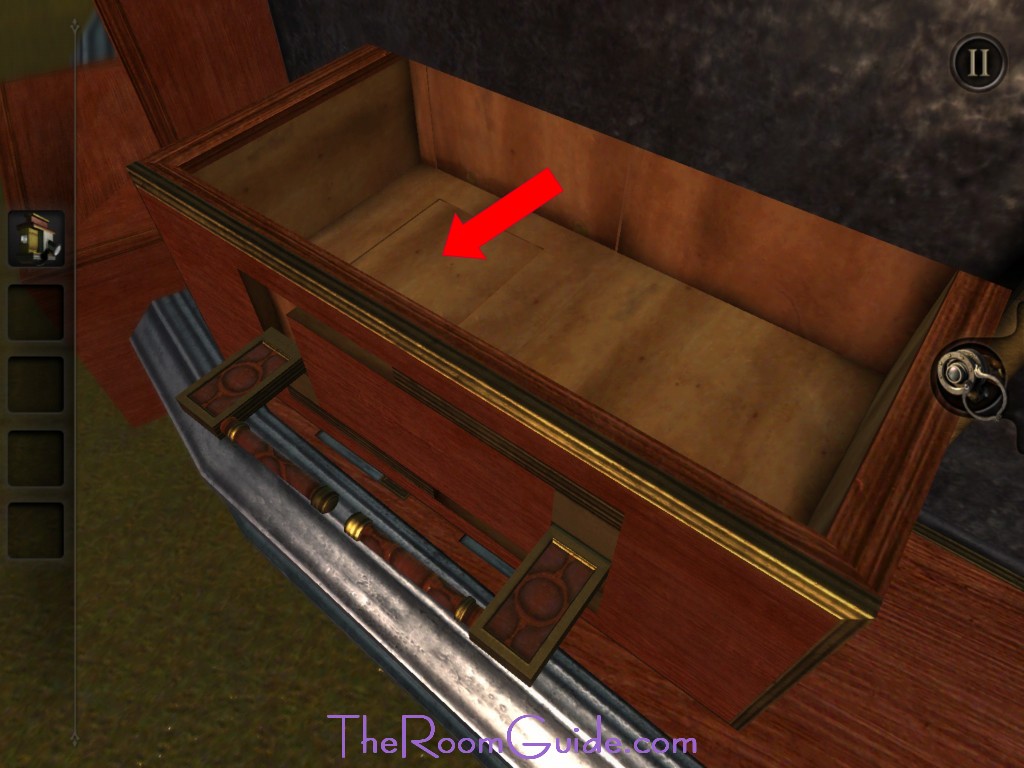
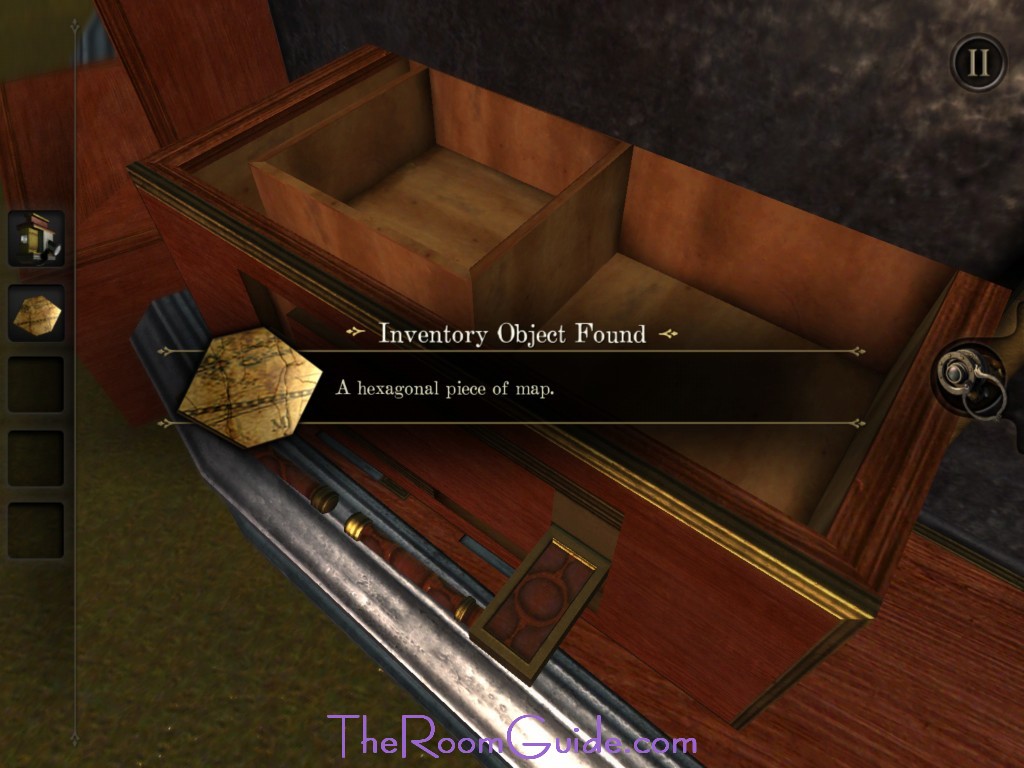
5. Flywheels: Insert the Tiny, Weighted Flywheel. Turn both switch to the right simultaneously. The wheels will start turning. Open the drawer and grab Some Sort of Device for Reflecting Light. Tap on the drawer to reveal a secret compartment inside the drawer. Collect a Hexagonal Piece of Map.


Goos
Good
Thanks
Thanks, but what if the peg becomes solid but still won’t go in?
You have to use the eye-glass and then you can turn the outer ring and slide the pieces about.
Thanks but I need more